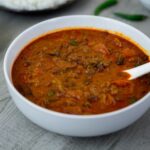
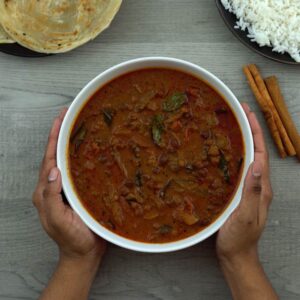
Kadala Curry
Enjoy the essence of Kerala with Kadala Curry, a vegan classic made with black chickpeas and aromatic garam masala, cooked in coconut oil. Perfectly paired with puttu, appam, or rice, it's a staple in every Kerala home and eatery.
Ingredients
For Cooking Black Chana
- ½ cup Black Chana kadala, soaked overnight
- 1 ½ cup Water
- 1 tsp Salt
For Masala Paste
- 1 Cinnamon Stick
- 4 Cloves
- 4 Cardamom
- 3 Dry Red Chili
- 1 ½ tsp Fennel Seeds
- 1 Javitri
- ¼ cup Coconut grated
- ½ cup Water
For Kadala Curry
- 1 onion sliced
- 2 Tomato sliced
- 1 tsp Chili Powder
- 2 tsp Coriander Powder
- 1 tsp Garam Masala optional
- 1 tsp Ginger Garlic Paste
- ½ tsp Turmeric Powder
- 3 Green Chili
- 2 sprig Curry Leaves
- ¼ cup Coconut Oil
- 1 ½ cups Water
- Salt as needed
Instructions
To Cook the Black Chana or Kadalai
- Place the pre-soaked overnight black chana in a pressure cooker. Combine with water and salt for balanced seasoning and sufficient moisture.
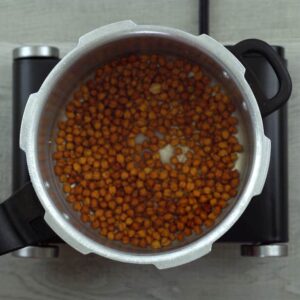
- Secure the lid with the whistle in place. Pressure cook the chana for 5 whistles, ensuring they are cooked thoroughly yet retain their shape and texture.
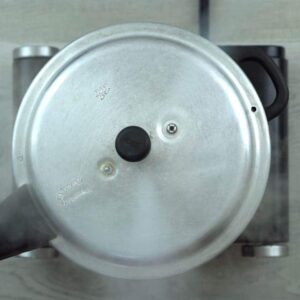
- Allow the pressure to release naturally, a crucial step for safety and to prevent the chana from becoming too soft. Once the pressure is fully released, open the lid and set aside the cooked chana along with the water.

To Prepare Masala Paste
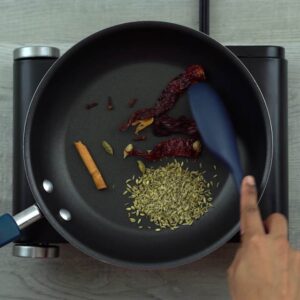
- Heat a pan over medium heat. Add cinnamon sticks, cloves, cardamom, javitri (mace), dry red chili, and fennel seeds. Sauté the spices until they become aromatic, which will infuse the masala with rich flavors.
- To the roasted spices, add freshly grated coconut. Continue to sauté until the coconut becomes crisp and fragrant. This step adds a unique texture and taste to the masala.
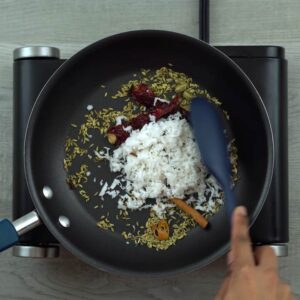
- Remove the mixture from heat. Transfer it to a blender jar. Add a recommended amount of water for grinding.

- Grind the mixture into a smooth paste. The consistency should be fine and even, making it perfect for blending into the curry. Reserve this freshly made masala paste for later use in the curry preparation.

To Prepare Kadala Curry
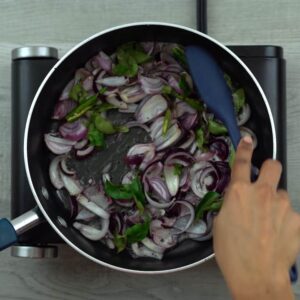
- In a pan over medium heat, pour coconut oil. Add mustard seeds, onion, curry leaves, and green chili. Sauté until the onion turns soft, which forms the flavorful base of the curry.
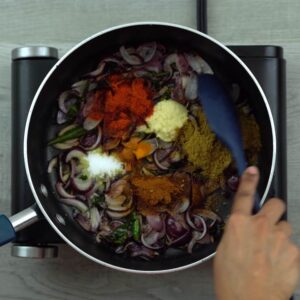
- Add ginger-garlic paste, chili, turmeric, coriander, garam masala powder, and salt. Mix well to ensure the spices are evenly distributed.
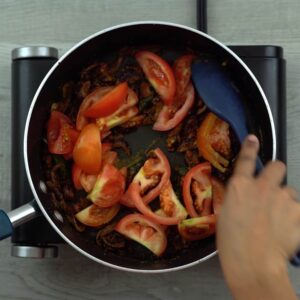
- Now, introduce the tomatoes. Sauté them until they turn mushy, which will add a rich, tangy flavor to the curry.
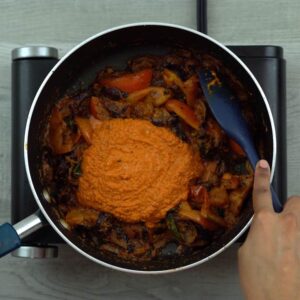
- Add the ground masala paste you prepared earlier. Mix thoroughly to combine the flavors.
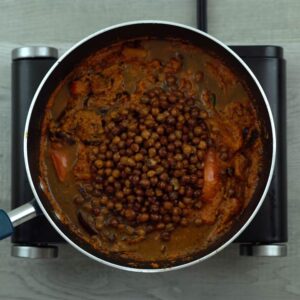
- Pour in the cooked black chana along with the water it was cooked in. Stir well, ensuring the chana blends with the masala.
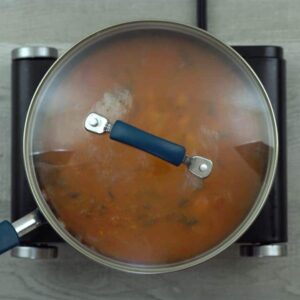
- Add additional water as mentioned. Cover the pan with a lid and let the curry cook for 7 to 10 minutes, allowing the flavors to meld together.
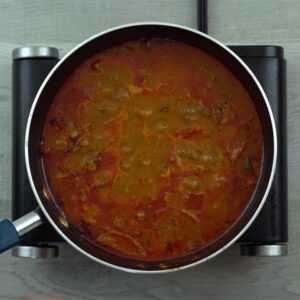
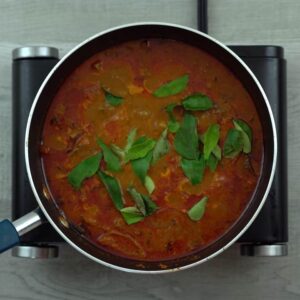
- Remove the lid and continue to simmer the curry until it achieves a reddish-brown color, indicating it's well-cooked.
- Garnish the curry with fresh curry leaves. Your Kadala Curry is now ready to be tasted and enjoyed with your favorite accompaniments.
To Serve
- Serve this savory Kadala Curry with puttu, appam, idiyappam, matta rice, white rice, or ghee rice. Check the serving suggestions section for more pairing ideas.
Notes
Enhance your Kadala Curry with these essential tips:
Preparation Essentials:
- Soaking Chickpeas: Soak chickpeas overnight for efficient cooking and to enhance the curry's flavor. This step is essential for a softer texture and a deeper taste.
- Freshness of Ingredients: Use fresh curry leaves and freshly ground spices if possible, as they impart more flavor compared to their dried or pre-ground counterparts.
- Authentic Garam Masala Paste: Crafting your garam masala paste with dry-roasted spices and coconut is crucial. It's this traditional method that gives Kerala's Kadala Curry its signature flavor.
- Using Coconut Oil: Coconut oil is not just an ingredient but a flavor enhancer, offering a unique aroma and taste to the curry. To truly experience traditional Kerala cuisine, using coconut oil is highly recommended.
- Curry Leaves are Key: They're not just a garnish but a flavor booster, pivotal in many Kerala dishes for their rich aroma and taste.
Cooking Techniques:
- Proper Cooking of Chickpeas: Ensure that the chickpeas are cooked until they are tender but not mushy. This will give the curry the right texture.
- Balancing Spices: Adjust the amount of chili and other spices according to your taste preference. Remember, the heat level can significantly influence the overall flavor of the dish.
- Simmering the Curry: Allow the curry to simmer after adding all the ingredients. This helps the flavors meld together, resulting in a more cohesive and rich taste.
- Consistency Adjustments: Adjust the consistency of the curry according to your preference by adding water or simmering it for longer. Some prefer a thicker gravy, while others may like it more fluid.
- Resting Time: Let the curry rest for a while after cooking. This resting period allows the flavors to develop and deepen.
- Taste and Adjust: Before serving, taste the curry and adjust the seasoning if necessary. Sometimes a little extra salt or a squeeze of lemon juice can elevate the overall flavor.
Nutrition
Serving: 1serving | Calories: 147kcal | Carbohydrates: 10g | Protein: 1g | Fat: 13g | Saturated Fat: 10g | Polyunsaturated Fat: 0.3g | Monounsaturated Fat: 1g | Sodium: 110mg | Potassium: 219mg | Fiber: 4g | Sugar: 3g | Vitamin A: 562IU | Vitamin C: 28mg | Calcium: 47mg | Iron: 1mg