
Chicken Biryani
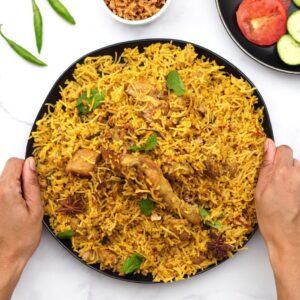
Chicken biryani is a timeless, delicious dish that originates from the Mughals. This one-pot recipe combines basmati rice with a rich blend of Indian spices and herbs, creating an aromatic and flavorful meal. Perfect for lunch, dinner, or any day of the week, chicken biryani is sure to delight your taste buds!
Ingredients
- 2.25 lb Chicken cleaned and cut
- 1½ cup Basmati Rice soaked for 1 hour
- ¼ cup Oil
- 1 Bay Leaf
- 1 Cinnamon Stick
- 1 Star Anise
- 1 Javitri
- 4 Cardamom
- 4 Green Chili
- 2 Onion thinly sliced
- 2 Tomato chopped
- ¼ tsp Turmeric Powder
- 1½ tsp Chili Powder
- 2 tsp Coriander Powder
- 1 tsp Garam Masala
- 1 tsp Biryani Masala
- 2 tsp Ginger Garlic Paste
- Salt to taste
- ¼ cup Curd yogurt
- ½ cup Mint Leaves
- 2¼ cup Water
- 1 tbsp Ghee
- Fried Onions to sprinkle
- Orange Food color optional
Instructions
Making Chicken Biryani
- Begin by heating oil in your pressure cooker. Toss in bay leaf, cinnamon, star anise, javitri, cardamom, and green chili. Sauté them until you can smell their inviting aroma. This step releases essential oils from the spices, enhancing the overall flavor of your biryani.

- Add the thinly sliced onions and sauté until they turn golden and caramelized. This adds a deep, sweet flavor to your biryani, forming the base of your dish.
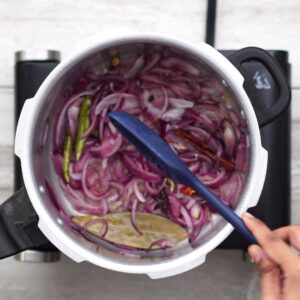
- Stir in turmeric, chili, coriander, biryani masala, garam masala, salt, and ginger-garlic paste. Sauté until the raw smell disappears.

- Add chopped tomatoes and half of the mint leaves. Sauté until the tomatoes turn mushy. This step adds a slightly tangy flavor, balancing the richness of the spices and chicken.

- Add the chicken pieces, ensuring they are thoroughly coated in the spicy masala for full flavor.
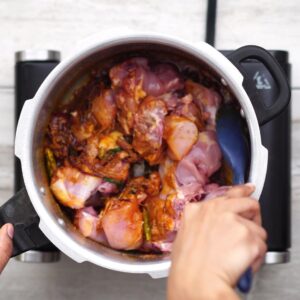
- Let the chicken simmer for about 7 to 10 minutes, stirring now and then. You'll know it's time when the chicken starts releasing its juices.
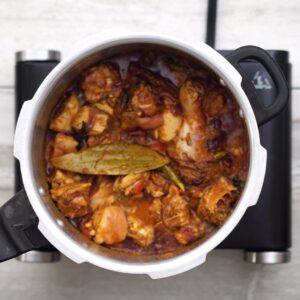
- Mix the curd with the chicken gravy until well incorporated. Curd adds a creamy texture and tanginess to the dish, enhancing the overall flavor.
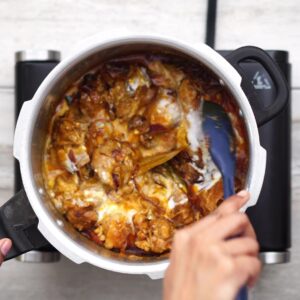
- Cook the chicken for another 12 to 15 minutes, stirring occasionally to prevent sticking and burning. It's ready when you see oil starting to form around the edges.
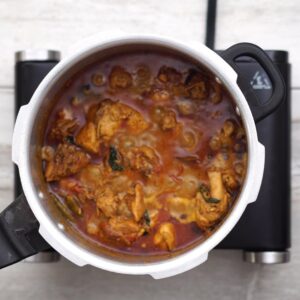
- Now, layer the soaked and drained basmati rice over the chicken gravy. Spread it out evenly for consistent cooking.
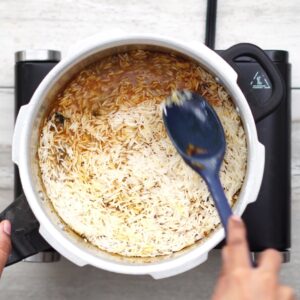
- Pour water along the sides of the rice, ensuring even distribution. The right amount of water is crucial for perfectly cooked, fluffy rice.

- Cook the rice until it's about 70% done - it should break when pressed between your fingers. Evenly pat down the rice. This ensures the rice will finish cooking perfectly during the final steaming.

- Sprinkle the remaining mint leaves, fried onions, and a drizzle of ghee over the rice. Optionally, add a hint of orange food color for visual appeal. Reduce the heat to low-medium.

- Seal the pressure cooker with its regulator on. Cook for approximately 15 minutes on low heat (don’t wait for the whistle since it's on low). This gentle cooking helps the flavors meld together while keeping the rice grains intact.
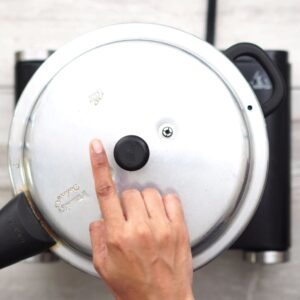
- Turn off the stove and let the biryani rest for 5 minutes before opening the lid. This resting period allows the steam to redistribute, ensuring evenly cooked rice and enhanced flavors.

- Gently fluff up the biryani with a fork, being careful not to break the rice grains. Your delicious Chicken Biryani is now ready to be savored and enjoyed!
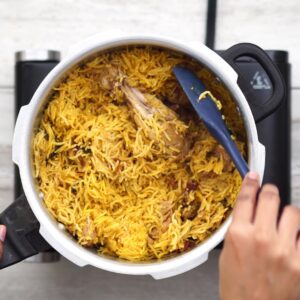
Serving
- Enjoy the delightful Chicken Biryani paired with your choice of raita or a non-vegetarian curry. Whether you prefer a rich, gravy-based curry or a dry dish, these accompaniments perfectly complement the biryani's flavors.
Notes
Here are my tips for making the perfect Chicken Biryani:
- Select Quality Ingredients: Choose aged Basmati or Seeraga Samba rice for their authentic aroma and ideal, non-sticky texture. Also, invest in high-quality spices—they make all the difference!
- Ideal Rice-Water Ratio: For Basmati rice, a 1:1.5 rice-to-water ratio is key for achieving perfectly cooked grains.
- Chicken Rice Ratio: Using equal parts of chicken and rice is a common standard when preparing chicken biryani. However, we prefer more chicken in our biryani. Here, I roughly used a 1:3 rice to chicken ratio. Feel free to adjust according to your taste preference.
- Chicken Cuts: Use a combination of chicken cuts—drumsticks, medium-sized bone-in pieces, boneless pieces, and wings—to enjoy a variety of textures and flavors in your biryani.
- Essential Soaking Step: Don’t overlook soaking the Basmati rice for at least an hour. This crucial step helps elongate the grains and enhances their texture.
- Build the Flavor Base: Take your time to properly caramelize onions until golden and cook tomatoes until they break down completely. These elements form a rich flavor foundation that is essential to a good biryani.
- Oil or Ghee Preference: Depending on your taste, use either oil for a lighter feel or ghee for a richer flavor. Each adds a distinct character to the biryani.
- Experiment with Rice Varieties: Consider using Seeraga Samba rice for a variation—it provides a softer texture and introduces a unique flavor twist to your biryani. This variety is especially popular in Southern India, like Tamil Nadu, where it's cherished for its distinctive aroma and taste.
- Resting Time: After cooking, let the biryani sit for at least 10-15 minutes before serving. This resting period allows the steam to redistribute throughout the biryani, enhancing the flavors and ensuring the rice grains are perfectly fluffy.
- Master Traditional Techniques: While this one-pot version is sure to delight your taste buds, if you're seeking a truly authentic experience, consider trying my Mughlai Chicken Biryani recipe. It follows the traditional dum cooking method, offering a deeply flavorful and aromatic biryani that captures the essence of this age-old cooking method.
- Instant Pot Method: If you don't have a traditional pressure cooker or simply want to speed up the cooking process, be sure to check out the detailed Instant Pot instructions I provided below. This method offers a quick and convenient way to enjoy the rich flavors of Chicken Biryani without compromising on taste or quality.
Nutrition
Serving: 1serving | Calories: 755kcal | Carbohydrates: 71g | Protein: 31g | Fat: 38g | Saturated Fat: 9g | Polyunsaturated Fat: 9g | Monounsaturated Fat: 18g | Trans Fat: 0.2g | Cholesterol: 101mg | Sodium: 267mg | Potassium: 630mg | Fiber: 7g | Sugar: 6g | Vitamin A: 1151IU | Vitamin C: 22mg | Calcium: 117mg | Iron: 3mg
Visit the Recipe
Want to view the full post? Simply scan the QR code with your camera and tap the link.
