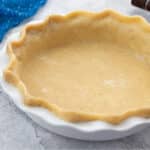
Homemade Pie Dough and Crust
Learn how to make a buttery, flaky pie crust with this simple homemade recipe! With basic ingredients and easy techniques, you’ll get perfect results every time. Whether you’re baking pumpkin pie or savory meat pies, this crust adds a delicious touch to any festive meal or gathering. Plus, you’ll find loads of prep and troubleshooting tips to guide you along the way!
Ingredients
- 2½ cups Unbleached All Purpose Flour Chilled in fridge for at least 30 mins
- 6 tbsp Unsalted Butter chilled and cubed
- ½ cup Vegetable Shortening chilled and cubed
- ½ cup Ice Cold Water add gradually in batches, see tips for more info
- Salt to taste
Instructions
Making the Pie Dough
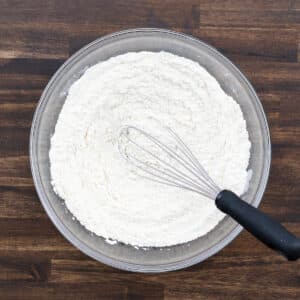
- Start by measuring the flour, then place it in the fridge for at least 30 minutes to keep everything cold. Once chilled, add the flour and salt to a mixing bowl and whisk to combine so the salt is evenly distributed. For accurate measuring, use a kitchen scale or level off cups with a butter knife. Chilling the flour helps prevent fats from melting too quickly, leading to a flakier crust.
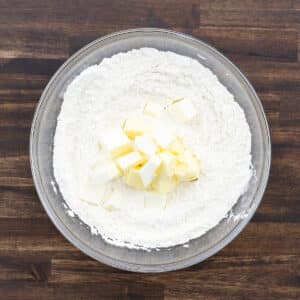
- Add the chilled, cubed butter and shortening to the flour mixture. For best results, keep the butter in the freezer, then transfer it to the fridge about 30 minutes before using—this keeps it firm and perfectly chilled. Shortening can go straight into the fridge, as it doesn’t firm up as quickly or as hard as butter. Since shortening has a higher melting point, it stays solid at fridge temperatures while remaining soft enough to work into the flour. Cutting both fats into small cubes makes them easier to incorporate, helping you achieve a flaky, tender crust.
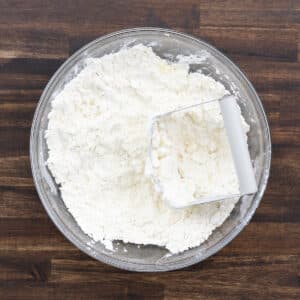
- Use a pastry cutter or two forks to gently cut the fats into the flour. Work carefully to avoid overworking, which can cause the fats to melt. Stop once you see small bits of butter and shortening coated in flour. Aim for a crumbly mixture with visible pieces of fat for the best flaky texture.
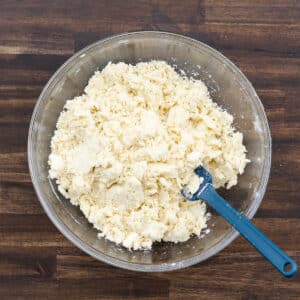
- Once the mixture reaches a crumbly texture, add ice-cold water one tablespoon at a time, mixing gently with a spatula. This gradual addition helps bring the dough together without overhydrating it. Stop adding water as soon as the dough starts coming together—you may not need all the water listed.
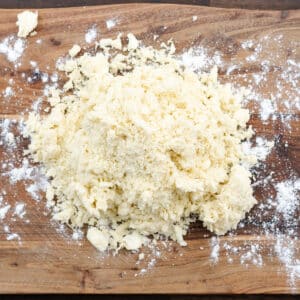
- Transfer the dough to a lightly floured work surface. A light dusting of flour prevents sticking as you gently bring the dough together. This makes the dough easier to handle without tearing or sticking, allowing you to shape it into a round disc.
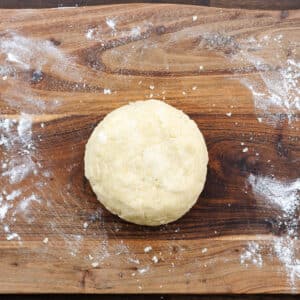
- Lightly flour your hands and gently fold the dough into itself to form a round ball. If the dough feels too dry, lightly dip your fingers in cold water and continue working it. For a sticky dough, add a little extra flour to balance the texture, helping it come together smoothly without becoming too wet.
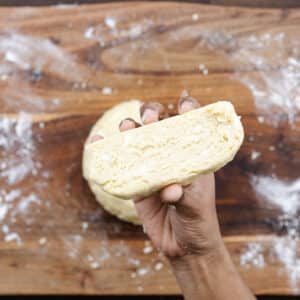
- Once the dough is formed into a ball, cut it in half. This recipe makes enough dough for two crusts, so splitting it is essential. You may notice some flaky layers inside when you cut it, as shown in the image below—this is a great sign and will contribute to a flaky crust.
- Shape each half into a round disc. These two discs can be used for two single-crust pies or one double-crust pie. If you only need one crust, you can save the other disc for later.
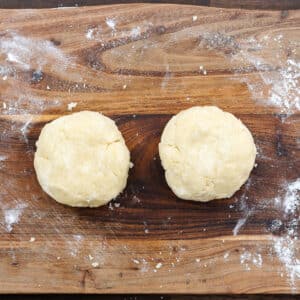
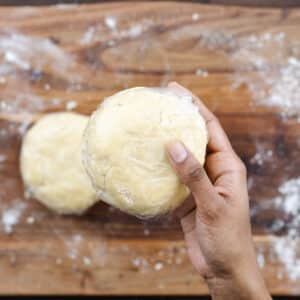
- Wrap each disc tightly in plastic wrap and refrigerate for at least 2 hours. Chilling solidifies the fats, making the dough easier to roll, and relaxes the gluten for a tender, flaky crust.
Rolling the Pie Dough
- After the dough has chilled for the recommended time, unwrap it and place it on a large sheet of parchment paper. You can also use a lightly floured countertop, but I prefer parchment paper to help prevent sticking or tearing while rolling. It also makes cleanup easier! If you want precise size and thickness, use a measuring chart or rolling pin rings to guide you.
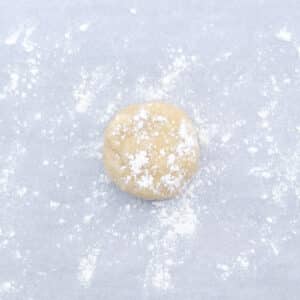
- Place another sheet of parchment paper on top of the dough. Gently flatten the dough with your hands to make rolling easier. Begin rolling from the center, applying gentle pressure outward in all directions for an even thickness. For added stability, tape down the edges of the parchment paper to prevent slipping—this will keep everything in place and make rolling smoother.
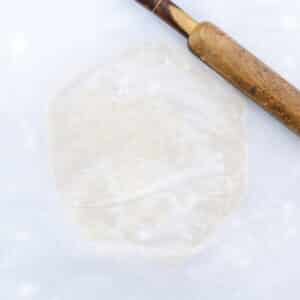
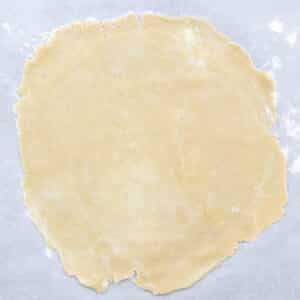
- Roll the dough into an 11–12 inch circle, perfect for a 9-inch pie dish. A 12-inch circle leaves a bit of extra dough around the edges, which you can tuck in or use for decoration. Once rolled, remove the top layer of parchment and check the shape. If needed, you can roll it out a bit more. Now your dough is ready to be transferred into the pie dish.
Transferring and Shaping the Crust
- Gently transfer the rolled dough into a 9-inch pie dish by flipping it over from the parchment paper. The parchment paper makes it easy to lift the dough without sticking. Once flipped, press the crust gently into the pie dish, pressing it along the sides and bottom to avoid trapping air bubbles. This will make fluting the edges easier in the next step. If the dough tears slightly at the edges during transfer, don’t worry—just pinch the torn pieces back together.
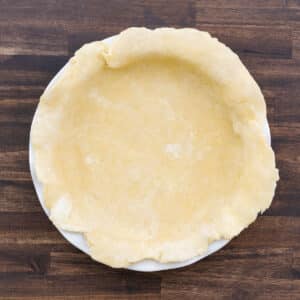
- If the edges are torn or cracked, gently press them together, then start fluting or crimping. To flute, press your thumb and index finger together on one side while using your other hand to pinch the dough between them. For crimping, press the tines of a fork along the edges to create a decorative, textured pattern. Both methods add a beautiful touch and help keep the crust intact, preventing filling from spilling over during baking.
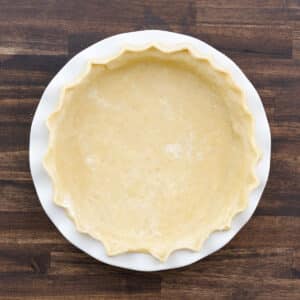
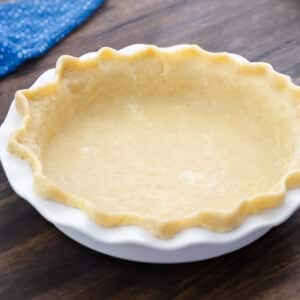
- Once your dough is shaped and fluted or crimped in the pie dish, it’s ready for baking. If the dough softened from handling, place the crust back in the fridge for 25–30 minutes to firm up. This helps maintain a flaky texture by keeping the layers of fat intact. You can use this crust directly for pies that don’t require blind baking. If your recipe calls for blind baking, follow the steps in the next section for detailed instructions.
Blind Baking the Crust
- Place a crumpled sheet of parchment paper over the pie crust, covering the bottom and sides completely. Crumpling the paper first helps it fit snugly, providing better coverage. This step is essential to prevent the dough from puffing up or shrinking during blind baking.
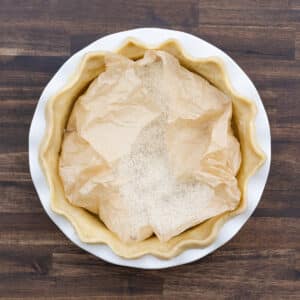
- Pre-bake the pie crust with pie weights in a preheated oven at 375°F for about 10 minutes. This initial bake sets the crust and slightly firms up the edges.
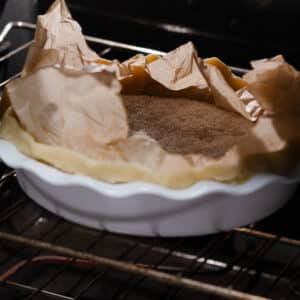
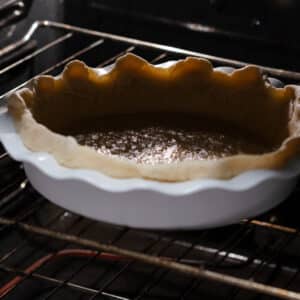
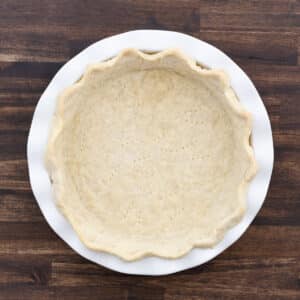
- After 10 minutes, carefully remove the pie dish from the oven. Take out the parchment paper and pie weights, then gently prick the bottom of the crust with a fork (docking) to allow steam to escape. Return the crust to the oven and bake for another 7–8 minutes, helping the bottom bake evenly without the sides shrinking. Be cautious when moving the pie dish to avoid breaking the edges. Now your blind-baked crust is ready to use in your pie recipes!
Using the Pie Crust
- Your blind-baked pie crust is now ready for any recipe that requires a pre-baked crust. For more details on using this crust in various single or double-crust pie recipes, check out the dedicated section below.
Notes
Here are some expert tips to help make your Pie Crust flaky and buttery every time:
Preparing Your Ingredients:
- Measure Ingredients Accurately: For a flaky, buttery crust, precise measurements are key. Carefully measure flour, butter, shortening, and water. Even slight variations can affect texture and structure. Use a kitchen scale if you have one—especially for flour, which can easily be over-measured by scooping.
- Chill Fats and Water: Cold ingredients—especially butter, shortening, and water—are essential for a flaky crust. Chilling these before mixing prevents fats from melting prematurely. When cold fats hit the oven’s heat, they release steam, creating those ideal flaky layers. If fats are too warm, they blend too much with the flour, resulting in a tougher crust.
- Prepare Ice-Cold Water: Fill a small bowl with water and add ice cubes. Let it chill for a few minutes. Measure out tablespoons of ice-cold water gradually as you make the dough. Though the recipe suggests a half cup, you may only need about 6-7 tablespoons for ideal consistency.
- Quantity of Ingredients: This recipe yields two pie crusts, perfect for either a single or double-crust pie. If you plan to make additional pies, it’s best not to double or triple the ingredients, as this can affect the texture. Instead, make separate batches using the same quantities for each crust, and store any extra dough for later use.
- Pie Weights: Some recipes call for briefly blind baking the crust, which requires parchment paper and pie weights. You can buy pie weights, or use a DIY alternative like rice (as I did in this recipe), sugar, or dried beans. These work just as well to weigh down the crust and prevent puffing during baking.
Working with Ingredients and Dough:
- Handle Ingredients Gently: Once you’ve added the chilled butter and shortening to the flour, mix them in gently until the mixture looks crumbly. Avoid overworking the dough, as this can cause the fats to melt and blend too much with the flour, which compromises the light, flaky texture you’re aiming for. Overworking may also reduce the amount of water needed, making the dough more prone to cracking when you roll it out.
- Do Not Knead: Once the dough begins to come together, gently gather it into a circular disc with your hands. Avoid kneading, as this develops gluten, which is great for bread but not for pie crust; too much gluten will make the crust tough instead of tender and flaky.
- Rolling the Dough: There are two ways to roll out pie dough. You can dust your countertop with flour and roll the dough directly on it with a rolling pin. However, based on my experience, I recommend placing the dough between two sheets of parchment paper. Rolling between parchment provides better control, prevents sticking, and makes it easier to transfer the dough to the pie pan without tearing. This method is especially helpful if you’re new to pie-making!
- Transferring the Rolled Dough: There are a few ways to transfer rolled dough to your pie dish. Some people fold the dough into quarters and lift it carefully, while others roll it onto the rolling pin and gently unroll it over the dish. Personally, I find using parchment paper the easiest method. By rolling the dough between parchment sheets, you can simply flip it into the pie dish, which helps prevent tears or sticking and makes the transfer much smoother.
- For Accidental Tears: If the dough tears while you’re rolling or transferring it, don’t worry! Simply pinch the torn edges together to seal them, then continue as usual. With the right technique, the dough will come together seamlessly, and you won’t notice the tear once it’s baked.
- Tools for Mixing: To make a perfectly flaky pie crust, a pastry cutter or two forks work well for cutting the fats into the flour. These tools allow you to blend just enough without overworking, keeping the fats in small, cold pieces for the best flakiness. Some prefer a food processor for convenience; if you use one, pulse carefully. Over-processing can blend the fats too thoroughly with the flour, resulting in a dough that won’t hold those essential flaky layers and may turn out greasy or dense.
- When to Skip Blind Baking: If your recipe doesn’t mention blind baking, you can skip this step. Simply fill the crust with your prepared filling and bake according to the recipe instructions.
- Troubleshooting Tips: If you’ve followed the recipe carefully but are still having issues, don’t worry—I’ve included a dedicated troubleshooting section below to help with common problems. Be sure to check it out for tips on getting your crust just right!
Nutrition
Serving: 1serving | Calories: 870kcal | Carbohydrates: 119g | Protein: 16g | Fat: 36g | Saturated Fat: 22g | Polyunsaturated Fat: 2g | Monounsaturated Fat: 9g | Trans Fat: 1g | Cholesterol: 90mg | Sodium: 8mg | Potassium: 177mg | Fiber: 4g | Sugar: 0.4g | Vitamin A: 1053IU | Calcium: 34mg | Iron: 7mg
Visit the Recipe
Want to view the full post? Simply scan the QR code with your camera and tap the link.
