
How to Boil Corn on the Cob
Learn how to cook perfectly juicy and flavorful Corn on the Cob with our easy boiling method. Simmered in a delightful mixture of water, milk, and butter, this recipe delivers perfect results every time! Ideal for family meals, gatherings, or parties, it's a crowd-pleaser that will have everyone coming back for more!
Ingredients
- 3 ears Corn husk and silks removed
- 5 cups Water or enough to fill the pot
- 1 cup Milk
- 4 tbsp Unsalted Butter
For Garnishing
- Black Pepper Powder to taste
- Salt to taste
- Butter
- Cilantro Leaves
Instructions
Boiling Corn on the Cob
- Start by stripping away the outer husk and removing the silks, which are the thin, string-like hairs attached to the corn cob. Cleaning your corn thoroughly ensures it's free from impurities and ready for cooking.

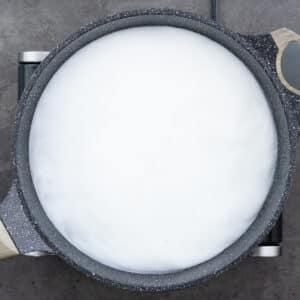
- In a wide pot over medium heat, pour enough water to fill the pot and add the suggested amount of milk. Allow the mixture to warm slightly, helping the milk incorporate with the water.
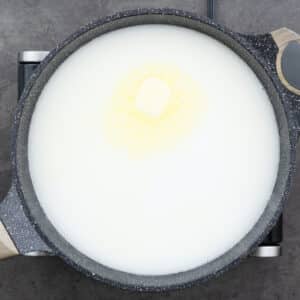
- Add the butter to the warming milk mixture and let it melt. Stir gently to combine everything thoroughly before bringing the mixture to a gentle boil. This step creates a rich, flavorful base that will infuse the corn with delicious tastes as it cooks.
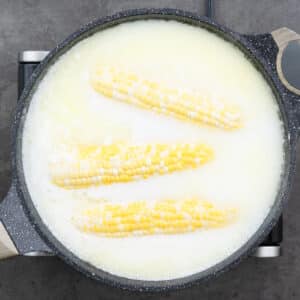
- Introduce the corn to the boiling milk and butter mixture. Cook for about 3-5 minutes, rotating and stirring occasionally to ensure even cooking and thorough flavor absorption.
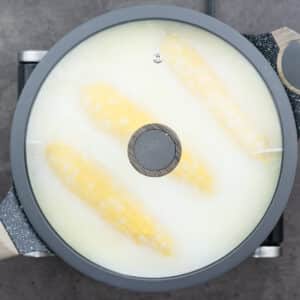
- Turn the heat down to low, cover the pot, and let the corn simmer gently for about 5-7 minutes. This simmering phase allows the corn to slowly soak up the sweet and creamy flavors of the milk and butter. Adjust the simmering time according to your preference for texture—leave it longer for softer kernels or shorter for a crisper bite.
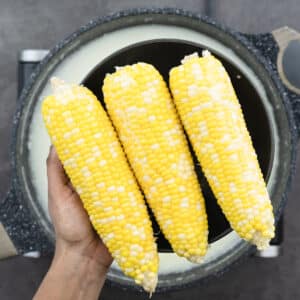
- Once the corn reaches a bright yellow and tender stage, which should happen within the suggested time, remove it from the pot. It's now ready to be served, ideally while it's still warm and full of flavor.
Serving
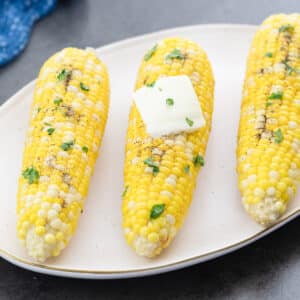
- Serve this Boiled Corn on the Cob seasoned with salt, black pepper, and butter, and garnished with cilantro leaves. For more variety of pairing options, check out our Serving Suggestions section below.
Notes
Here are some essential tips to help you make your corn on the cob delicious every time:
- Let the Flavors Meld: I always recommend bringing the milk and butter to a slight boil before adding the corn. This step allows the flavors to meld together, creating a richer and more delicious taste.
- Customize the Cooking Time: Although the suggested boiling time typically yields bright, tender, and juicy kernels, feel free to adjust the cooking duration based on your preferred level of tenderness. This flexibility ensures that your corn is cooked just the way you like it.
- Avoid Accidents: Be cautious when handling the corn, especially since it's cooked in a buttery mixture that can make it slippery. Use tongs to safely remove the corn from the pot, and be mindful of hot liquid to prevent spills.
- For Easy Handling: To make eating the corn easier, especially if it's hot or slippery, I recommend using corn holders or skewers. This tool allows for fuss-free enjoyment right off the grill or out of the pot.
- Prefer Cutting: If you're serving children or using the corn kernels in a salad, cutting the kernels off the cob is a practical option. This makes it easier and safer for kids to eat and perfect for mixing into other dishes.
- Use Sugar and Lemon: If your corn isn't as sweet as you'd like, adding a pinch of sugar to the boiling water can enhance its natural sugars. A squeeze of lemon can also add a nice zesty note, which balances the sweetness of the corn.
- Chill for Salads: If you plan to use the corn in a cold salad, chill the cobs in ice water after boiling to stop the cooking process quickly. This helps the corn maintain a crisp texture, which is ideal for salads.
- Reusing Boiled Water: Don't throw away the flavorful water, milk, and butter mixture after boiling corn! This liquid is packed with taste and nutrients. Check out the dedicated section below to learn creative ways to reuse it.
Nutrition
Serving: 1serving | Calories: 186kcal | Carbohydrates: 5g | Protein: 3g | Fat: 18g | Saturated Fat: 11g | Polyunsaturated Fat: 1g | Monounsaturated Fat: 4g | Trans Fat: 1g | Cholesterol: 50mg | Sodium: 53mg | Potassium: 129mg | Fiber: 0.1g | Sugar: 4g | Vitamin A: 600IU | Calcium: 118mg | Iron: 0.1mg
Visit the Recipe
Want to view the full post? Simply scan the QR code with your camera and tap the link.
