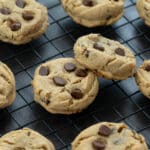
Peanut Butter Chocolate Chip Cookies
Enjoy the perfect blend of creamy peanut butter and rich chocolate chips in these easy-to-make Peanut Butter Chocolate Chip Cookies. They’re a fantastic treat for Thanksgiving, Christmas, or any festive gathering—a true crowd-pleaser!
Ingredients
- 2 ½ cups All Purpose Flour
- 1 tsp Baking Powder
- 1 tsp Baking Soda
- ½ tsp Salt or to taste
- 1 cup Unsalted Butter at room temperature
- 1 cup Brown Sugar
- ½ cup White Sugar
- 2 Eggs at room temperature
- 2 tsp Vanilla Extract
- 2 cups Peanut Butter creamy
- 1½ cup Semi-Sweet Chocolate Chips plus few extra chocolate chips to press while the cookies are warm
Instructions
Preparing Dry Ingredients
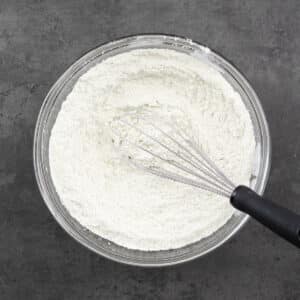
- Start by sifting the all-purpose flour, baking powder, baking soda, and salt. This step helps remove any lumps, creating a smooth, even texture in your cookies. Sifting also aerates the flour, which can make the cookies lighter. After sifting, whisk the ingredients together to combine well, then set the mixture aside.
Preparing Wet Ingredients
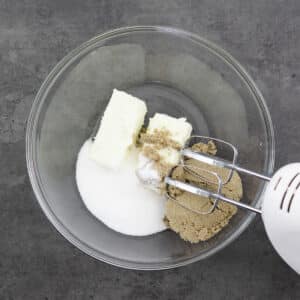
- In a separate bowl, cream room-temperature butter, brown sugar, and white sugar using an electric beater on medium speed. Aim for a light and fluffy consistency, which should take about 3-5 minutes. This step incorporates air, creating a smooth, creamy base for your cookies.
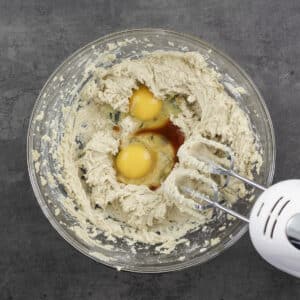
- Add the eggs and vanilla extract to the butter-sugar mixture, beating on low speed. This gently incorporates the eggs without losing the airiness from creaming. Mix until everything is well-combined and creamy, taking care not to overbeat.
- On low speed, gently blend in the creamy peanut butter until it’s fully combined with the butter, sugar, and egg mixture. This step adds a rich, nutty flavor and creates a smooth, creamy consistency in the dough.
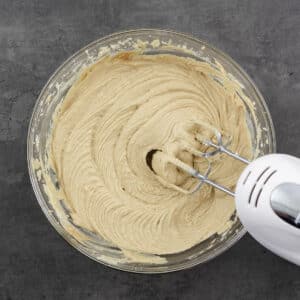
Preparing Peanut Butter Cookie Dough
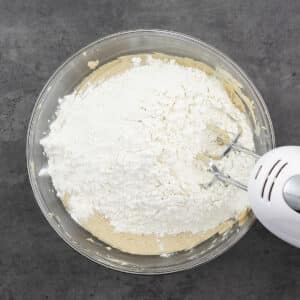
- Gradually incorporate the dry ingredients into the wet mixture, mixing on low speed to prevent overworking the dough. Mixing gently helps avoid excessive gluten formation, which can make cookies tough. Stop mixing as soon as no dry flour is visible.
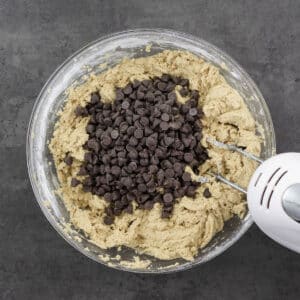
- Add the semi-sweet chocolate chips and mix on low speed. Then, use a spatula to gently fold the chips in, distributing them evenly without crushing them or overmixing the dough.
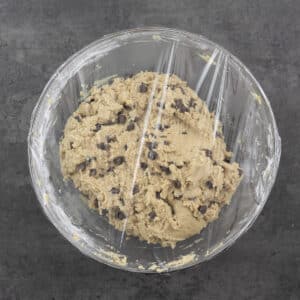
- Cover the dough tightly with plastic wrap, making sure it’s well-sealed, and refrigerate for an hour. Chilling is important as it allows the flavors to meld and the fats to solidify, leading to a more flavorful and chewy cookie.
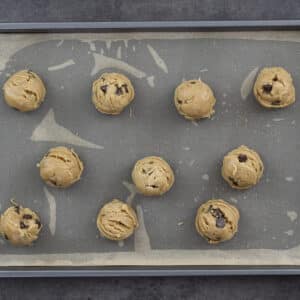
- Use a medium-sized cookie scoop to portion the dough into 3-tbsp-sized balls and place them on a parchment-lined baking tray. Space them 2-3 inches apart to allow room for spreading. Lightly flatten the tops with a spoon or your palm, as peanut butter cookie dough tends to spread less during baking.
Baking the Cookies
- Preheat your oven to 350°F and bake the cookies for 14-15 minutes. Watch for the edges to turn golden brown while the centers remain soft—this is key to achieving that perfect combination of a slightly crisp edge and a chewy middle. If the cookies seem a bit underbaked in the center, that’s okay—they’ll continue to set as they cool.
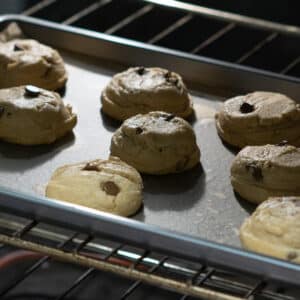
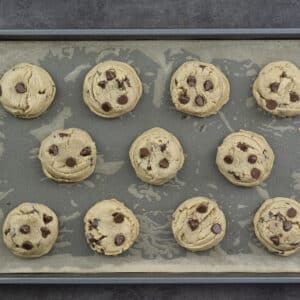
- Once baked, let the cookies rest on the baking tray for 5-10 minutes. This cooling period allows the cookies to firm up and set, making them easier to handle without breaking. Moving them too soon can cause them to crumble, as the cookies are still delicate while hot. After resting, transfer them to a wire rack to cool completely if you’re not serving them right away.
Serving
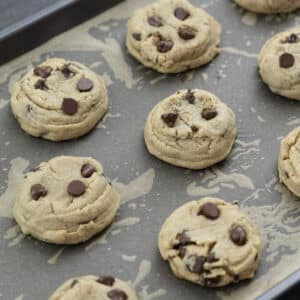
- Enjoy these warm cookies with a scoop of vanilla ice cream or a cold glass of milk. The warmth of the cookies melts the ice cream slightly, making each bite extra tasty. For more fun ideas, check out our Serving Suggestions section below!
Notes
Here are some expert tips to perfect your Peanut Butter Chocolate Chip Cookies:
Preparation of Ingredients:
- Quality Ingredients: Using fresh, high-quality ingredients makes a noticeable difference. Freshly opened brown sugar, for instance, has more moisture, adding to the cookies' chewiness, while good-quality chocolate chips melt better, creating rich, gooey pockets. Choosing premium ingredients gives your cookies a flavor boost.
- Accurate Measurements: Precision is essential for consistent results, especially with flour. Too much can make cookies dense, while too little can cause them to spread too much. Weighing ingredients with a scale provides accuracy, but if you’re using measuring cups, scoop the flour and level it off with a butter knife to avoid overpacking.
- Room Temperature Ingredients: Room temperature butter, eggs, and vanilla extract help ingredients blend smoothly, giving the dough a uniform consistency. Cold butter doesn’t mix as well, leading to unevenly textured cookies. Let your butter sit out for about 30 minutes before using, and crack eggs into a bowl and let them rest for a few minutes to warm up.
- Unsalted Butter: Using unsalted butter allows you to control the salt level in your cookies. If you only have salted butter, consider reducing the added salt to avoid an overly salty taste.
Preparation Tips:
- Chilling for Flavor: Chilling the dough for at least an hour helps enhance flavor and prevents the cookies from spreading too much during baking. For even more flavor, you can chill the dough overnight—this is especially useful if you’re prepping the dough ahead of time.
- Cookie Size Options: The recommended size is 3 tablespoons per cookie for larger, bakery-style cookies. For smaller cookies, use 1.5 tablespoons for a more bite-sized treat. Adjusting the size affects baking time slightly, so keep an eye on them if you make smaller cookies, as they may bake a bit faster.
- Flatten the Dough: Peanut butter cookie dough tends to be dense, so it doesn’t spread much on its own. Lightly flattening each dough ball helps them bake more evenly. Use a spoon or your hand to press down gently; this small step helps you achieve a nice, even cookie shape.
Baking Techniques:
- Parchment Paper Use: Line your baking tray with parchment paper to prevent sticking and burning, promoting even baking of the cookies.
- Oven Temperature Accuracy: Even a small temperature difference can impact your cookies' texture. Proper preheating and consistent temperature control are key for even baking. Keep an eye on your oven’s temperature to avoid over- or under-baking. For added precision, you might consider using an oven thermometer to monitor the actual temperature inside.
- Rotate the Baking Tray: Halfway through baking, rotate the tray 180 degrees. This step helps prevent uneven baking, as ovens often have hot spots. Rotating helps all the cookies receive the same amount of heat, resulting in even color and texture across the entire tray.
- Cooling Rack Method: Once your cookies are baked, transfer them to a cooling rack immediately. This stops the baking process by allowing air to circulate around the cookies, preventing them from becoming too hard or chewy. Leaving them on the baking tray for too long can lead to overbaking due to residual heat. Plus, cooling on a rack keeps the bottoms crisp and prevents sogginess.
Customization Tips:
- Chocolate Chip Variety: Semi-sweet chocolate chips give a classic flavor, but you can experiment with dark, milk, or even white chocolate chips for different tastes. Or mix two types of chocolate for extra depth. Adding a few chopped chocolate chunks along with the chips also brings a delicious texture.
- Adding Nuts for Texture: Adding chopped nuts, like walnuts, pecans, or almonds, brings a crunchy texture that complements the soft cookie. Toasting the nuts briefly beforehand can add extra depth to the flavor.
- Personalize with Add-ins: Customize your cookies by adding a handful of shredded coconut for chewiness, oats for a hearty texture, or a pinch of cinnamon for warmth. These small changes can make each batch feel unique.
- Experiment with Sweetness: Adjusting the sugar allows you to control the flavor profile. Using a bit less sugar enhances the peanut taste while adding a bit more gives a sweeter, dessert-like flavor.
Nutrition
Serving: 1serving | Calories: 237kcal | Carbohydrates: 29g | Protein: 3g | Fat: 12g | Saturated Fat: 8g | Polyunsaturated Fat: 1g | Monounsaturated Fat: 3g | Trans Fat: 0.2g | Cholesterol: 26mg | Sodium: 114mg | Potassium: 116mg | Fiber: 1g | Sugar: 19g | Vitamin A: 196IU | Calcium: 31mg | Iron: 1mg
Visit the Recipe
Want to view the full post? Simply scan the QR code with your camera and tap the link.
