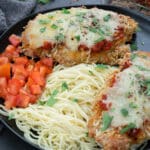
Baked Chicken Parmesan
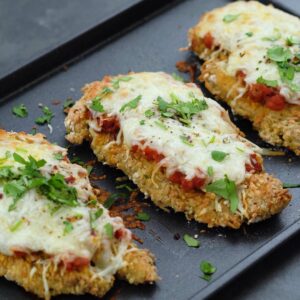
Baked Chicken Parmesan, often called Chicken Parm or Parmigiana, offers a delightful and healthier take on the classic Italian-American dish. It features crispy, Parmesan-crusted chicken breasts topped with rich marinara sauce, a blend of Parmesan and mozzarella cheeses, and a mix of herbs and seasonings. Perfect alongside pasta, salads, or roasted vegetables, this dish is a versatile and satisfying choice for any lunch or dinner.
Ingredients
For Sauce
- 1 tbsp Olive Oil
- 3 tbsp Onion chopped, white, purple or yellow onion
- 2 tbsp Garlic finely chopped
- 14 oz Diced Tomato
- ½ tsp Chili Flakes
- ½ tsp Black Pepper Powder
- ½ tsp Basil Leaves
- Salt to taste
For Egg Mixture
- 3 Egg
- ¼ tsp Salt
For Breading
- 1 cup All Purpose flour
- ¼ cup Cornstarch
- 1 cup Panko Breadcrumb
- 1 cup Parmesan Cheese
- ½ tsp Onion Powder
- ½ tsp Black Pepper Powder
- ½ tsp Oregano
- ½ tsp Chili Flakes
Other Ingredients
- 1 lb Boneless Chicken Breast thinly sliced
- ½ tsp Garlic Powder
- ½ tsp Black Pepper Powder
- Salt to taste
- Mozzarella Cheese for topping
- Cilantro or Basil Leaves for garnishing
Instructions
Making the Sauce
- In a skillet over medium heat, add the oil. Once hot, add onions and garlic, sautéing until they become fragrant and take on a golden color.
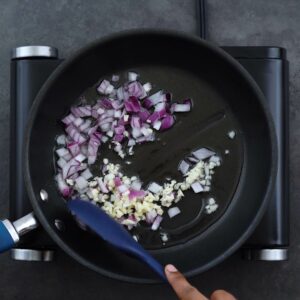
- Stir in the diced tomatoes and continue to cook for 5 to 7 minutes. Allow the tomatoes to soften thoroughly, which will make them easier to mash and help concentrate their flavors.
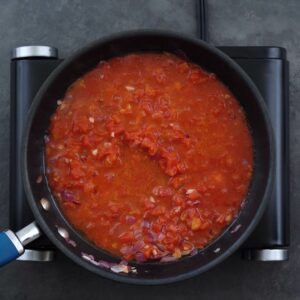
- Use a potato masher to crush the tomatoes right in the skillet. Aim for a soft, mushy consistency to ensure a smooth sauce with a rich texture.
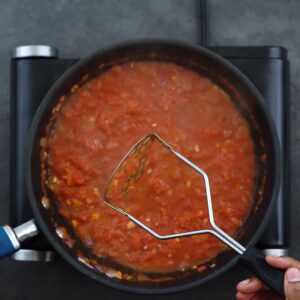
- Add chili flakes, black pepper, and fresh basil leaves. Simmer the mixture for an additional 2 to 3 minutes. This simmering allows the seasonings to infuse throughout the sauce, enhancing its overall flavor.
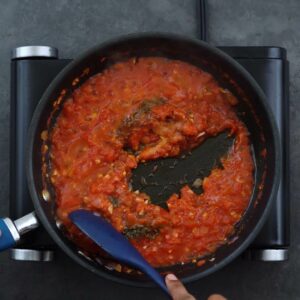
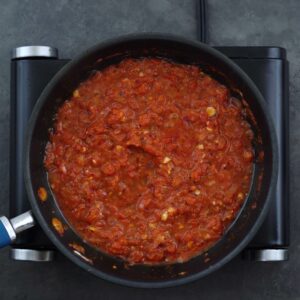
- Remove the sauce from the heat and set it aside for later use in the recipe.
Breading the Chicken
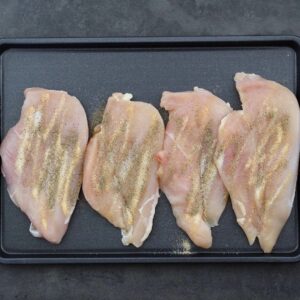
- Season each chicken breast slice with garlic powder, salt, and pepper. Set them aside to marinate briefly, which helps the spices infuse deeper into the meat.
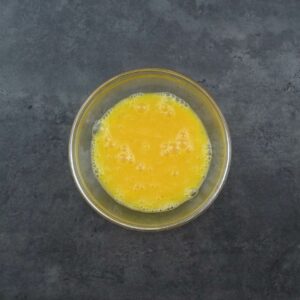
- In a bowl, whisk together the eggs and a pinch of salt until the mixture is nicely frothy. This texture helps the egg mixture stick better to the chicken.
- Combine all-purpose flour, cornstarch, panko breadcrumbs, grated Parmesan cheese, onion powder, pepper powder, oregano, and a dash of salt in a shallow tray. Mix these ingredients thoroughly to ensure each piece of chicken is evenly coated with flavors in the subsequent steps.
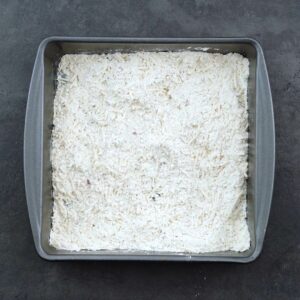
- First, dip each seasoned chicken breast into the egg mixture, making sure it’s fully coated. This acts as the glue for the breading. Then, dredge the chicken through the breading mixture, pressing gently to coat it thoroughly on all sides. Ensure complete coverage for the perfect crisp. Repeat with all chicken slices.
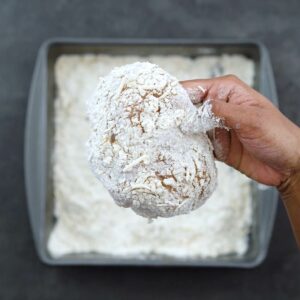
Baking Chicken Parmesan
- Start by arranging the breaded chicken breasts on an oil-greased baking tray. For an even crispier exterior, consider giving the chicken a light spray with cooking oil. This helps to avoid any powdery flour spots and enhances the golden color.
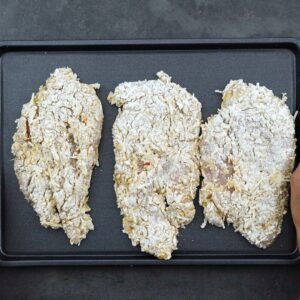
- Place the tray in a preheated oven set to 425°F. Bake for 25 to 30 minutes, or until the chicken achieves a beautiful golden hue and a crispy texture.
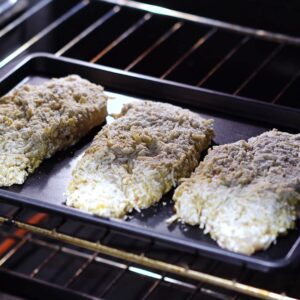
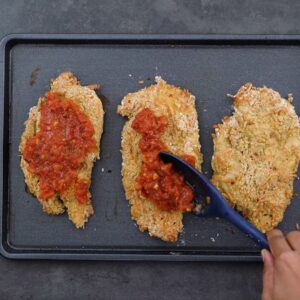
- Once the chicken is crispy, remove it from the oven. Generously coat each piece with the marinara sauce prepared earlier, ensuring it covers the chicken uniformly for maximum flavor.
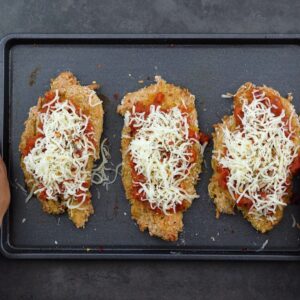
- Layer a generous amount of mozzarella cheese over the sauce and sprinkle fresh basil leaves for an aromatic touch. The basil not only adds flavor but also infuses the dish with a delightful aroma as it bakes.
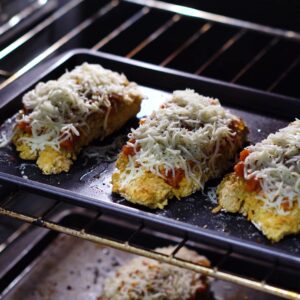
- Return the chicken to the oven and continue baking for an additional 5 to 10 minutes, or until the cheese is perfectly melted and slightly browned at the edges.
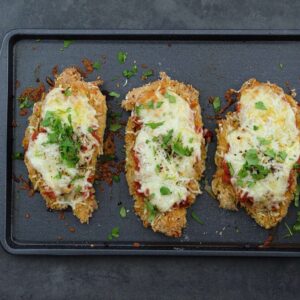
- Once done, remove the Crispy Baked Chicken Parmesan from the oven. For a fresh finishing touch and a pop of color, garnish with finely chopped basil or cilantro. Let the dish rest for a few minutes before serving to allow the flavors to meld together beautifully.
Serving
- Enjoy this Baked Chicken Parmesan over pasta or on its own, paired with your favorite grains, fresh salads, roasted vegetables, or any other side dishes you love. For more delicious pairing ideas, check out the serving suggestions section below.
Notes
Here are my top tips to help you make the perfect Baked Chicken Parmesan:
- Breading: For a crispy exterior, coat the chicken breast with a mixture of all-purpose flour, cornstarch, panko, and Parmesan cheese. Dip the seasoned chicken in beaten eggs or buttermilk to ensure the breading adheres well.
- Avoiding Powdery Flour: To prevent a powdery or chalky appearance on your chicken, lightly spray the breaded pieces with cooking oil before baking. This step not only enhances the golden color but also helps achieve a more appealing and crisp texture.
- Cheese Quality: While freshly grated mozzarella and Parmesan typically offer a superior melt and richer flavor, don’t hesitate to use pre-grated cheese if that’s what’s available. I find it works wonderfully and can be just as delicious, making it a practical and tasty option for busy days.
- Layering the Cheese: Instead of just topping the chicken with cheese, layer some mozzarella within the chicken coating as well. This creates pockets of gooey cheese inside the breading for an extra cheesy experience.
- Making it Gluten-Free: To accommodate dietary restrictions, use gluten-free breadcrumbs and ensure all other ingredients, like flour and cornstarch, are gluten-free varieties.
- Resting the Breaded Chicken: Before baking, allow the breaded chicken to rest for 5-10 minutes. This resting period helps the coating to set and adhere better, reducing the likelihood of it flaking off during baking.
- Baking Time and Temperature: Bake the chicken at 425°F for 25 to 30 minutes until golden and crisp. After adding cheese, continue baking for an additional 5 to 10 minutes until the cheese is melted and bubbly. Depending on the size and thickness of your chicken, you might need to adjust the oven temperature between 400°F and 450°F to ensure even cooking. Importantly, regardless of the temperature setting or chicken size, always make sure that the internal temperature of the chicken reaches 165°F, as recommended by the USDA. This step is crucial to ensure that the chicken is cooked safely and thoroughly.
Nutrition
Serving: 1serving | Calories: 544kcal | Carbohydrates: 51g | Protein: 44g | Fat: 18g | Saturated Fat: 7g | Polyunsaturated Fat: 2g | Monounsaturated Fat: 7g | Trans Fat: 0.03g | Cholesterol: 212mg | Sodium: 1569mg | Potassium: 812mg | Fiber: 3g | Sugar: 4g | Vitamin A: 1093IU | Vitamin C: 13mg | Calcium: 402mg | Iron: 5mg
Visit the Recipe
Want to view the full post? Simply scan the QR code with your camera and tap the link.
