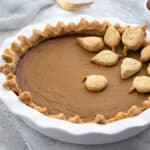
Pumpkin Pie
Enjoy the rich, creamy flavors of a classic pumpkin pie, filled with warm fall spices. Made with a buttery homemade pie crust and a silky-smooth pumpkin filling, it’s the perfect dessert for festive occasions. Whether it’s Thanksgiving, Christmas, or any fall gathering, this pie is sure to impress and please everyone.
Ingredients
- 1 Pie Crust homemade, par-baked
- 15 oz Pumpkin Puree
- 3 Eggs large
- 1¼ cup Brown Sugar
- 1 tbsp Cornstarch
- 1 tsp Ground Cinnamon
- ¼ tsp Ground Cloves
- ½ tsp Ground Ginger
- ¼ tsp Black Pepper Powder
- ¼ tsp Nutmeg grated
- 1 cup Heavy Cream
- ¼ cup Milk
- Salt to taste
Instructions
Making the Pumpkin Filling
- In a large mixing bowl, add the pumpkin purée, eggs, and brown sugar. You can use either store-bought or homemade pumpkin purée, but if using homemade, make sure it’s smooth and not grainy. Drain any excess liquid with a cheesecloth to avoid a watery filling.
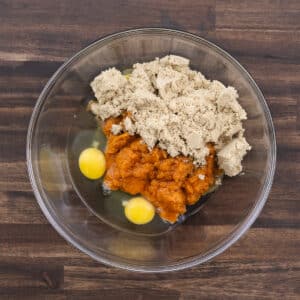
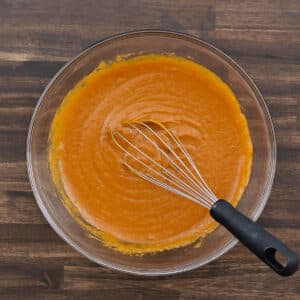
- Using a whisk, mix the ingredients on medium speed until well combined. This step creates a smooth, even mixture as the base for your creamy filling.
- Add the fall spices—cinnamon, clove, nutmeg, ginger, and black pepper—along with salt, cornstarch, milk, and heavy cream. Mix everything together until well blended.
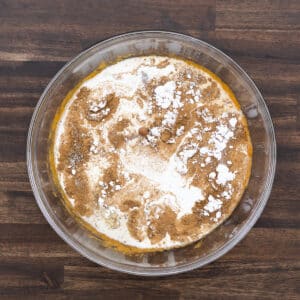
- Whisk the filling until you achieve a smooth and consistent mixture. Avoid overmixing, as too much air can cause cracks or a bumpy texture during baking. Once combined, the filling is ready for the next steps.
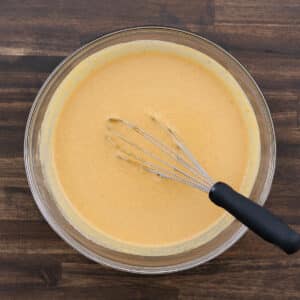
- I’m using a pre-baked pie crust for this recipe. If you’d like to make it from scratch, be sure to check out my detailed post on homemade pie crust with step-by-step guidance. Pour the filling into the pre-baked crust, filling it about ¾ of the way to allow for slight expansion during baking. If you end up with leftover filling, don’t worry—I’ve shared tips below on how to use it creatively.
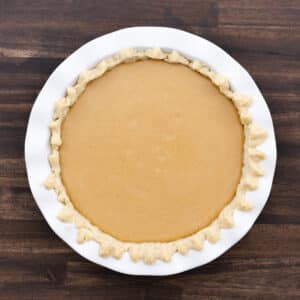
Baking the Filling
- Preheat your oven to 375°F. Place the pie on the middle rack of the oven to promote even baking. Bake for 50–60 minutes, or until the filling is set. Avoid opening the oven door too frequently, as this can cause uneven cooking by letting heat escape.
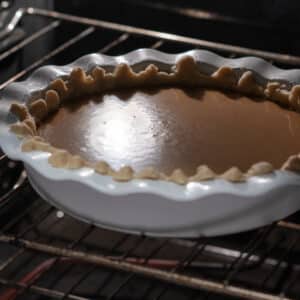
- Around the 50-minute mark, check the pie for doneness. The edges of the filling should be slightly puffed, and the center should still have a gentle wobble when you shake the pie lightly. This wobble will set as the pie cools. If the center appears too liquid or hasn’t reached the desired texture, bake for an additional 5–10 minutes, checking frequently.
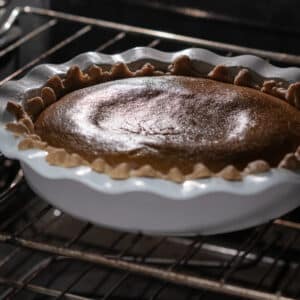
- Once baked, carefully remove the pie from the oven and place it on a wire rack to cool at room temperature for at least 2 hours. This step is crucial—it allows the residual heat to finish cooking the filling while helping it set completely. Skipping this resting period can result in a pie that’s too soft or difficult to slice.
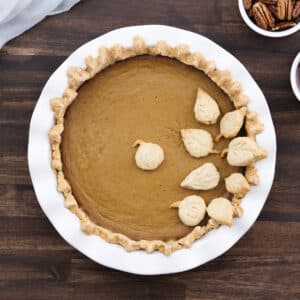
Serving
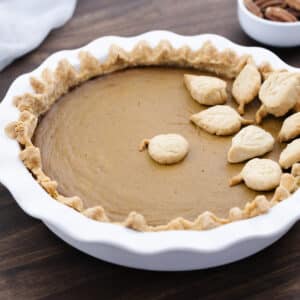
- After cooling, decorate the pie with fun elements like baked pie dough shapes, or top it with whipped cream, caramel drizzle, or a sprinkle of cinnamon. This homemade pumpkin pie makes a perfect dessert for your Thanksgiving or Christmas meal. For more pairing ideas, be sure to check out the Serving Suggestions section below!
Notes
Here are some helpful tips I’ve learned to achieve a perfectly smooth and creamy pumpkin pie every time:
Baking and Preparing Your Pumpkin Pie
- Pie Crust: For a flaky, buttery crust, I recommend using my homemade pie crust. You can find a detailed step-by-step guide on my blog, complete with tips, tricks, and troubleshooting ideas from my experience. If you’re short on time, store-bought pie dough works too—just follow the package instructions for the best results.
- Parbaking the Pie Crust: Whether you’re using a homemade or store-bought pie crust, I always recommend parbaking it to avoid a soggy or doughy texture in the pie. Since the filling is quite wet, parbaking helps set the crust and keeps it from getting mushy, especially for pies like pumpkin. This method has always given me great results, so I suggest trying it for the best outcome! Honestly, I haven’t skipped parbaking before, so I can’t say how the pie would turn out without it.
- Use Room Temperature Ingredients: Make sure your eggs, dairy, and pumpkin purée are at room temperature before mixing. This helps the ingredients combine smoothly and prevents the eggs from curdling. Using cold ingredients can lead to a lumpy or separated filling, which we definitely want to avoid.
- Preheat the Baking Sheet: Place a baking sheet in the oven while it preheats, and bake your pie on top of it. This helps the bottom crust cook evenly and prevents it from becoming soggy.
- Pie Dish Size: I’ve used a 9-inch pie dish that’s about 2 inches deep, and it works perfectly for this recipe. When filling the crust, leave a little space at the top to avoid spills while baking. If your pie dish is shallower, the filling might overflow, so double-check the depth before starting. If you’re using the same size as me, you might have a bit of filling left over—use it to make mini pies, tarts, or even a small custard!
- Use a Pie Shield: If your crust starts to brown too quickly while baking, you can use a pie shield or cover the edges with aluminum foil to protect it. I haven’t needed one with this recipe, but feel free to use it if you’d like.
- Test for Doneness: To check if your pie is done, insert a knife or toothpick into the center of the filling. If it comes out clean or with a few moist crumbs, your pie is ready. If there’s wet filling sticking to it, bake for a little longer. Once done, let the pie cool completely to allow the filling to fully set.
Serving and Storing Your Pumpkin Pie
- Decorating: If you want to get creative, use any extra pie dough to make fun shapes like leaves, Christmas trees, or pumpkins to decorate your pie. The pie crust recipe I’ve shared makes enough for two pies, so you can use the extra for this! My kids and I love making decorative leaves—we bake them separately for a few minutes and then place them on the pie. It’s a fun way to involve kids while baking.
- Cooling the Pumpkin Pie: Let your pumpkin pie cool for at least 2 hours after baking. This step is super important to get that smooth, creamy texture and to let the filling set properly. Cooling also helps the flavors develop, and your pie will be firm enough for clean slices when you’re ready to serve.
- Cool on a Wire Rack: Let your pie cool on a wire rack to allow air to circulate evenly. This prevents condensation from forming under the crust, which can make it soggy.
- Cut Neatly with a Warm Knife: For clean slices, dip your knife in warm water, wipe it dry, and then cut the pie. Repeat this step for each slice to keep the edges neat and smooth.
- Reheat Gently: If you prefer serving the pie warm, reheat individual slices in the microwave for 10–15 seconds or warm the whole pie in the oven at 300°F for about 15 minutes.
- Food Safety: Don’t leave your pumpkin pie out at room temperature for more than 2 hours. Since it contains eggs and dairy, it’s best to follow FDA guidelines to keep it safe. Foods like this can quickly enter the "danger zone" (between 40°F and 140°F), where bacteria can grow. If you’re serving the pie later, refrigerate it until just before serving and return any leftovers to the fridge promptly.
Bonus: Troubleshooting Tips
- If you’ve followed the recipe but still face issues, don’t worry—I’ve got you covered. Check out the troubleshooting section below for solutions to common problems and extra tips to perfect your pumpkin pie!
Nutrition
Serving: 1serving | Calories: 287kcal | Carbohydrates: 41g | Protein: 4g | Fat: 13g | Saturated Fat: 8g | Polyunsaturated Fat: 1g | Monounsaturated Fat: 3g | Trans Fat: 0.01g | Cholesterol: 104mg | Sodium: 87mg | Potassium: 224mg | Fiber: 2g | Sugar: 36g | Vitamin A: 8824IU | Vitamin C: 2mg | Calcium: 85mg | Iron: 1mg
Visit the Recipe
Want to view the full post? Simply scan the QR code with your camera and tap the link.
