
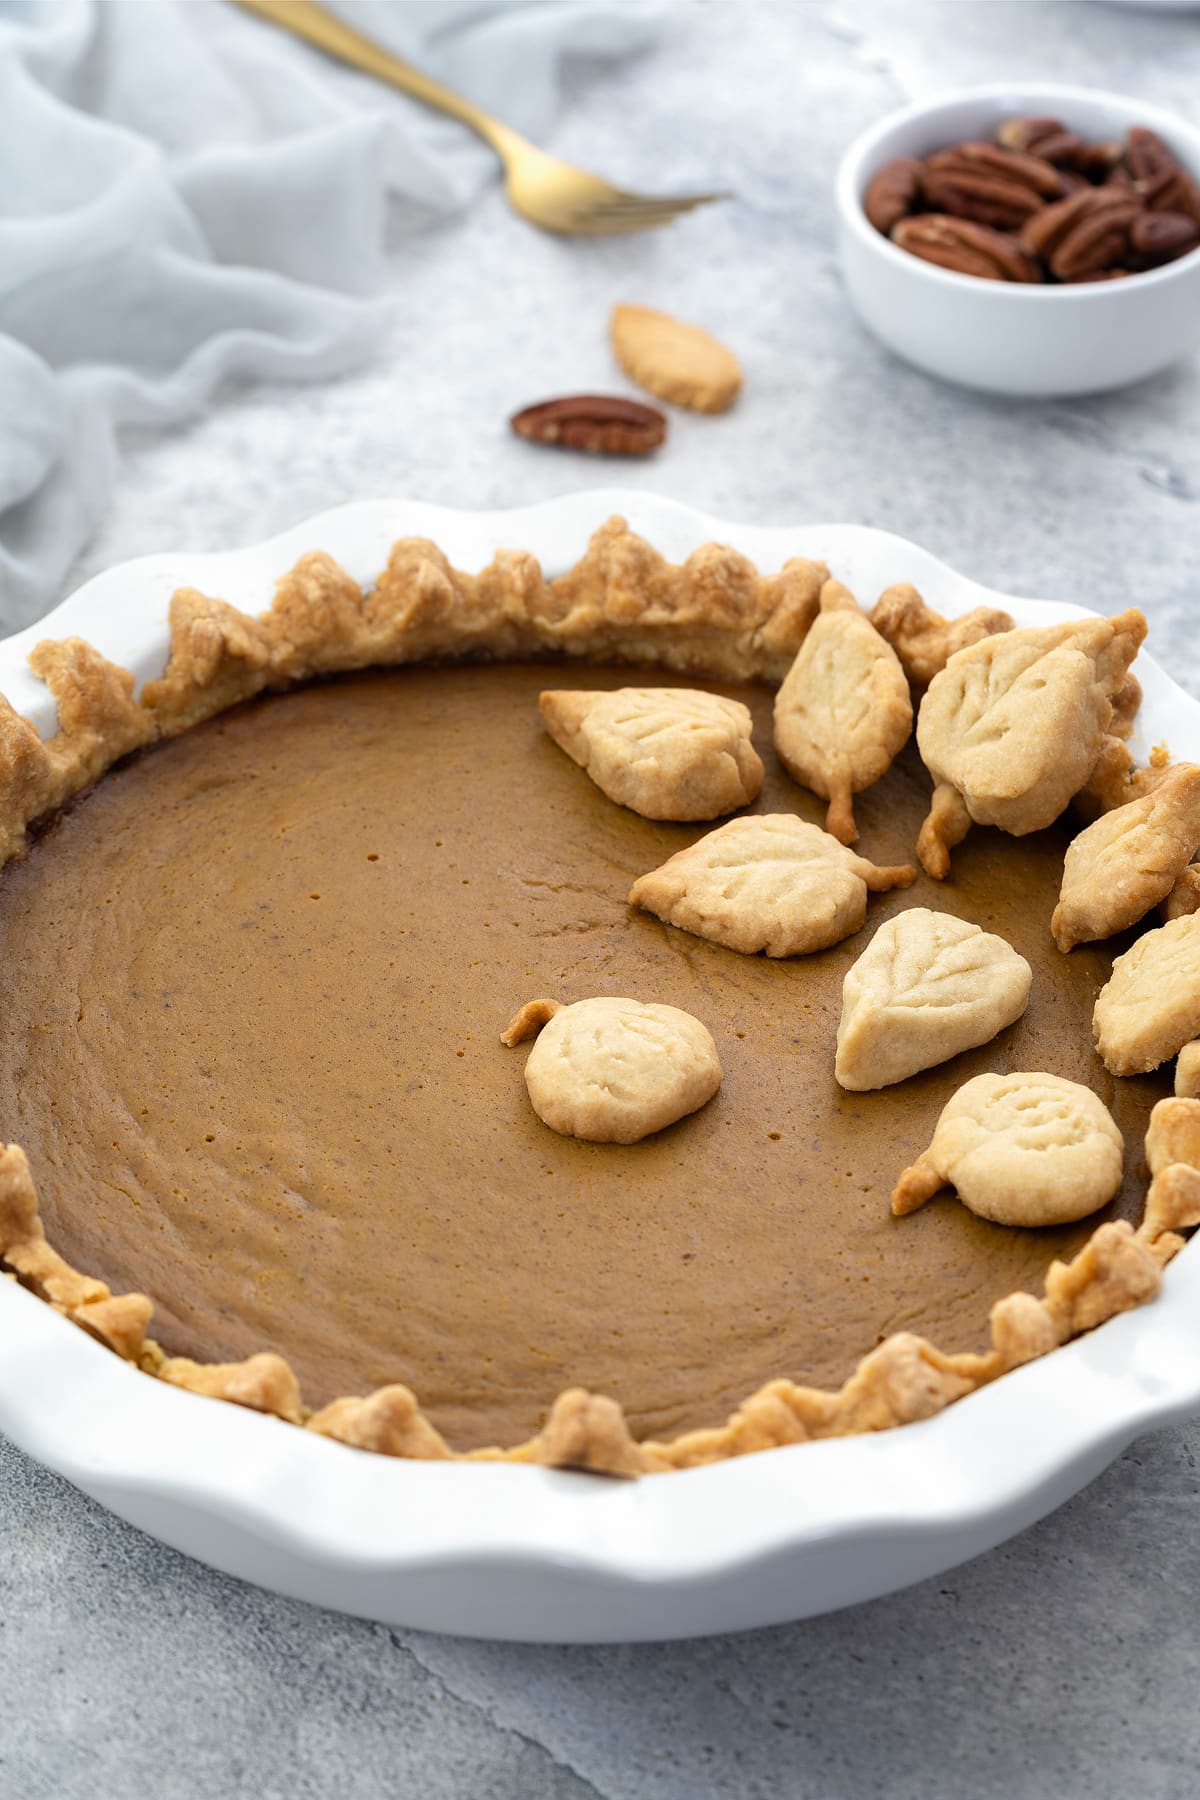
Pumpkin Pie is smooth, rich, and perfect for Thanksgiving or any fall gathering. It’s made with creamy pumpkin purée, warm spices, and a buttery, flaky pie crust—homemade or store-bought, whichever you prefer. Serve it with whipped cream, caramel sauce, or vanilla ice cream for a classic holiday dessert.
What You’ll Find On This Page
This pie is a staple in the U.S. and Canada during Thanksgiving, but honestly, it’s too good to save for just one occasion. Its cozy, spiced flavors are perfect throughout fall and winter, especially when pumpkins are in season or you’re just craving something comforting.
The best pumpkin pies start with fresh, quality ingredients, and making it from scratch really makes a difference. It may take a bit more time to prepare the crust, mix the filling, and bake it to perfection, but trust me—it’s worth the effort. Plus, pumpkin pie stores beautifully in the fridge or freezer, making it a great make-ahead dessert to ease your holiday stress.
Today, I’m excited to share my favorite pumpkin pie recipe with you. It’s made entirely from scratch, including the crust, and comes with step-by-step instructions and general and troubleshooting tips to help you avoid common issues like soggy crusts, cracks, or undercooked filling.
Enjoy the fall with More Pumpkin Recipes:
- Pumpkin Cheesecake
- Pumpkin Bread
- Pumpkin Cookies
- Pumpkin Muffins
- Pumpkin Pancakes
- Pumpkin Soup
- Roasted Pumpkin
- Roasted Pumpkin Seeds
- Pumpkin Dip
Ingredients and Substitutions Overview
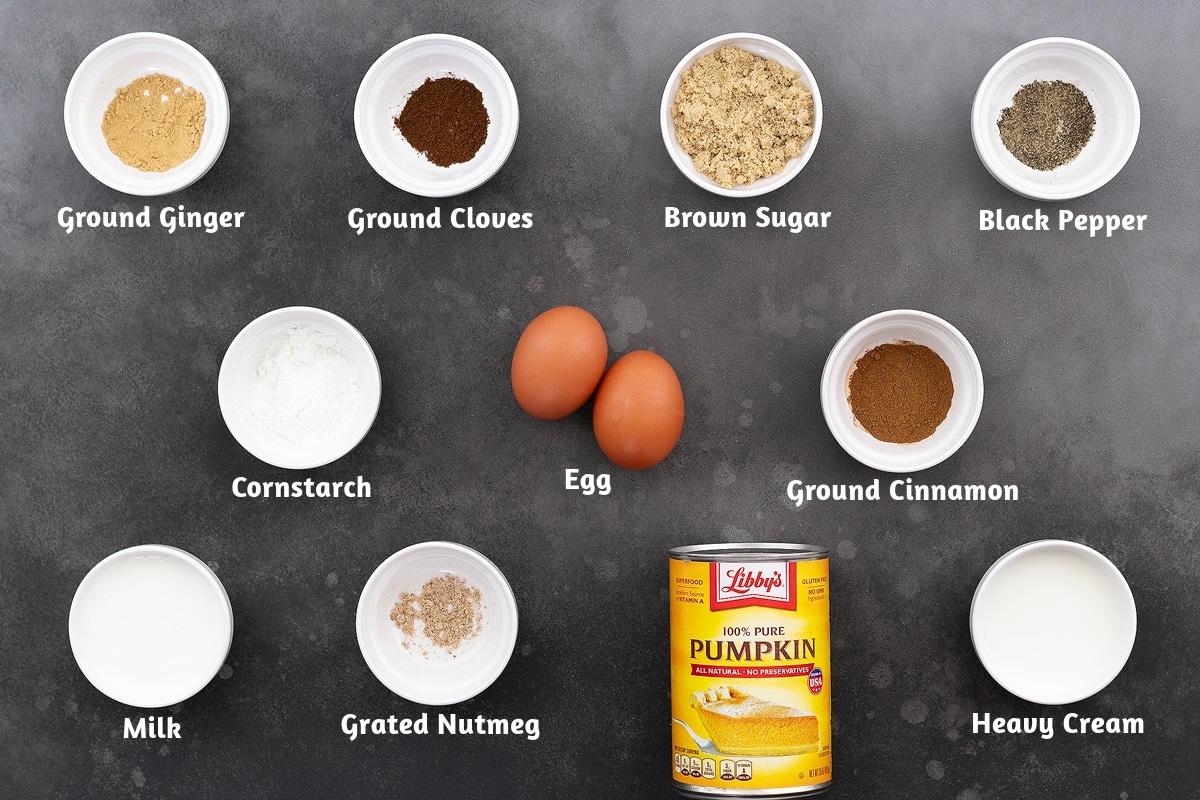
To make this Pumpkin Pie, you’ll need a parbaked pie crust, a few basic pantry staples, and some classic fall ingredients that are easy to find at most grocery stores. Let’s go over each ingredient below:
- Pie Crust: I’m using a parbaked, made-from-scratch crust for this recipe. If you’d like to give it a try, check out my detailed homemade pie crust recipe filled with tips and tricks to get it just right. If you’re short on time, store-bought pie dough works too.
- Pumpkin Purée: This is the main ingredient that gives your pie its creamy, smooth texture. I’ve used canned pumpkin purée from Libby’s for its consistent quality, but homemade purée works great too.
- Egg: Eggs bind the ingredients and give the filling a smooth, custard-like texture. Without them, the pie won’t set or slice properly.
- Fall Spices: A mix of cinnamon, cloves, nutmeg, ginger, and black pepper adds warm, comforting flavors. I’ve used individual spices here, but you can substitute with about 2 teaspoons of pumpkin pie spice mix if you have it on hand. It delivers a similar flavor profile and works just as well.
- Heavy Cream and Milk: These make the filling rich, smooth, and creamy, giving the pie its soft and satisfying texture.
- Cornstarch: Cornstarch thickens the filling, helping it set with a smooth, firm texture. You can also use all-purpose flour as a substitute—just use 2 tablespoons of flour for every 1 tablespoon of cornstarch.
- Brown Sugar: Brown sugar adds sweetness with a hint of caramel-like depth from the molasses. If you don’t have brown sugar, white sugar is a good substitute, though the flavor will be slightly different.
How to Make Pumpkin Pie at Home?
Let’s gather the ingredients and make a classic pumpkin pie together! I’ll guide you through preparing the creamy filling and baking it in a parbaked pie crust for a crack-free pie every time. Each step includes photos and a detailed video to make it easy to follow. Now, let’s get started!
Note: Making pie crust from scratch involves a lot of details, so I’ve created a dedicated post for my homemade pie crust recipe. I recommend checking it out first before starting this pumpkin pie recipe.
Enjoy More Popular Thanksgiving Recipes:
- Apple Pie
- Pecan Pie
- Roasted Whole Chicken
- Mashed Potatoes
- Baked Sweet Potato
- Green Bean Casserole
- Sweet Potato Casserole
- Stuffing
- Mac and Cheese
- Gravy
- Cranberry Sauce
- Creamed Corn
- Spinach Artichoke Dip
Pumpkin Pie
Ingredients
- 1 Pie Crust, homemade, par-baked
- 15 oz Pumpkin Puree
- 3 Eggs, large
- 1¼ cup Brown Sugar
- 1 tbsp Cornstarch
- 1 tsp Ground Cinnamon
- ¼ tsp Ground Cloves
- ½ tsp Ground Ginger
- ¼ tsp Black Pepper Powder
- ¼ tsp Nutmeg, grated
- 1 cup Heavy Cream
- ¼ cup Milk
- Salt, to taste
Instructions
Making the Pumpkin Filling
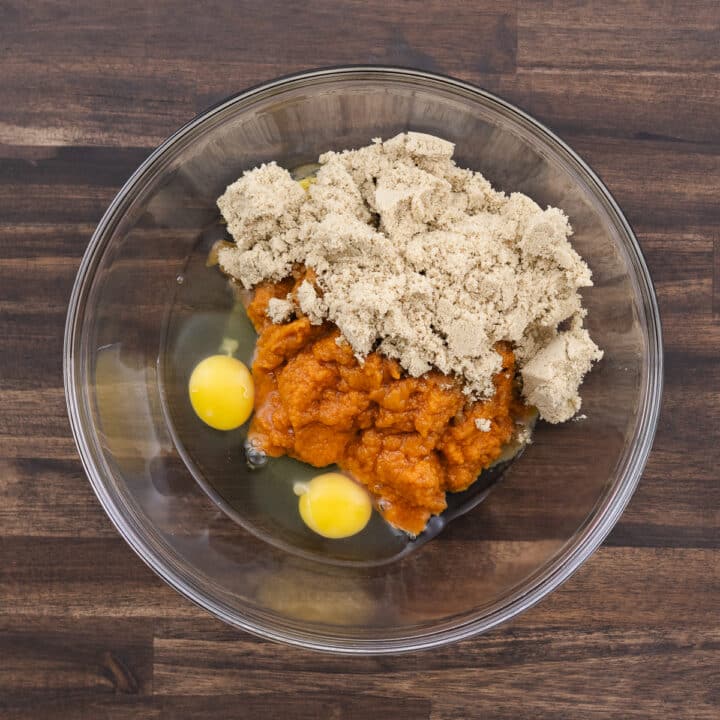
- In a large mixing bowl, add the pumpkin purée, eggs, and brown sugar. You can use either store-bought or homemade pumpkin purée, but if using homemade, make sure it’s smooth and not grainy. Drain any excess liquid with a cheesecloth to avoid a watery filling.

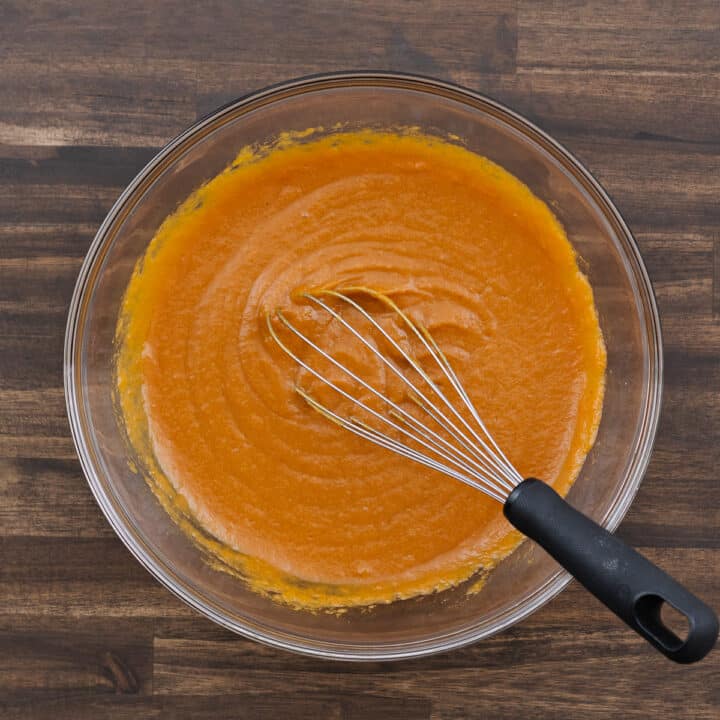
- Using a whisk, mix the ingredients on medium speed until well combined. This step creates a smooth, even mixture as the base for your creamy filling.
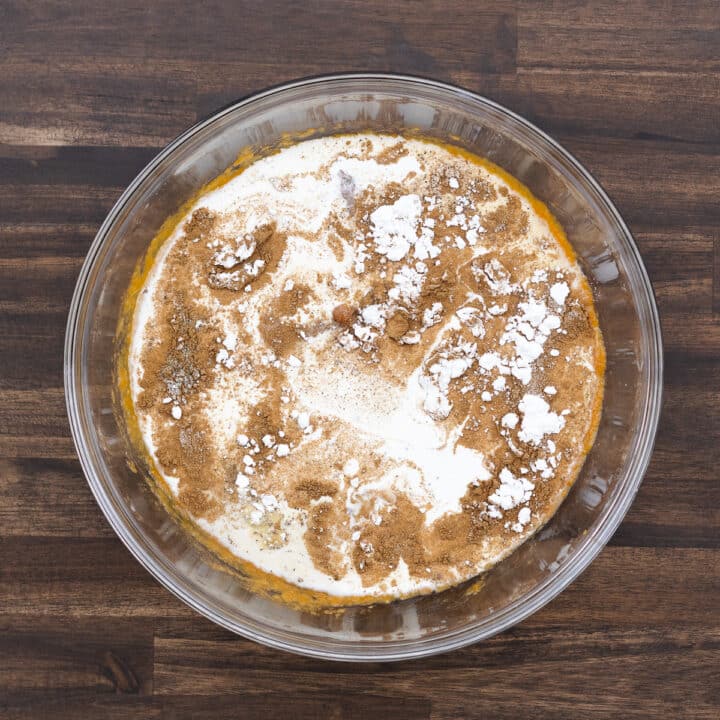
- Add the fall spices—cinnamon, clove, nutmeg, ginger, and black pepper—along with salt, cornstarch, milk, and heavy cream. Mix everything together until well blended.
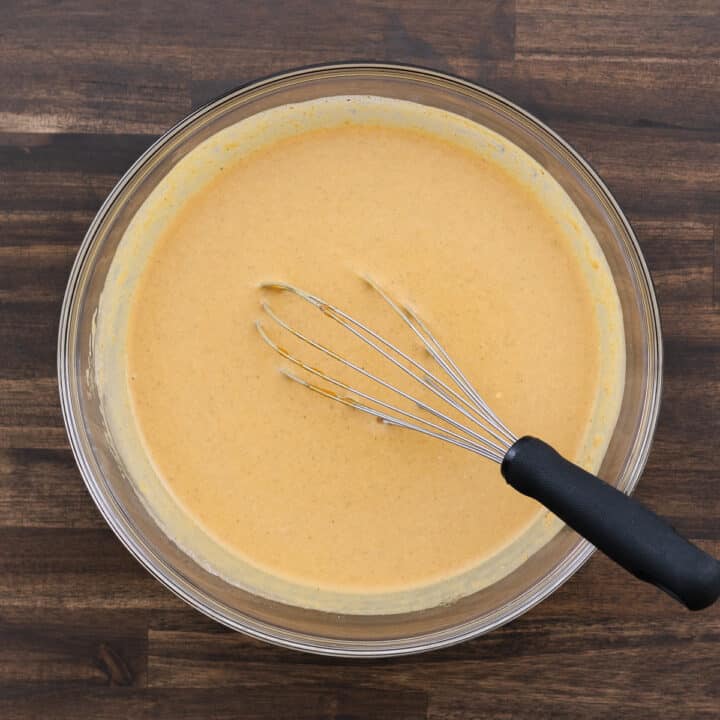
- Whisk the filling until you achieve a smooth and consistent mixture. Avoid overmixing, as too much air can cause cracks or a bumpy texture during baking. Once combined, the filling is ready for the next steps.
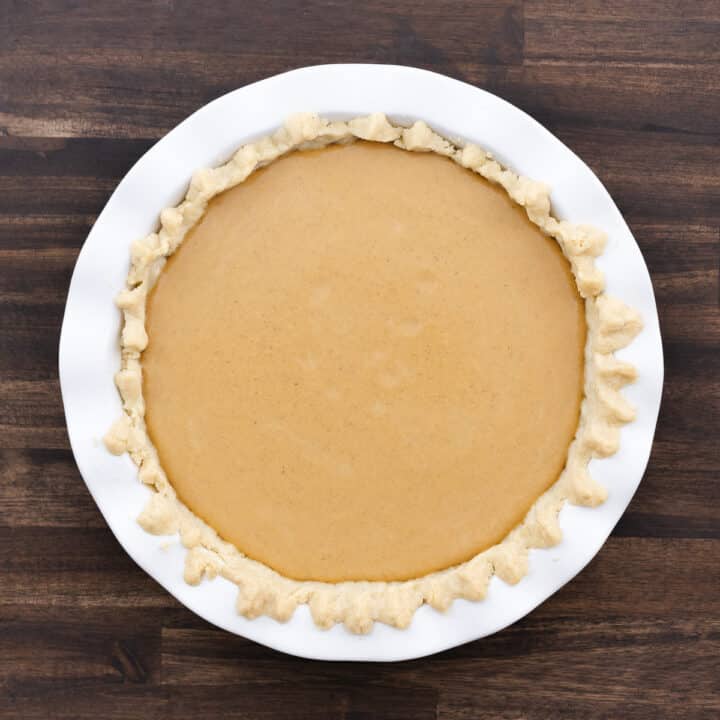
- I’m using a pre-baked pie crust for this recipe. If you’d like to make it from scratch, be sure to check out my detailed post on homemade pie crust with step-by-step guidance. Pour the filling into the pre-baked crust, filling it about ¾ of the way to allow for slight expansion during baking. If you end up with leftover filling, don’t worry—I’ve shared tips below on how to use it creatively.
Baking the Filling
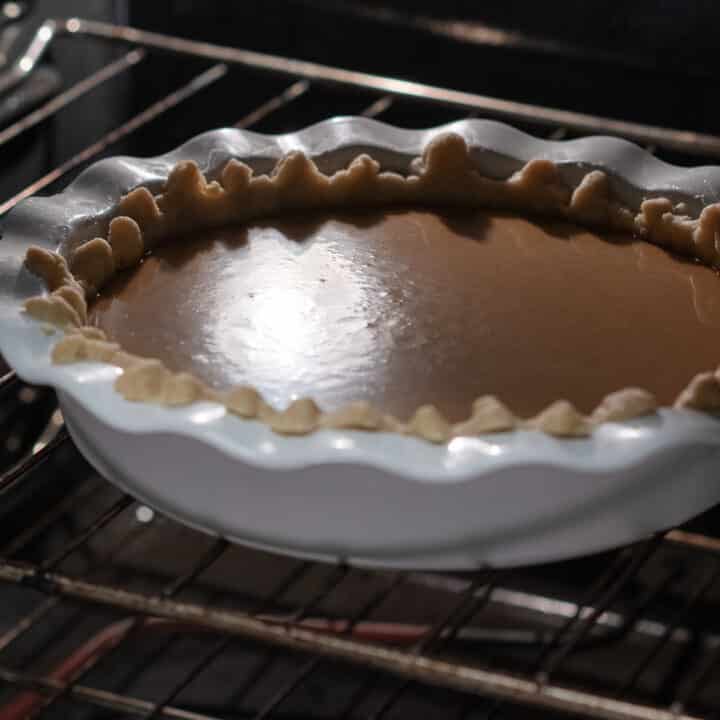
- Preheat your oven to 375°F. Place the pie on the middle rack of the oven to promote even baking. Bake for 50–60 minutes, or until the filling is set. Avoid opening the oven door too frequently, as this can cause uneven cooking by letting heat escape.
- Around the 50-minute mark, check the pie for doneness. The edges of the filling should be slightly puffed, and the center should still have a gentle wobble when you shake the pie lightly. This wobble will set as the pie cools. If the center appears too liquid or hasn’t reached the desired texture, bake for an additional 5–10 minutes, checking frequently.
- Once baked, carefully remove the pie from the oven and place it on a wire rack to cool at room temperature for at least 2 hours. This step is crucial—it allows the residual heat to finish cooking the filling while helping it set completely. Skipping this resting period can result in a pie that’s too soft or difficult to slice.

Serving
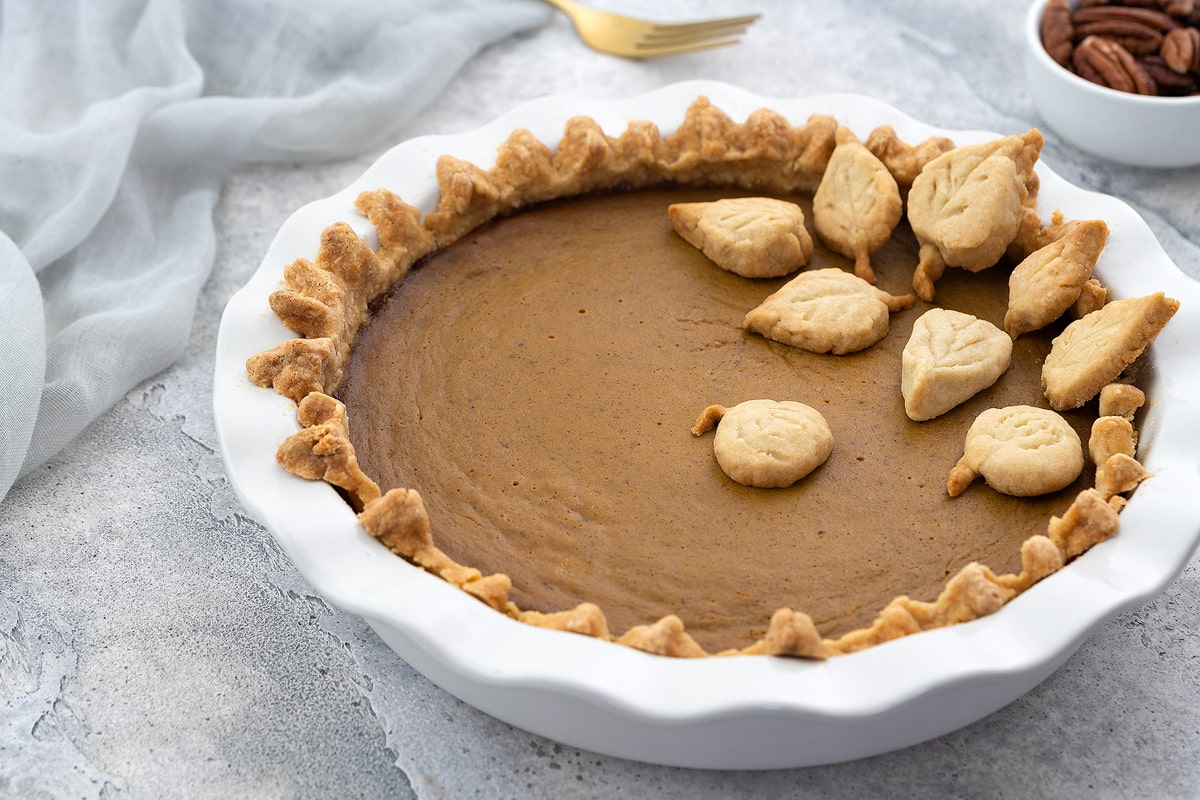
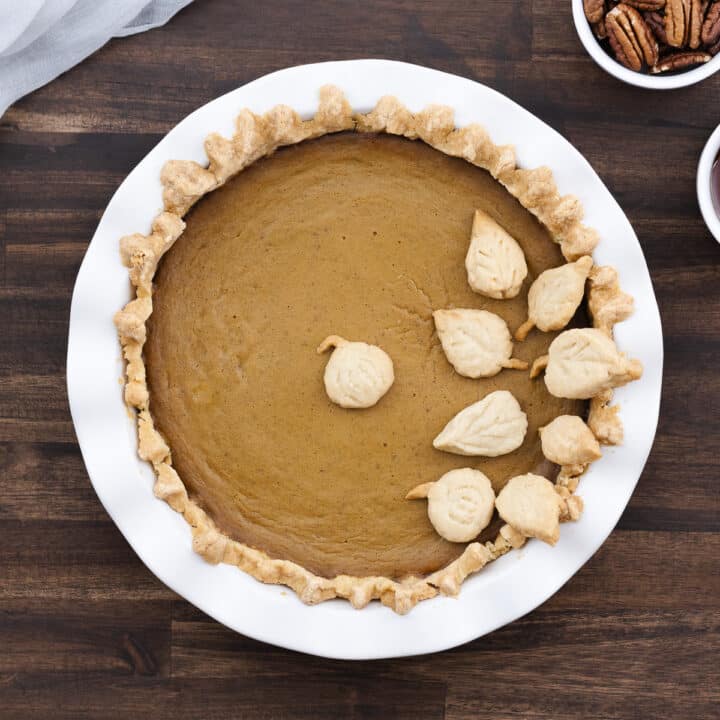
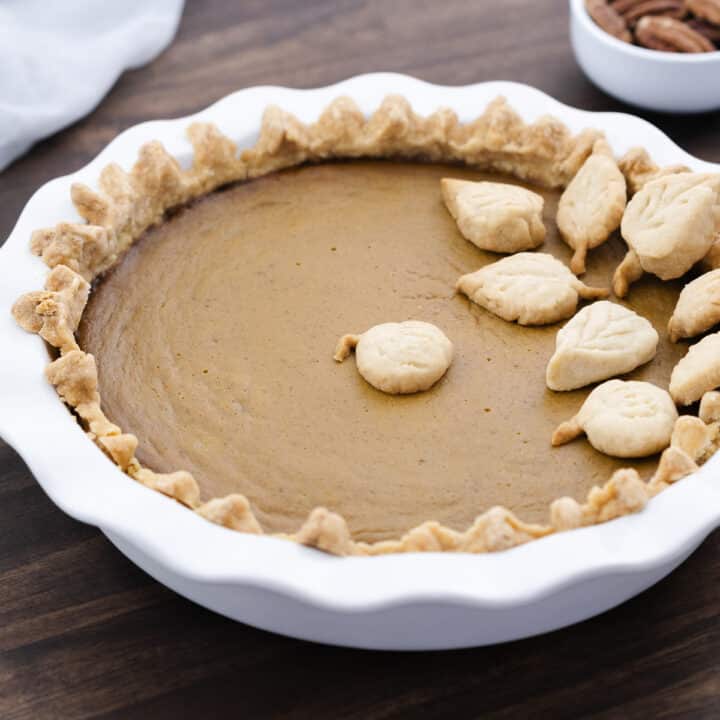
- After cooling, decorate the pie with fun elements like baked pie dough shapes, or top it with whipped cream, caramel drizzle, or a sprinkle of cinnamon. This homemade pumpkin pie makes a perfect dessert for your Thanksgiving or Christmas meal. For more pairing ideas, be sure to check out the Serving Suggestions section below!
Recipe Video
Chef's Notes and Tips
Baking and Preparing Your Pumpkin Pie
- Pie Crust: For a flaky, buttery crust, I recommend using my homemade pie crust. You can find a detailed step-by-step guide on my blog, complete with tips, tricks, and troubleshooting ideas from my experience. If you’re short on time, store-bought pie dough works too—just follow the package instructions for the best results.
- Parbaking the Pie Crust: Whether you’re using a homemade or store-bought pie crust, I always recommend parbaking it to avoid a soggy or doughy texture in the pie. Since the filling is quite wet, parbaking helps set the crust and keeps it from getting mushy, especially for pies like pumpkin. This method has always given me great results, so I suggest trying it for the best outcome! Honestly, I haven’t skipped parbaking before, so I can’t say how the pie would turn out without it.
- Use Room Temperature Ingredients: Make sure your eggs, dairy, and pumpkin purée are at room temperature before mixing. This helps the ingredients combine smoothly and prevents the eggs from curdling. Using cold ingredients can lead to a lumpy or separated filling, which we definitely want to avoid.
- Preheat the Baking Sheet: Place a baking sheet in the oven while it preheats, and bake your pie on top of it. This helps the bottom crust cook evenly and prevents it from becoming soggy.
- Pie Dish Size: I’ve used a 9-inch pie dish that’s about 2 inches deep, and it works perfectly for this recipe. When filling the crust, leave a little space at the top to avoid spills while baking. If your pie dish is shallower, the filling might overflow, so double-check the depth before starting. If you’re using the same size as me, you might have a bit of filling left over—use it to make mini pies, tarts, or even a small custard!
- Use a Pie Shield: If your crust starts to brown too quickly while baking, you can use a pie shield or cover the edges with aluminum foil to protect it. I haven’t needed one with this recipe, but feel free to use it if you’d like.
- Test for Doneness: To check if your pie is done, insert a knife or toothpick into the center of the filling. If it comes out clean or with a few moist crumbs, your pie is ready. If there’s wet filling sticking to it, bake for a little longer. Once done, let the pie cool completely to allow the filling to fully set.
Serving and Storing Your Pumpkin Pie
- Decorating: If you want to get creative, use any extra pie dough to make fun shapes like leaves, Christmas trees, or pumpkins to decorate your pie. The pie crust recipe I’ve shared makes enough for two pies, so you can use the extra for this! My kids and I love making decorative leaves—we bake them separately for a few minutes and then place them on the pie. It’s a fun way to involve kids while baking.
- Cooling the Pumpkin Pie: Let your pumpkin pie cool for at least 2 hours after baking. This step is super important to get that smooth, creamy texture and to let the filling set properly. Cooling also helps the flavors develop, and your pie will be firm enough for clean slices when you’re ready to serve.
- Cool on a Wire Rack: Let your pie cool on a wire rack to allow air to circulate evenly. This prevents condensation from forming under the crust, which can make it soggy.
- Cut Neatly with a Warm Knife: For clean slices, dip your knife in warm water, wipe it dry, and then cut the pie. Repeat this step for each slice to keep the edges neat and smooth.
- Reheat Gently: If you prefer serving the pie warm, reheat individual slices in the microwave for 10–15 seconds or warm the whole pie in the oven at 300°F for about 15 minutes.
- Food Safety: Don’t leave your pumpkin pie out at room temperature for more than 2 hours. Since it contains eggs and dairy, it’s best to follow FDA guidelines to keep it safe. Foods like this can quickly enter the "danger zone" (between 40°F and 140°F), where bacteria can grow. If you’re serving the pie later, refrigerate it until just before serving and return any leftovers to the fridge promptly.
Bonus: Troubleshooting Tips
- If you’ve followed the recipe but still face issues, don’t worry—I’ve got you covered. Check out the troubleshooting section below for solutions to common problems and extra tips to perfect your pumpkin pie!
Nutrition Info
Disclaimer
We're not nutrition experts, and the nutritional information provided is an estimate. Please use it as a guide. For precise details, it's best to consult a professional. To learn more, please view our Detailed Disclaimers.
Pumpkin Pie Troubleshooting
Even with all the tips shared here, unexpected results can happen. Don’t worry—I’ve outlined some common issues and troubleshooting tips below to help you out. I hope they’re helpful!
Why Does Pumpkin Pie Filling Crack?
Cracks in the filling are often caused by overbaking or baking at too high a temperature. The filling continues to cook from residual heat even after you remove the pie from the oven. That’s why it’s important to take it out when the center is still slightly jiggly.
Another common cause is cooling the pie too quickly, like placing it in the fridge immediately after baking. Sudden temperature changes can lead to cracks. To avoid this, bake the pie at a steady temperature and let it cool gradually at room temperature before refrigerating.
Why Does the Pie Crust Turn Soggy?
A soggy crust happens when the filling’s moisture seeps into the crust during baking. That’s why parbaking the crust before adding the filling is so important—it creates a barrier to prevent this.
Another common reason is underbaking the pie, so make sure to bake it until the filling is fully set and the crust is golden brown. Using a pie dish with good heat conductivity can also help the crust bake evenly and stay crisp.
Why Does the Pie Filling Turn Bumpy?
Bumpy filling can occur if the pie is overbaked or baked at too high a temperature. This causes the filling to puff unevenly and settle with bumps as it cools. Vigorous mixing can also introduce air bubbles that show up as bumps after baking. To prevent this, gently mix the filling until just combined and bake the pie at a steady, moderate temperature.
Why Does Water Form on the Filling After Storing?
Water pooling on the filling, known as weeping, can happen for a few reasons. Overbaking can cause the filling to release moisture as it cools. Storing the pie before it’s fully cooled may also create condensation from trapped heat. A humid environment or improper storage can make the problem worse. To prevent this, bake the pie until the filling is just set, let it cool completely at room temperature, and store it covered in the fridge.
Quick Fix for Water-Pooled Pie
If your pumpkin pie has water pooling on the surface, gently blot the moisture with a piece of paper towel. Be careful not to press too hard, as you don’t want to disturb the filling. After blotting, place the pie back in the fridge to chill. This helps the filling set and allows the moisture to redistribute more evenly.
Serving Suggestions
Pumpkin pie makes a perfect dessert for fall and holiday gatherings like Thanksgiving or Christmas. Here are some of my favorite pairings to serve with it—I hope you’ll enjoy them too:
- Whipped Cream: A dollop of freshly whipped cream adds a light, creamy touch that complements the pie’s rich, spiced flavors.
- Caramel Drizzle: For extra sweetness, drizzle warm caramel sauce over the pie. Add some toasted pecans on top if you like a bit of crunch.
- Cranberry Sauce: A dollop of tangy cranberry sauce on the side can add a refreshing and festive twist to the dessert.
- Fresh Fruit: Add a refreshing touch by serving the pie with sliced apples, pears, or a side of fresh berries for a balance of flavors.
- Warm Drinks: Pair the pie with spiced chai, black coffee, or a pumpkin spice latte to enhance its cozy flavors.
- Apple Cider or Hot Chocolate: For a festive touch, serve the pie with a warm cup of apple cider, hot chocolate, or cocoa.
Storage Suggestions
Homemade pumpkin pie tastes even better as the flavors come together, making it a great dessert to prepare in advance. Whether you’re planning ahead or saving leftovers, here are my go-to tips for keeping it fresh:
- Make It Ahead: Bake your pumpkin pie 1 to 2 days in advance and store it in the refrigerator. Let the pie cool completely to room temperature after baking. Once cooled, wrap it tightly in plastic wrap or place it in an airtight container to protect the crust edges. Store it in the fridge until you’re ready to serve.
- Leftovers in the Fridge: If you have leftovers, make sure the pie has cooled to room temperature first. Cover it loosely with plastic wrap or foil, or place it in an airtight container. You can keep it in the fridge for up to 3–4 days.
- In the Freezer: Freezing is a great option if you’re not planning to finish the pie soon. Wrap it tightly in plastic wrap and then in foil to prevent freezer burn. It can be frozen for 1–2 months. When you’re ready to serve, thaw it overnight in the fridge or let it sit at room temperature for a few hours before enjoying it.
Leave a Review