
Here’s how you can perfect making sunny-side-up eggs, a classic dish beloved for its tender whites and lush, runny yolks. All you need are a few simple ingredients: eggs, some oil or butter, and a pinch of seasoning. This comforting dish is versatile, ideal not just for breakfast but also as a delightful addition to lunch or dinner.
What You’ll Find On This Page
Sunny-side-up eggs aren’t just a breakfast staple; they bring comfort to any meal with their delicate texture and rich flavor. Mastering the art of cooking them involves careful attention to the heat, timing, and the choice of pan, turning it into a valuable kitchen skill.
Explore More Egg Recipes:
Ingredients and Substitutions Overview
The ingredients for making sunny-side-up eggs are simple and you probably already have them in your kitchen. Let's take a look at what you'll need below.
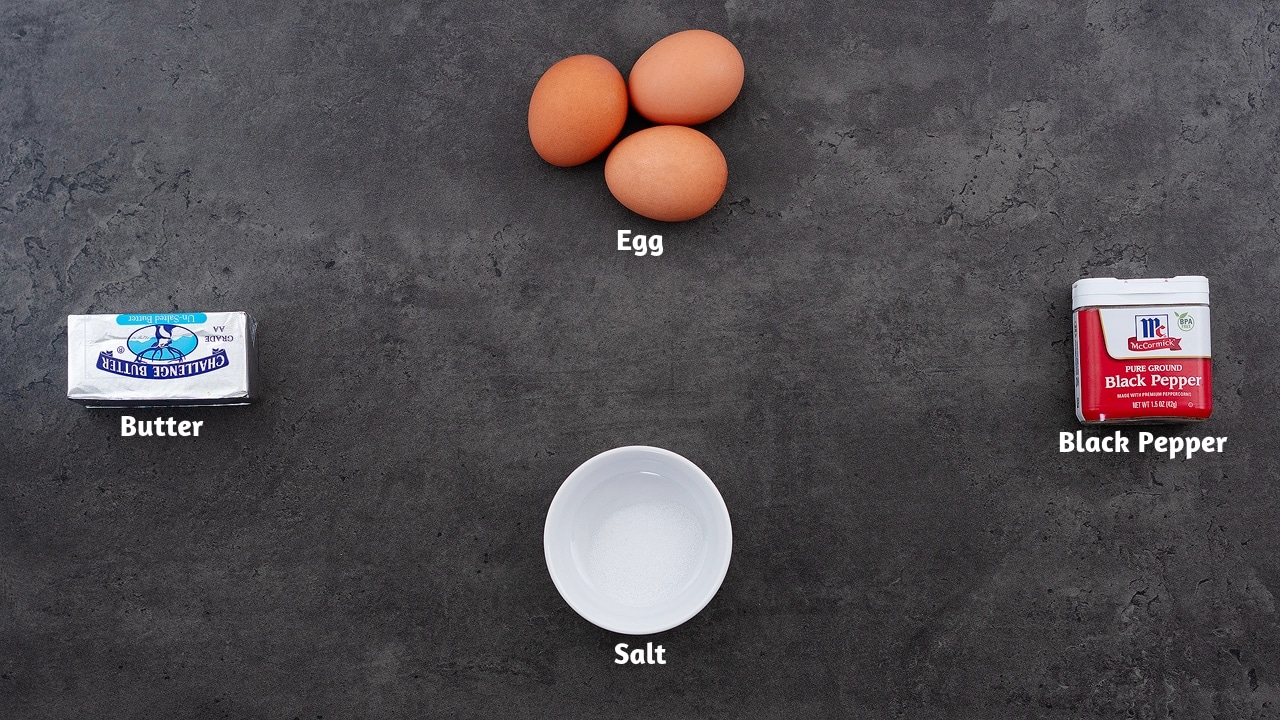
- Fresh Eggs: The main ingredient. Choose the freshest eggs available for firmer whites and creamier yolks.
- Oil or Butter: Use a little fat to cook the eggs. This helps prevent sticking and adds flavor. You can choose either oil or butter based on your preference.
- Seasonings: A pinch of salt and a sprinkle of black pepper powder are all you need to bring out the delicious natural flavors of your eggs.
How to Make Sunny-Side-Up Eggs at Home?
While making sunny-side-up eggs is straightforward, the process requires a delicate touch. To help you along, I've shared step-by-step instructions, along with images and a video tutorial that will guide you to master the skill. Let's get started!
Explore the World of Omelette Recipes:

Sunny Side Up Eggs
Ingredients
- 1 Egg
- 1 tsp Butter, unsalted
- Salt, to taste
- Black Pepper Powder, to taste
Instructions
Preparing Sunny-Side-Up Egg
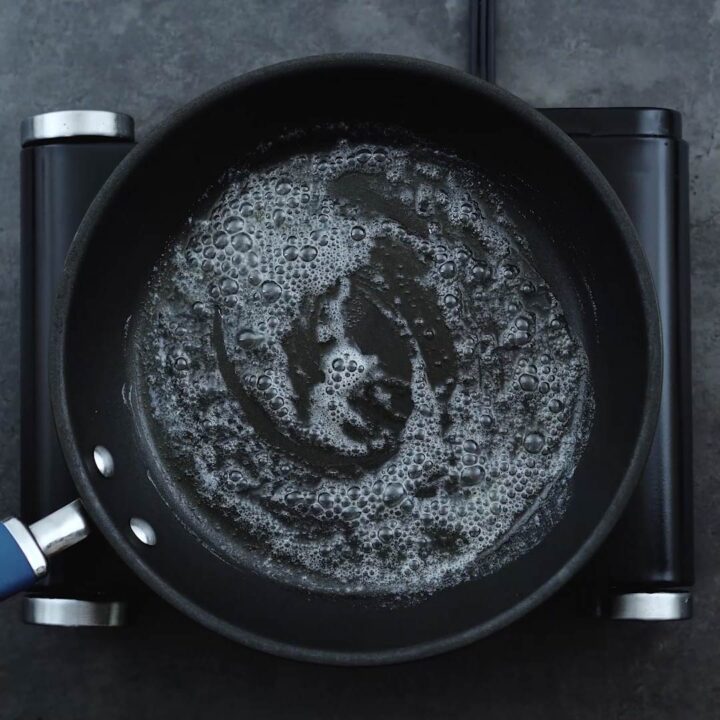
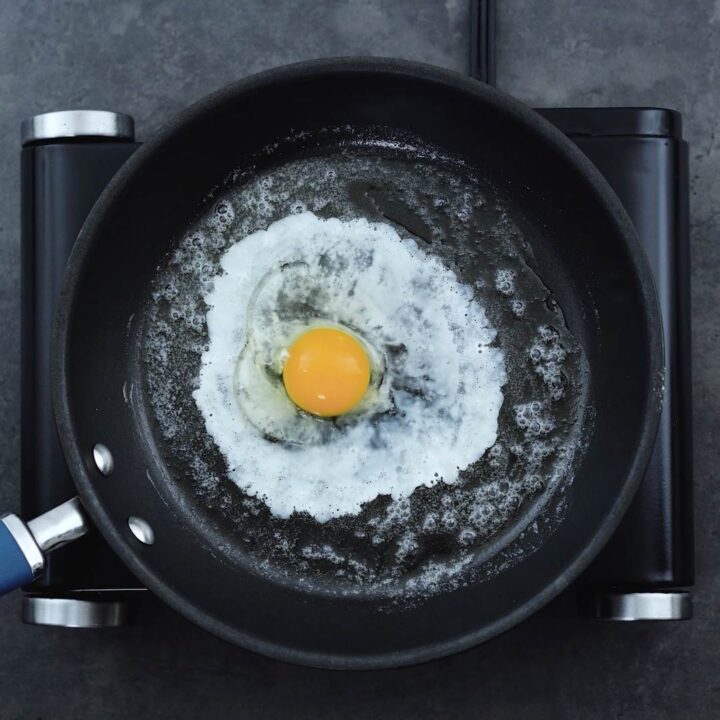
- Heat a non-stick skillet over medium-low heat and add a teaspoon of butter or oil. Make sure it's spread evenly to coat the surface.

- Carefully crack an egg into the pan, aiming to keep the yolk intact. Allow the egg white to settle slightly.
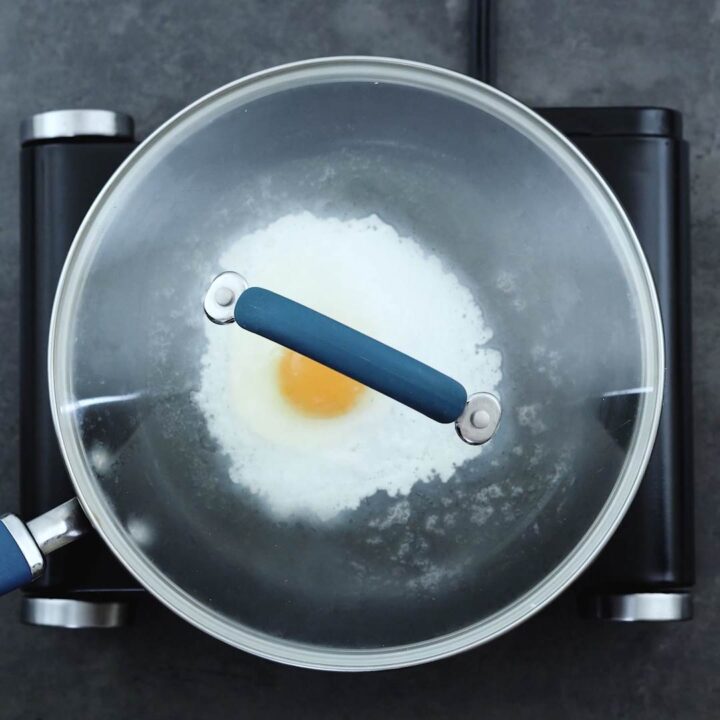
- Place a lid on the pan to trap the heat and cook for 2 to 2½ minutes, until the egg white solidifies but the yolk remains deliciously runny.
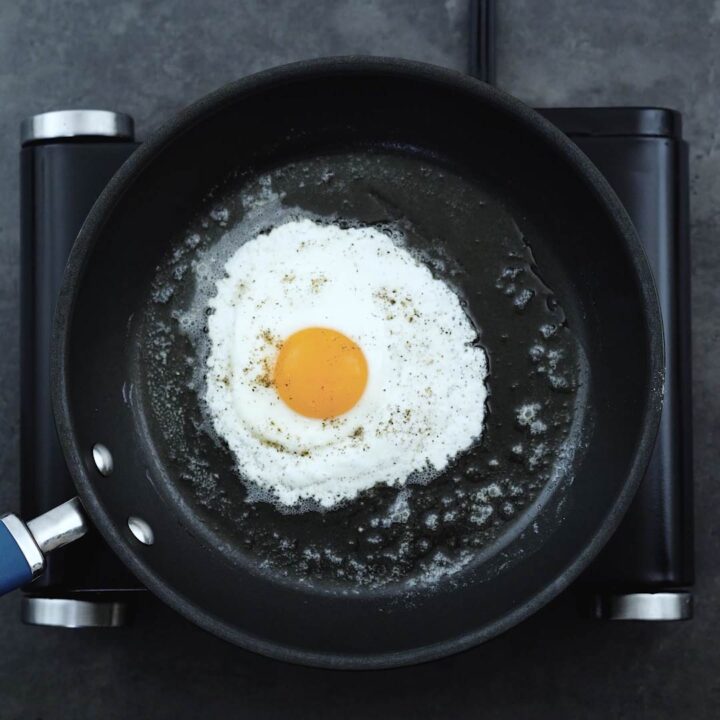
- Season the egg with a pinch of salt and pepper to taste.
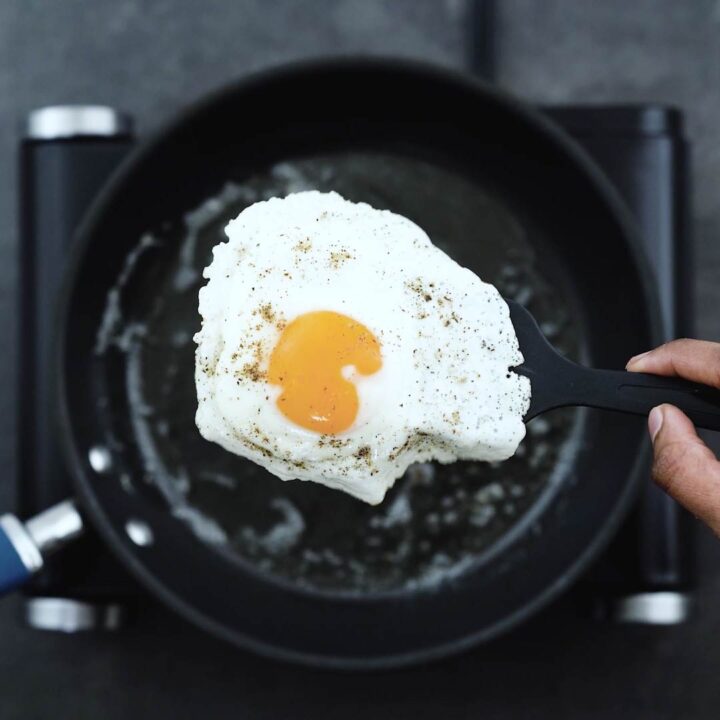
- Use a spatula to gently lift the egg from the pan and transfer it to your plate. Enjoy your perfectly cooked sunny-side-up egg right away for the best experience.
Serving
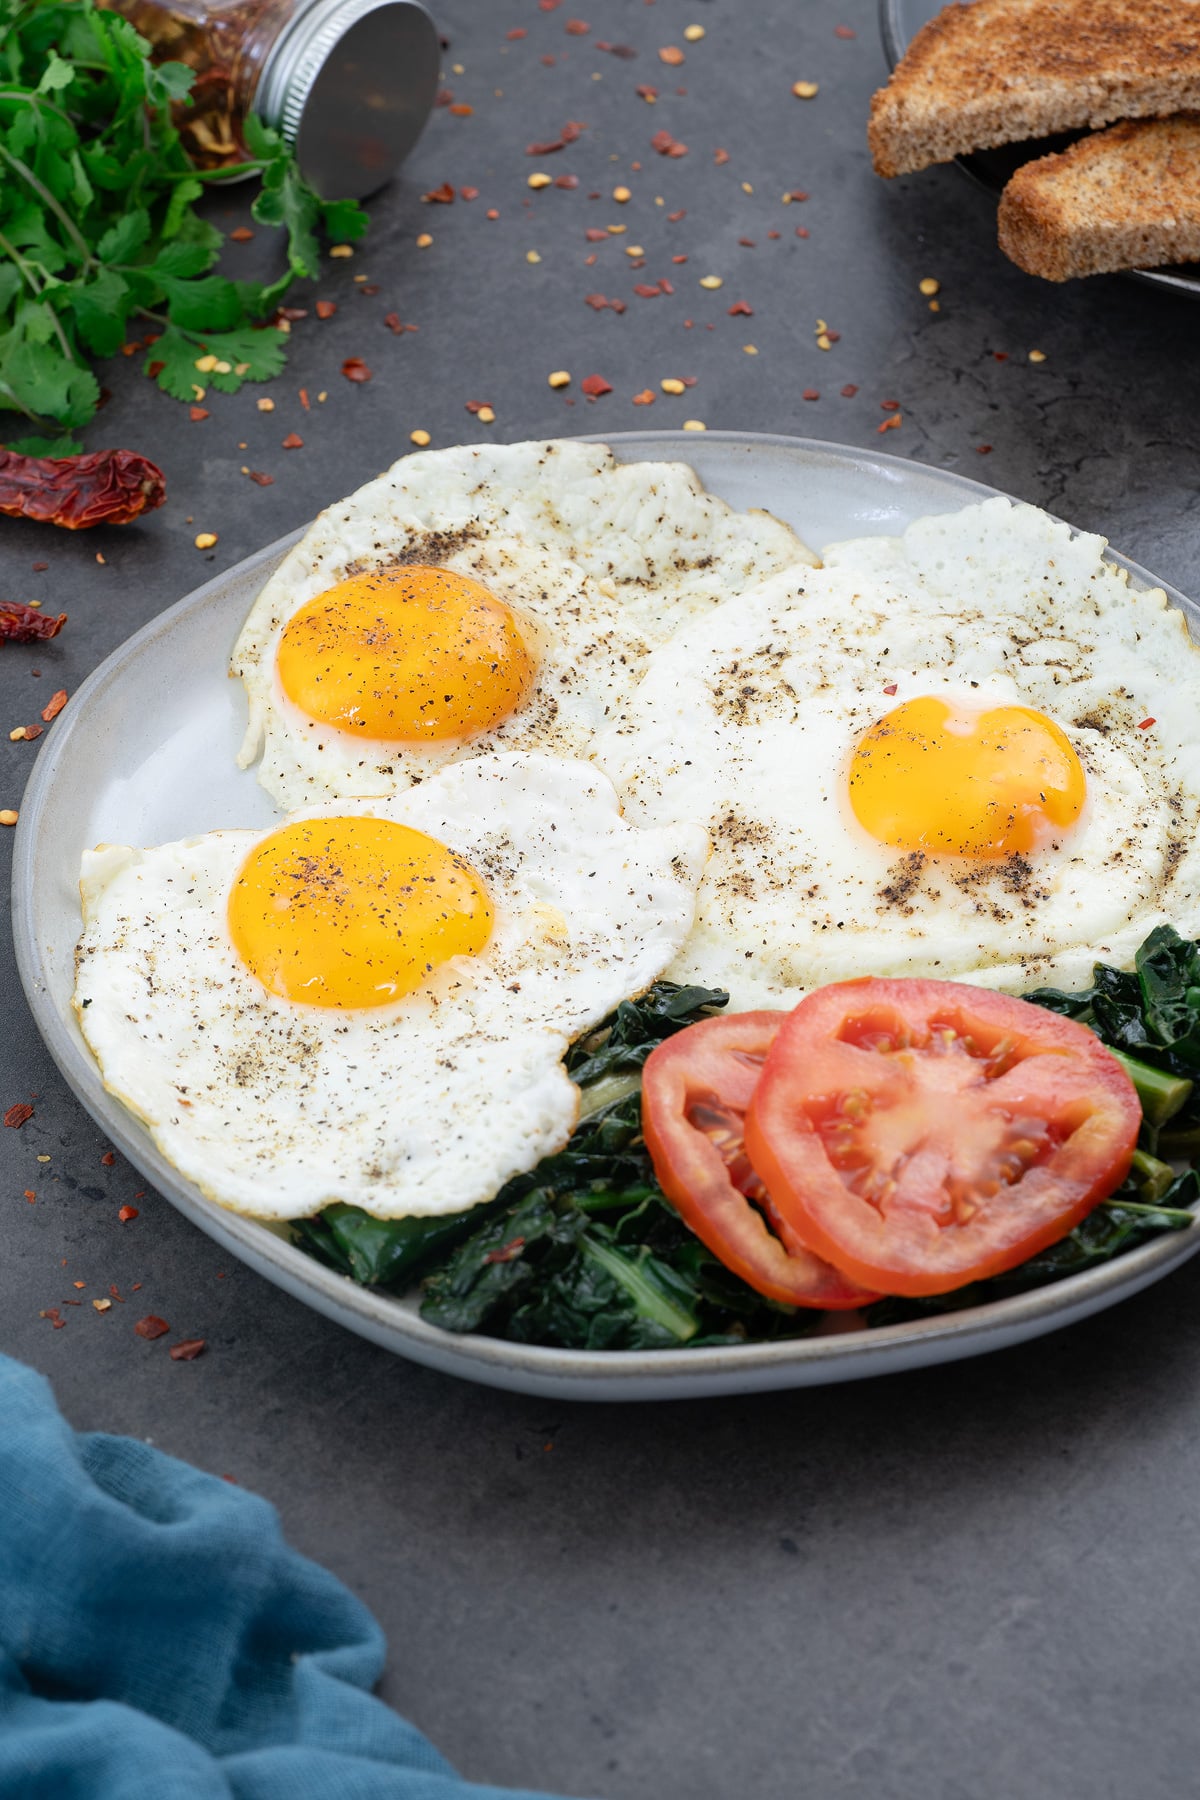
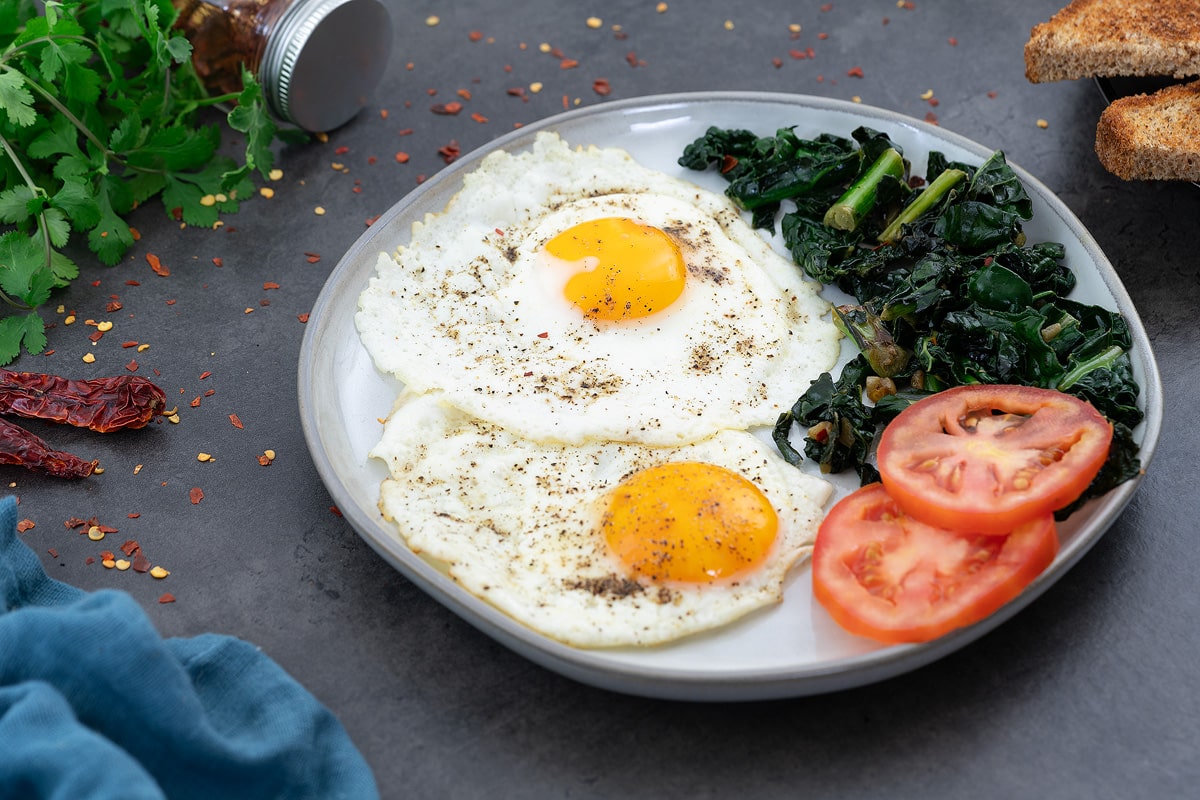
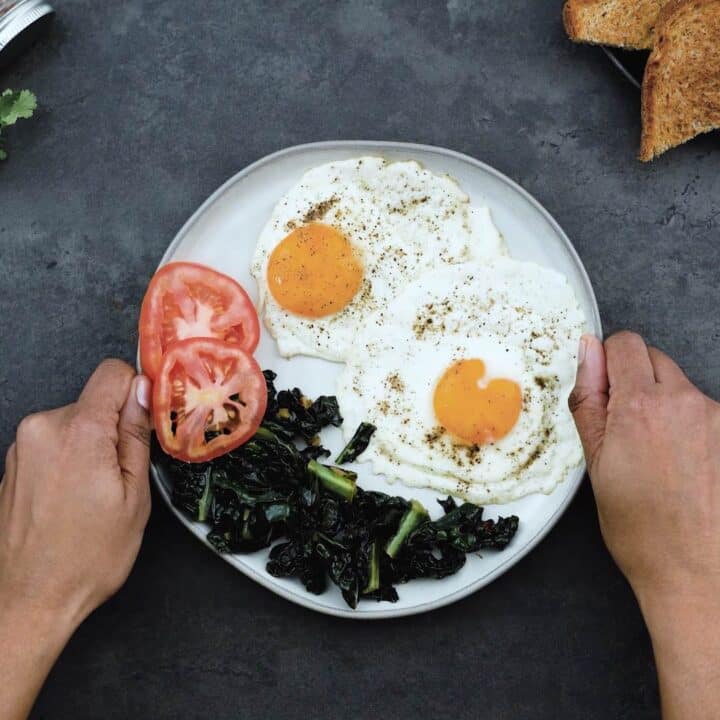
- Pair your sunny-side-up egg with crispy toast, nestle it in a breakfast sandwich, or serve it alongside sautéed greens for a hearty morning meal. For lunch or dinner, it's a perfect topping for Asian dishes like Thai basil chicken, nasi goreng, or various rice bowls. For more pairing ideas, check out the Serving Suggestions section below.
Recipe Video
Chef's Notes and Tips
- Choose Fresh Eggs: Using fresh eggs is key because they hold their shape better in the pan, which makes your eggs look nicer.
- Pick the Right Pan: Non-stick pans are great for beginners, but seasoned cast iron or ceramic pans also work well if you use enough oil or butter to prevent sticking.
- Crack Eggs Carefully: To keep the yolks intact, gently crack the eggs close to the surface of the pan. This approach helps ensure that the yolks remain whole, giving you a beautifully cooked sunny-side-up egg.
- Keep the Heat Moderate: Start with your pan on low to medium heat. Cooking eggs on high heat can cause the whites to cook too quickly, which might lead to burnt edges.
- Add Fat for Flavor and Non-stickiness: A bit of oil or butter not only prevents the egg from sticking but also adds a nice flavor to them.
- Don’t Overcrowd: Make sure to leave enough space between each egg in the pan. This allows them to cook evenly and spread out without merging into each other.
- Season After Cooking: Sprinkle salt and pepper on your eggs after they're in the pan. Adding salt too early can draw moisture out of the whites, making them watery. Seasoning later helps maintain the perfect texture of your sunny-side-up eggs.
- Adjust Cooking Time for Perfect Yolks: Depending on whether you like your yolks runny or firm, adjust your cooking time accordingly. Less time for runny yolks, more for firmer ones.
Nutrition Info
Disclaimer
We're not nutrition experts, and the nutritional information provided is an estimate. Please use it as a guide. For precise details, it's best to consult a professional. To learn more, please view our Detailed Disclaimers.
Serving Suggestions
I love serving sunny-side-up eggs right from the skillet. They're a delightful treat that pairs well with a variety of sides to round out your meal. Here are some of my favorite combinations to share with you:
- Toast: Classic and versatile, toasted bread pairs wonderfully with eggs. Try it with sourdough, whole wheat, or a crisp baguette.
- Breakfast Potatoes: Crispy and seasoned with herbs, breakfast potatoes make a flavorful side. Choose from options like hash browns, homemade French fries, or roasted potatoes.
- Bacon or Sausage: Add a savory note with crispy bacon or your favorite breakfast sausage.
- Avocado: A slice or mash of avocado seasoned with salt and pepper adds a creamy, nutritious touch.
- Sautéed Vegetables: Incorporate color and nutrients with sautéed veggies such as spinach, kale, mushrooms, bell peppers, or tomatoes.
- Greens: A light salad with fresh greens, a simple vinaigrette, and perhaps some cherry tomatoes or cucumber slices can offer a refreshing contrast.
- Fruit: A small serving of fresh fruit like sliced oranges, berries, or a fruit salad can add a sweet and refreshing element.
- Nasi Goreng: A sunny-side-up egg is the perfect topping for Indonesian Fried Rice, adding a deliciously creamy texture when mixed in.
- Thai Basil Chicken (Pad Krapow Gai): Like Nasi Goreng, a fried egg on top of Thai Basil Chicken enriches every bite with its creamy yolk.
Sunny Side Up vs. Fried Eggs
Sunny-side-up eggs are gently cooked on one side with a lid on top, leaving the yolks soft and runny, much like the morning sun. Fried eggs, on the other hand, are flipped during cooking. This technique lets you choose how runny you want the yolks, from slightly soft (over-easy) to completely firm (over-hard). The key difference between these two styles is how they're cooked and how the yolks turn out.
Leave a Review