
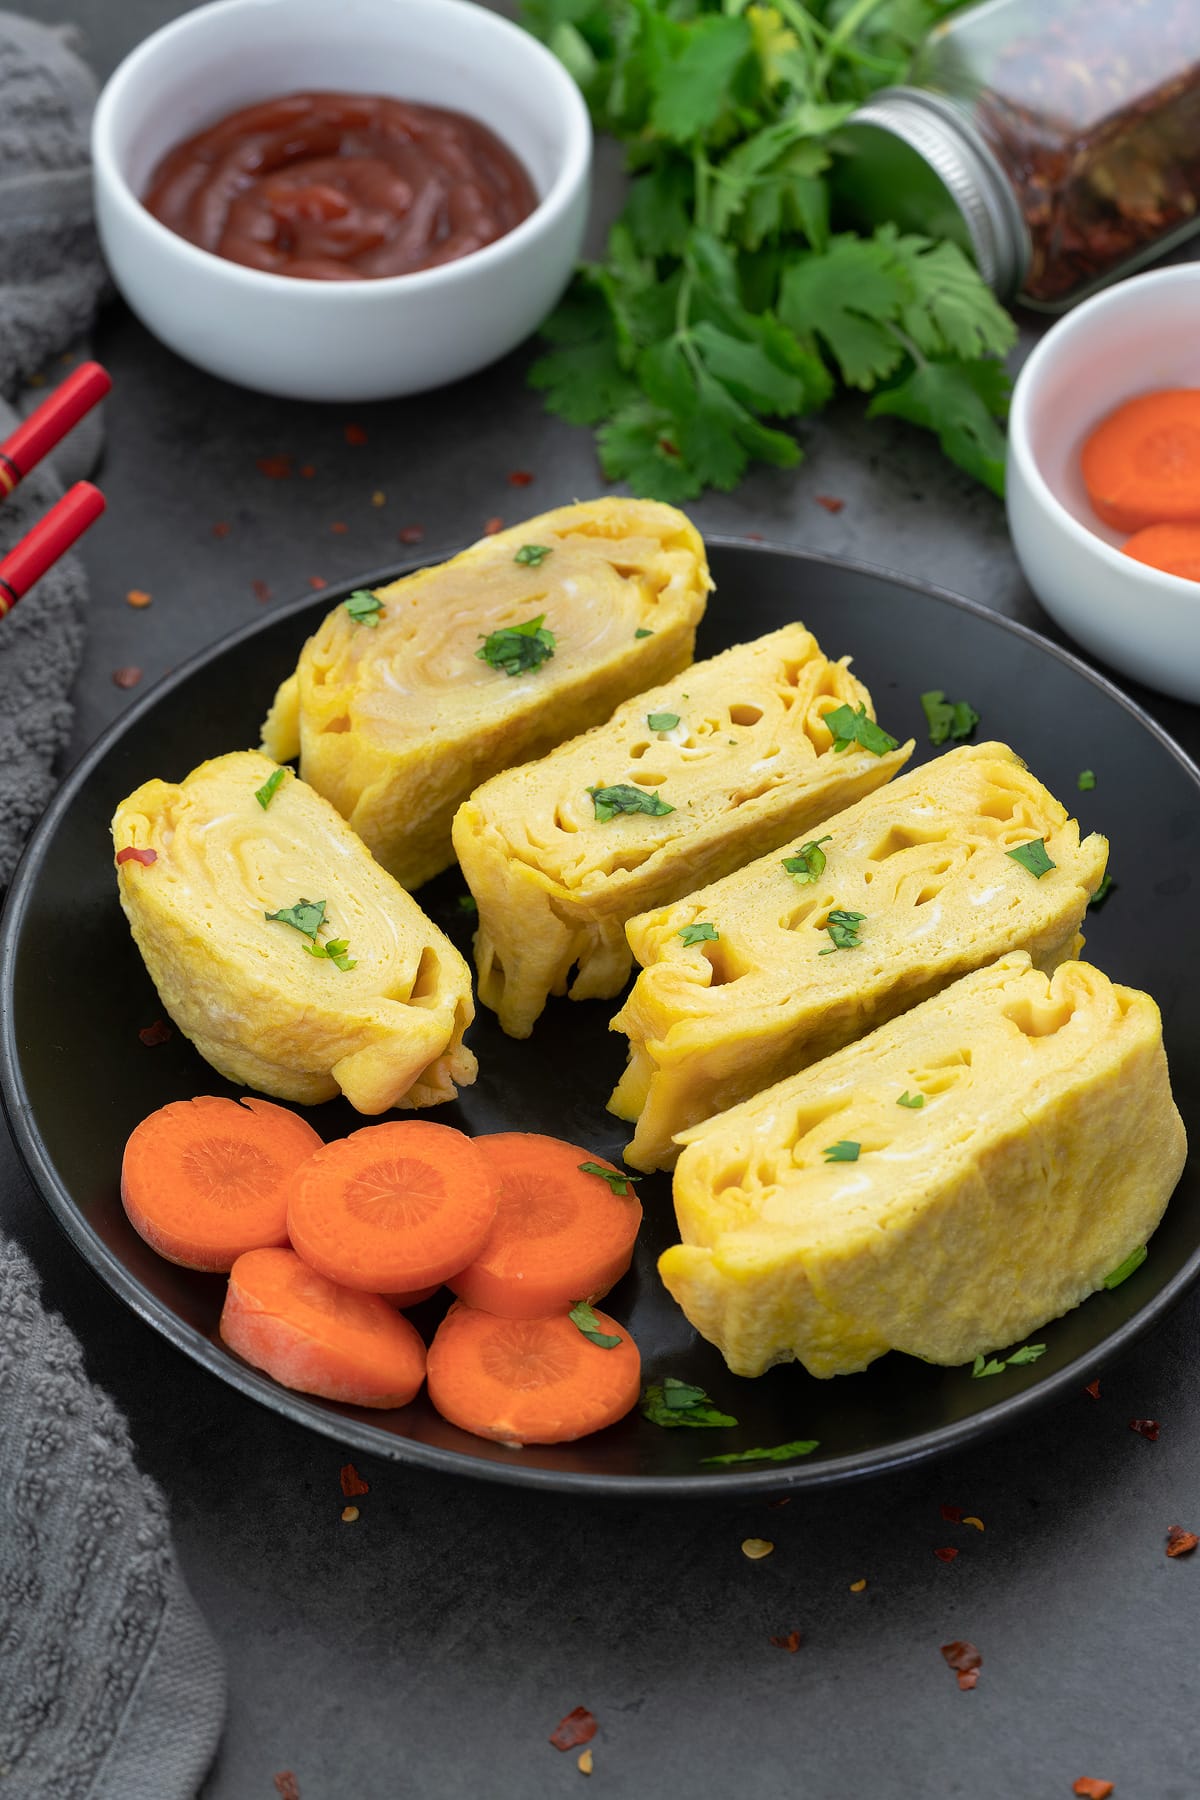
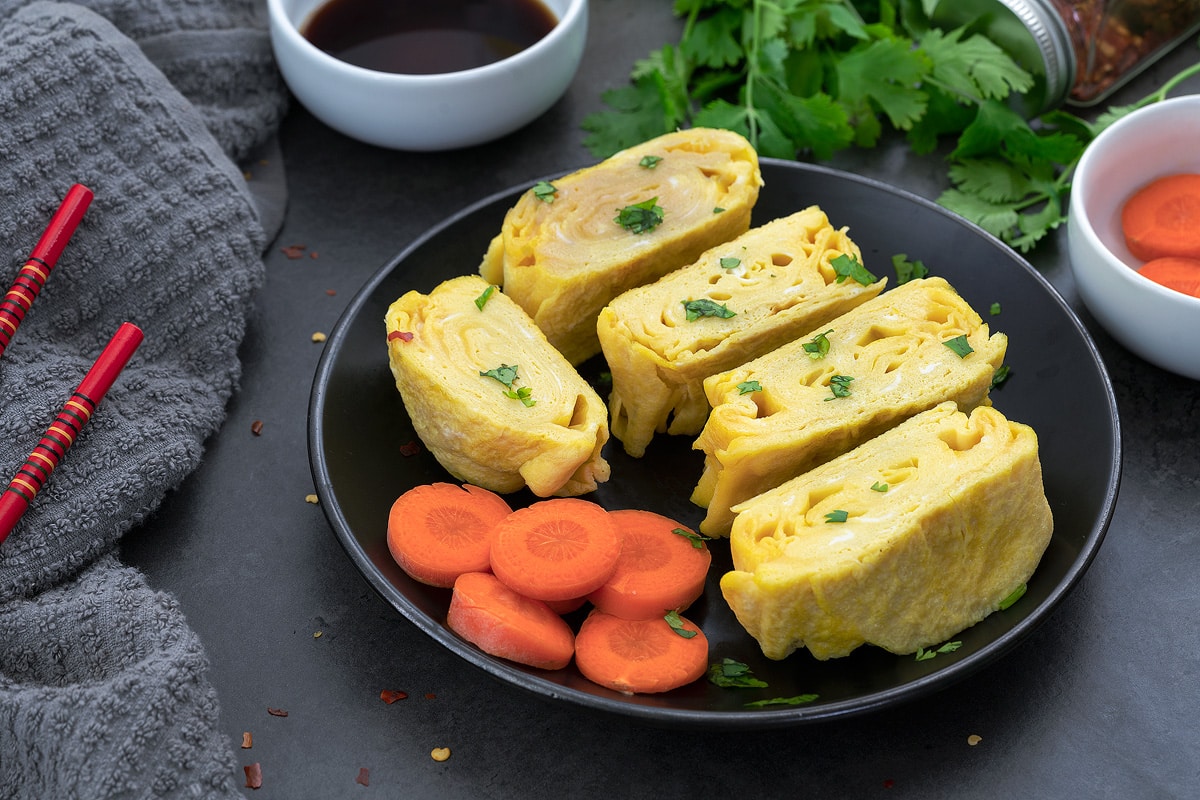
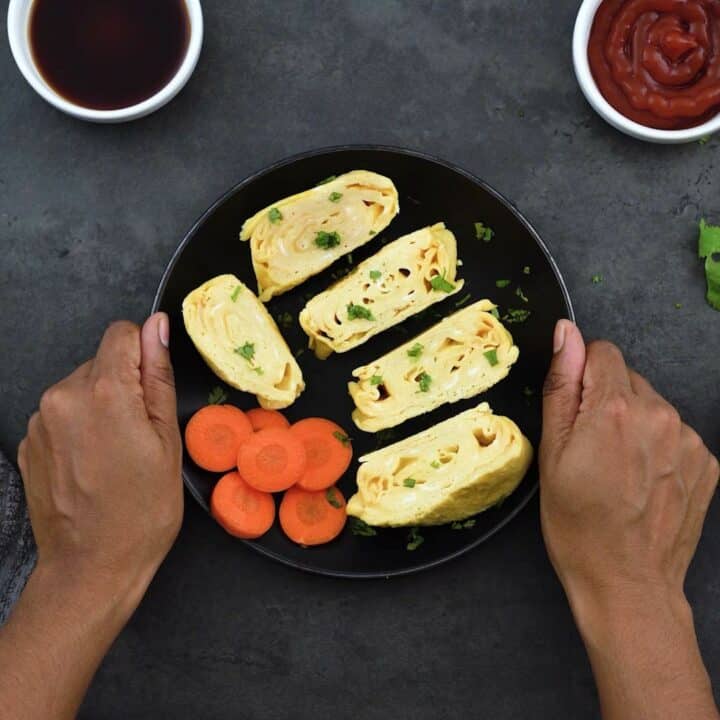
Tamagoyaki, a delicious Japanese omelette that's a mix of sweet and savory. This light, fluffy rolled egg is seasoned with just soy sauce and sugar. You can add your own twist with fillings like veggies, meat, or seafood.
What You’ll Find On This Page
Tamagoyaki, or "grilled egg," is super versatile. It's great for breakfast, as a sushi topping, or in your bento lunch box. You make it by rolling cooked egg layers into a log and slicing it to show off the beautiful layers. Kids and adults love its yummy taste. You'll usually need a rectangular pan for that traditional look, but a regular frying pan does the trick too.
Ready to try making Tamagoyaki at home? It's perfect with rice and your favorite Teriyaki Chicken or Salmon for a complete, homemade bento-style meal. Let’s get started!
Explore More Egg Recipes:
Ingredients and Substitutions Overview
For your Tamagoyaki, you'll need just a few simple ingredients, all of which are easily found at your local grocery store. Here's what you'll need:
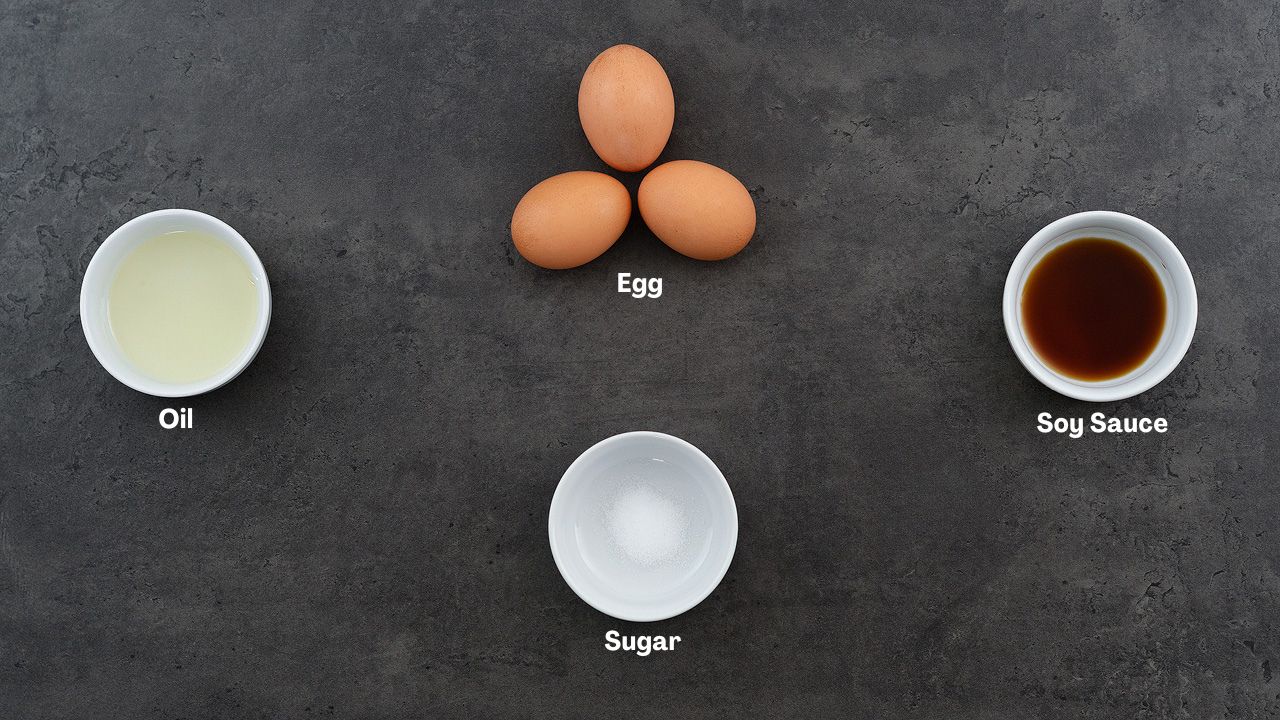
- Eggs: Pick any type you prefer—organic, brown, or white. You'll need six eggs for about 2 servings, but you can adjust the quantity based on how many you're serving.
- Soy Sauce: A teaspoon is enough to give that deep umami taste.
- Sugar: A bit of sugar will lightly sweeten the omelette. If you like, you can substitute with mirin for a richer flavor.
- Oil: Just enough to lightly grease the pan before cooking.
Enjoy More Japanese Dishes:
How to Make Tamagoyaki at Home?
Although a special Tamago pan is traditionally used, you can also achieve beautifully layered and shaped Tamagoyaki with a regular nonstick frying pan. I've done it myself and the results are great! Check out the photos and video accompanying each step to see how you can easily recreate this classic dish at home. Now, let's roll into the recipe steps!
Explore a Variety of Omelet Recipes:

Tamagoyaki (Japanese Omelette)
Ingredients
- 6 Egg
- 1 tsp Soy Sauce
- ¼ tsp Sugar, or as needed
- 1 tsp Oil, for rubbing the pan
Instructions
Making Tamagoyaki
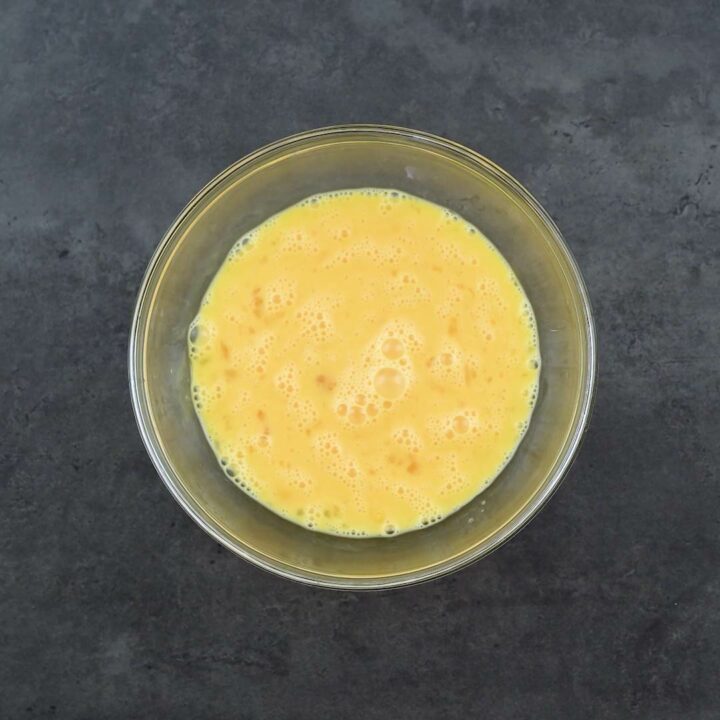
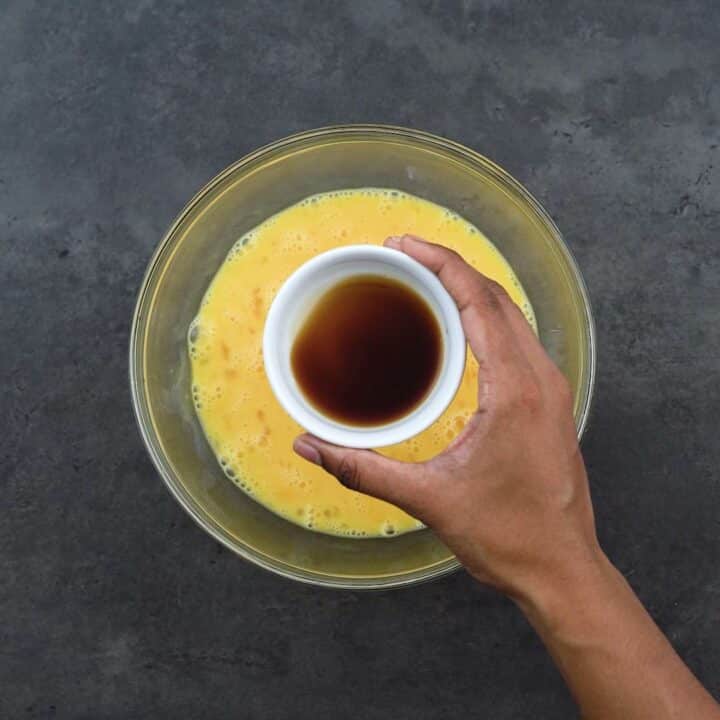
- Start by cracking the eggs into a mixing bowl and whisk vigorously until the mixture is frothy, which will help achieve a light and airy texture in your omelette.

- Add soy sauce and sugar to the whisked eggs and blend well. This combination ensures a perfect balance of umami and sweetness in the flavor of your Tamagoyaki.
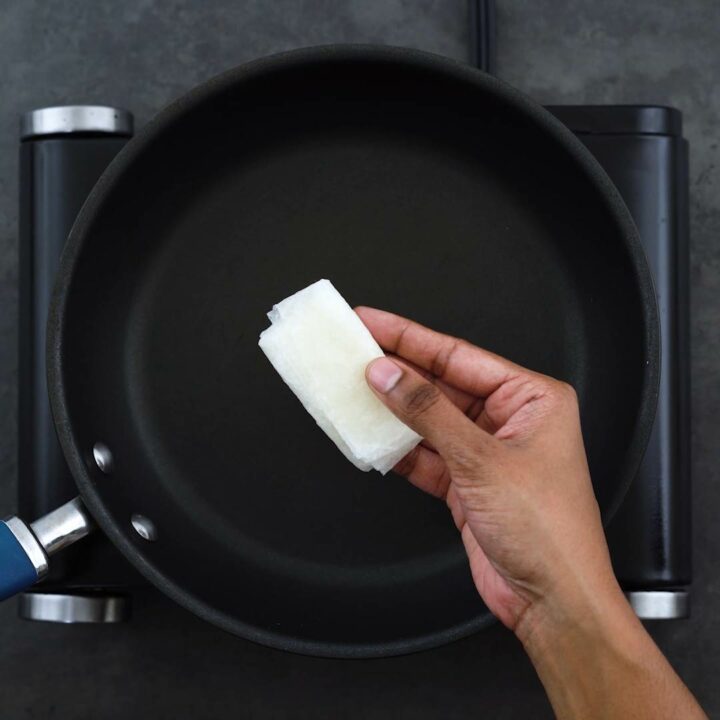
- Lightly oil a pan using a folded paper towel or cloth. Heat the pan over medium heat, setting the stage for even cooking.
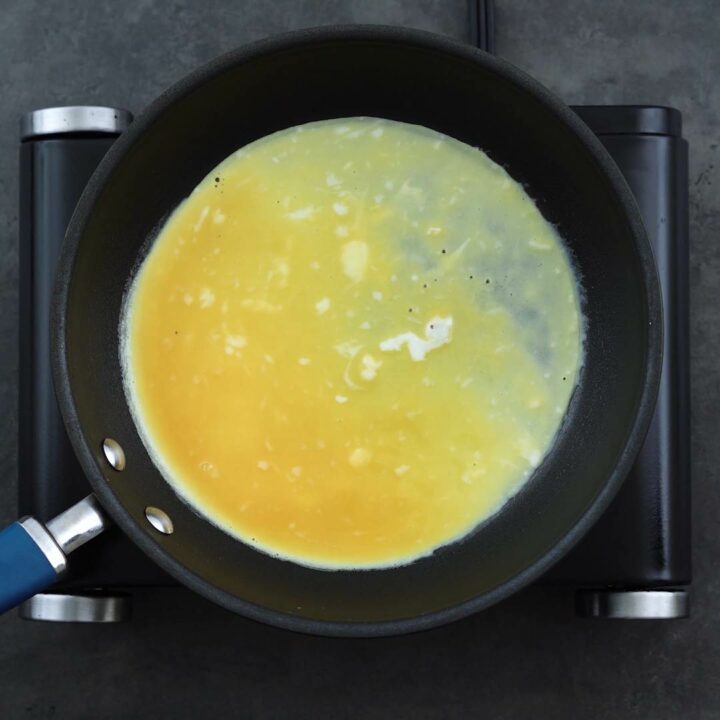
- Gently pour a thin layer of the egg mixture into the warm pan. Tilt the pan to evenly cover the bottom with the egg.
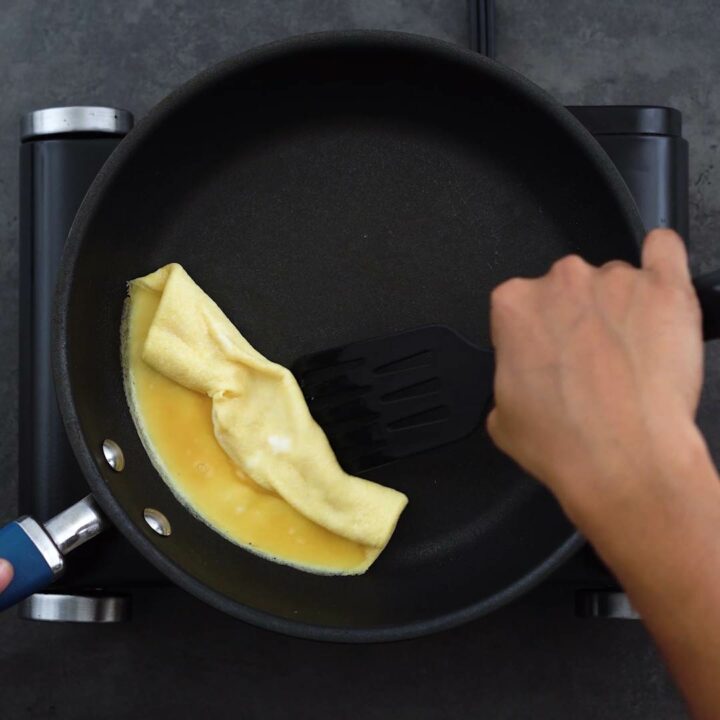
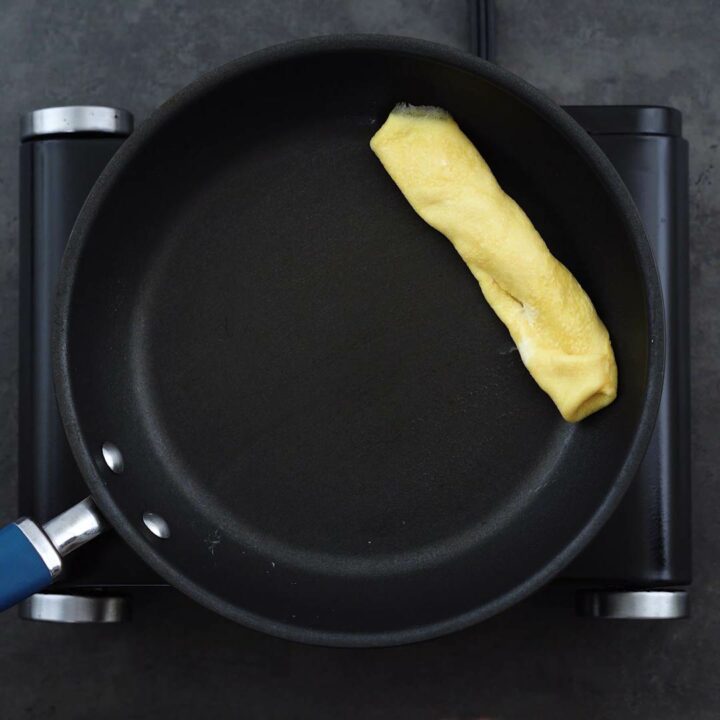
- Once the bottom of the egg starts to set but the top remains slightly moist, carefully roll the egg from one side of the pan to the other, forming a log shape.
- After the initial roll, brush a bit more oil onto the pan with a folded paper towel or cloth. This helps prevent sticking for the next layers.
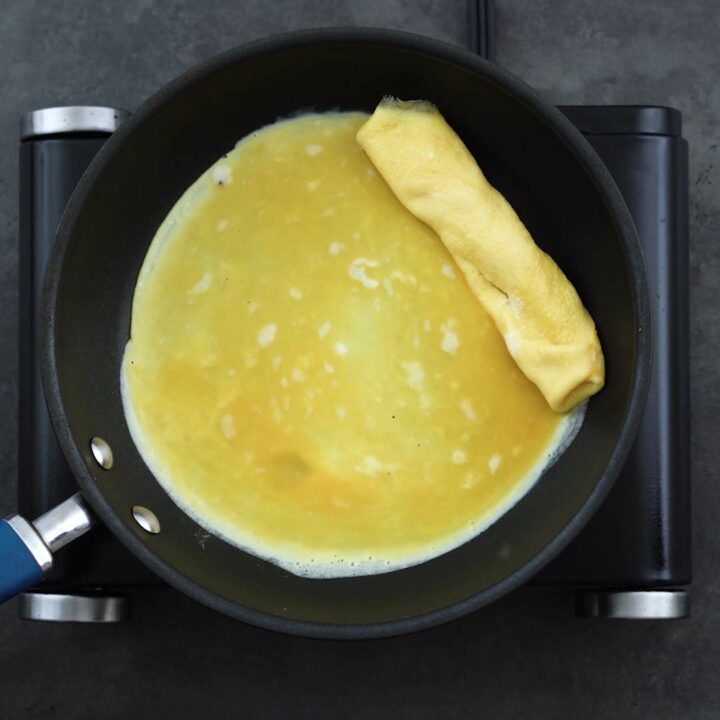
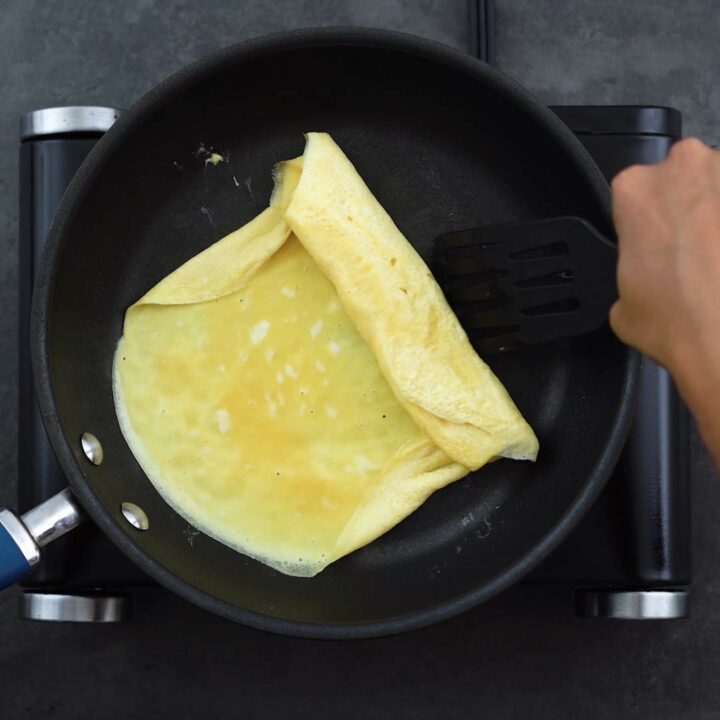
- Pour another thin layer of the egg mixture into the pan, allowing it to flow underneath the already rolled egg. This technique helps bond the layers together seamlessly.
- Wait for the new layer to firm up slightly, then continue the rolling process towards you. Repeat this step, adding and rolling, until all the egg mixture is used up.
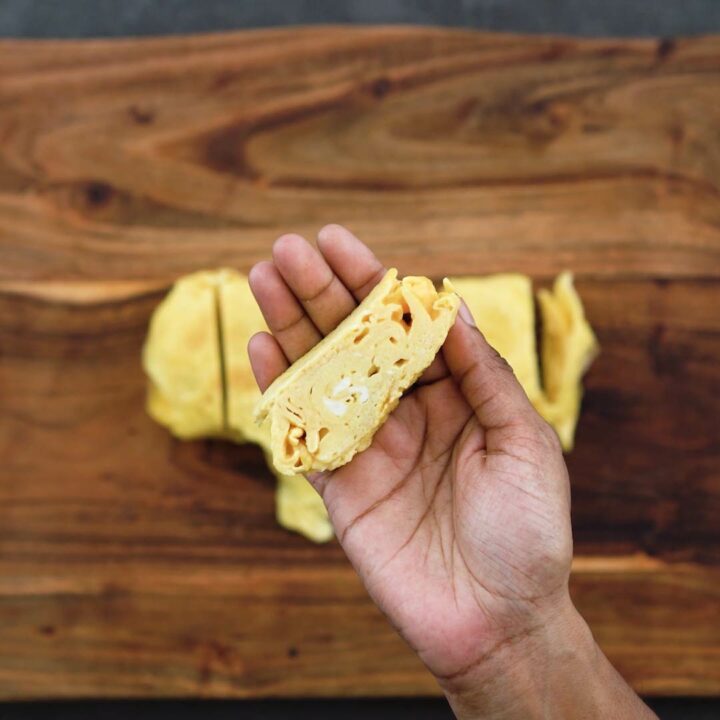
- Once your Tamagoyaki is fully rolled, remove it from the heat. Let it rest for a moment on a cutting board, making it easier to handle and slice.
- Cut the Tamagoyaki into neat, even rounds. Your beautifully layered Japanese omelette is now ready to be enjoyed, offering a delightful bite each time!

Serving
- Enjoy Tamagoyaki as a delightful breakfast treat or include it as a savory side in your bento box lunch. It's a versatile dish that's sure to brighten up your mealtime!
Recipe Video
Chef's Notes and Tips
- Oiling Technique: To control oil usage and maintain a healthier meal, lightly grease the pan with a folded paper towel or cloth dipped in oil before each new layer of egg. It's crucial to apply a thin layer of oil, even with a nonstick pan, to prevent the omelette from sticking and tearing as you add and roll each layer.
- Temperature Control: If the eggs are browning too quickly, lower the heat slightly. Slow cooking is essential for avoiding burns and achieving a nice, golden color.
- Flavor Adjustments: Tamagoyaki is traditionally flavored with soy sauce for umami and sugar for sweetness. Adjust these to taste, reducing or omitting sugar for a more savory version.
- Custom Fillings: Enhance your Tamagoyaki by adding fillings like chopped vegetables, seaweed strips, or seafood bits to personalize flavor and texture.
- Slicing Technique: Let the omelette cool for a few minutes before you start slicing. This brief resting period helps ensure you get clean, even slices without the omelette falling apart.
- Practice Makes Perfect: Don't be discouraged if your initial attempts aren't perfect. Making Tamagoyaki well requires practice, especially mastering the rolling technique.
- Pan Options: You don't need a traditional Tamagoyaki pan to make this omelette. Although a rectangular Tamagoyaki pan is ideal for creating a thick, log-shaped omelette, a regular nonstick round pan can also yield good results. Using a round pan might produce a flatter omelette, so if you aim for a more authentic rolled appearance, opt for a smaller round pan to better maintain the desired shape.
Nutrition Info
Disclaimer
We're not nutrition experts, and the nutritional information provided is an estimate. Please use it as a guide. For precise details, it's best to consult a professional. To learn more, please view our Detailed Disclaimers.
Storage Suggestions
I suggest enjoying Tamagoyaki fresh for the best taste. If you need to store it, it'll keep in the fridge for up to two days in an airtight container. You can also freeze it for about a month.
When you're ready to have it again, just thaw it in the fridge overnight or quickly warm it up in the microwave. This way, it stays delicious and ready to enjoy whenever you like!
Varieties of Tamagoyaki
Tamagoyaki can be made in several styles, each offering a unique taste and texture:
- Atsuyaki Tamago: This is a thicker, denser version, resembling a firm grilled egg. It's excellent for those who enjoy a more substantial bite.
- Dashimaki Tamago: This variant is softer and moister, enhanced with the flavors of dashi, a staple Japanese stock, giving it a distinctive savory taste.
Additionally, you can customize Tamagoyaki with various fillings such as seaweed, grated vegetables, seafood (like shrimp and salmon), or proteins like chicken, tofu, and minced meats. This adaptability makes Tamagoyaki a versatile choice for any meal, allowing you to tailor it to your taste preferences or dietary needs.
Leave a Review