
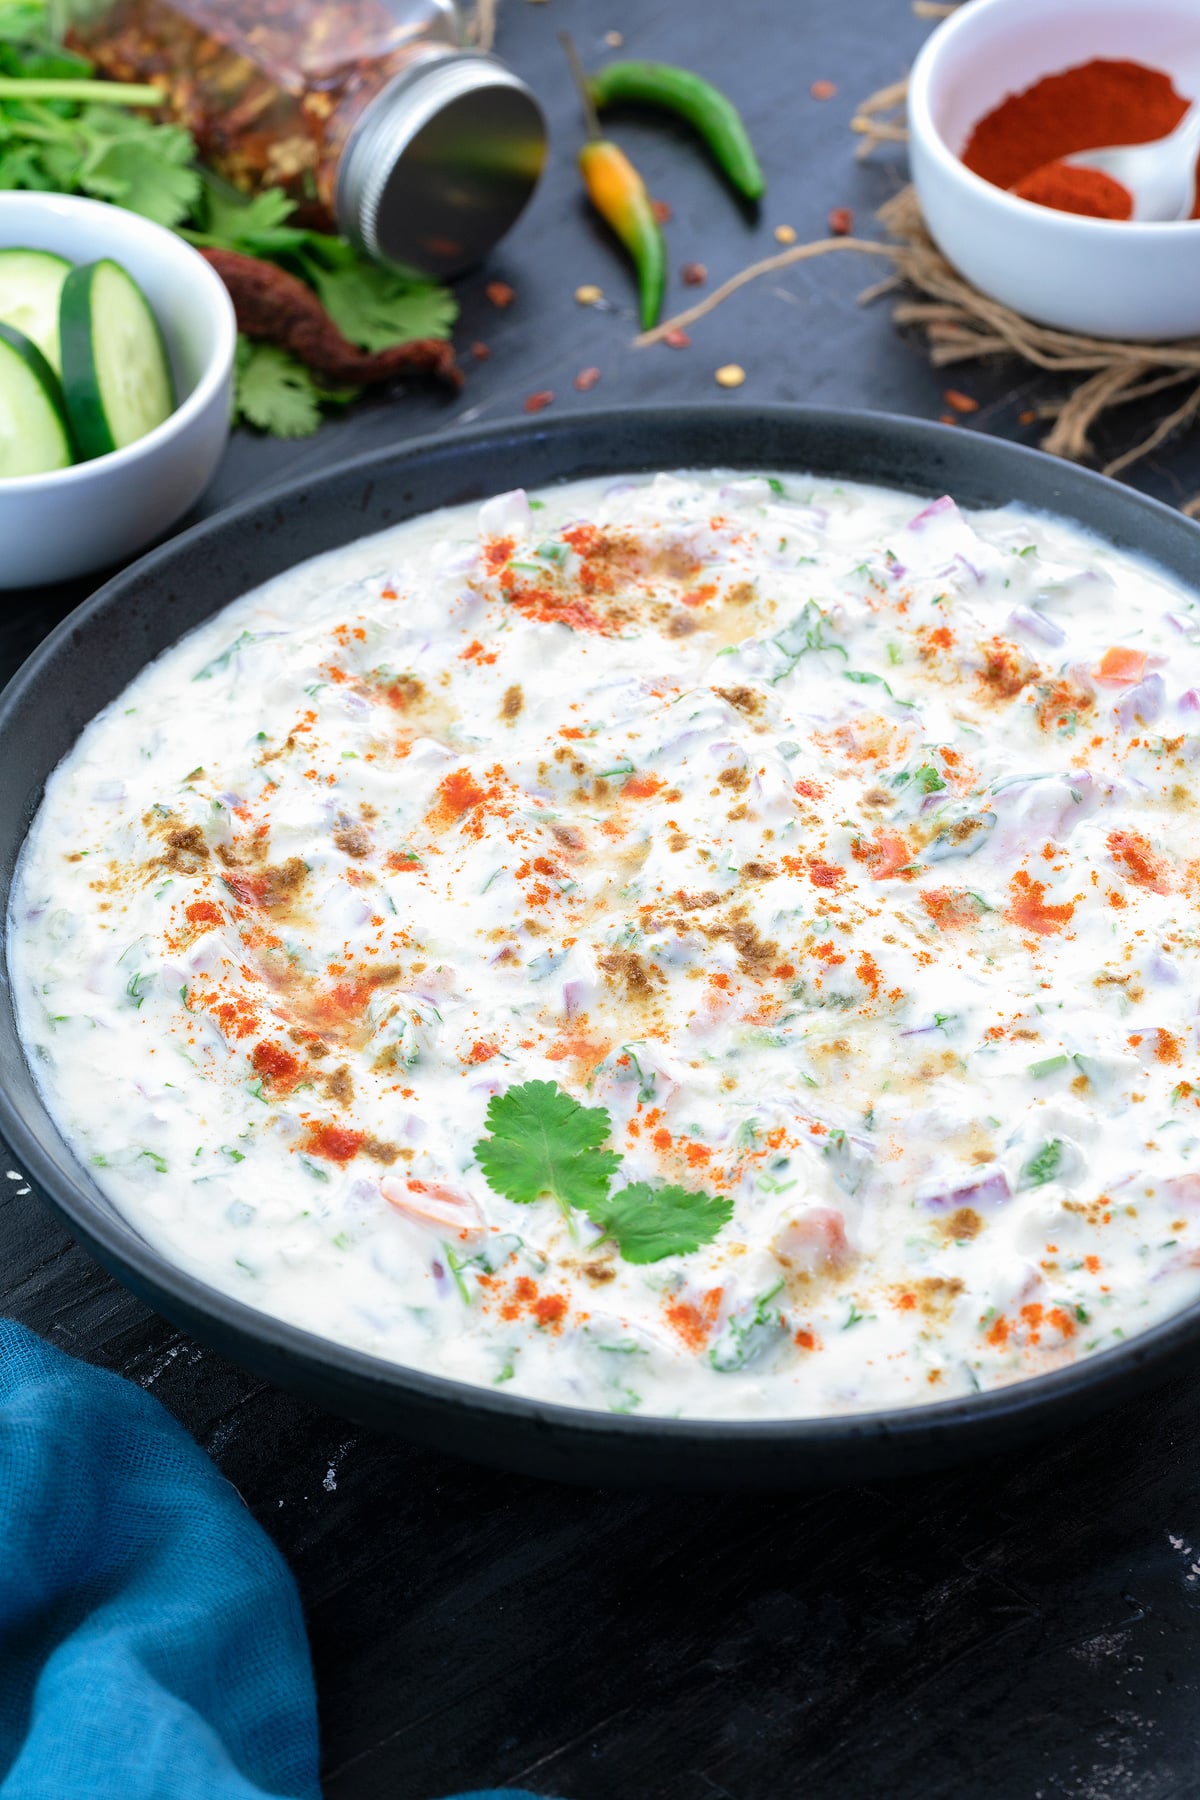
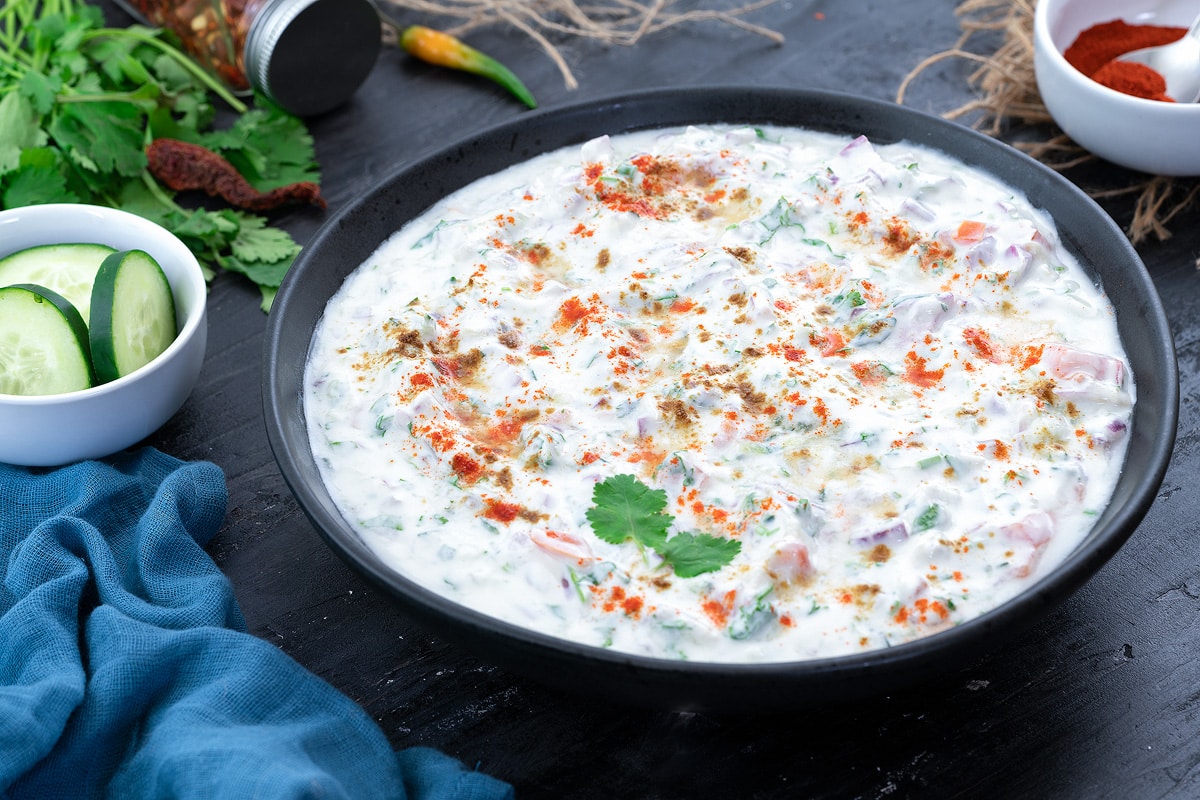
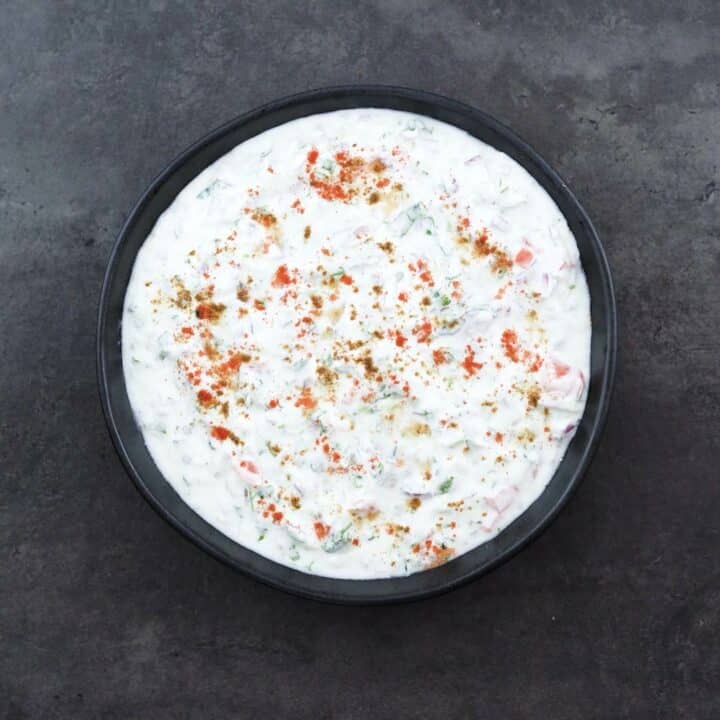
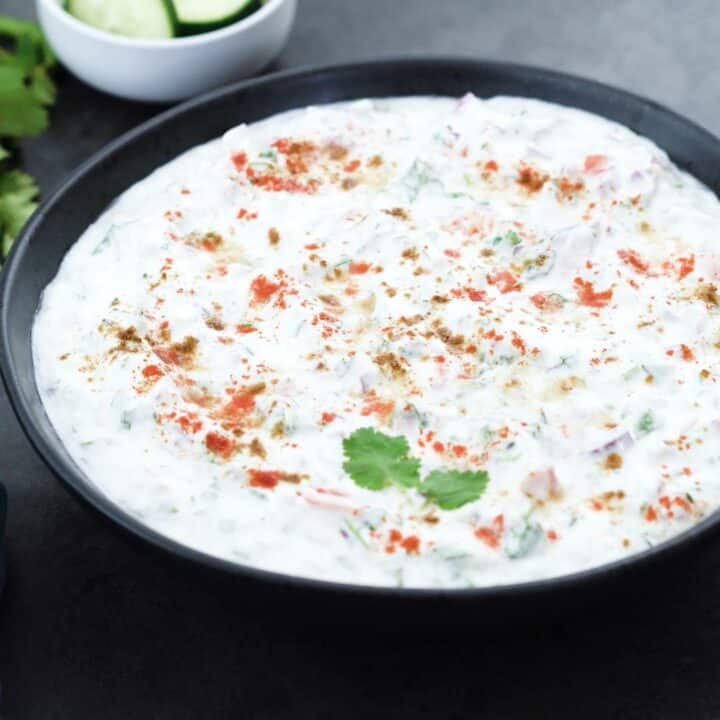
Raita, a creamy and tangy Indian yogurt dip, is a versatile accompaniment to various dishes. It's primarily made with yogurt and enhanced with fresh vegetables, herbs, fruits, and a few simple spices. It's not only quick to prepare, taking less than 10 minutes, but also adds a refreshing touch to any meal.
What You’ll Find On This Page
You can enjoy Raita alongside chicken kebabs, various biryanis like chicken and lamb, as well as pulaos, naan, roti, and spicy Indian curries.
Beyond just biryani and pulaos, Raita is incredibly versatile. Try it in sandwiches, as a dip for fried snacks, or with other dishes. Its yogurt base is rich in probiotics, which help with digestion and gut health. By adding fresh veggies, fruits, and herbs, you not only boost the flavor but also increase its health benefits.
Ingredients and Substitutions Overview
To make Raita, you'll need fresh produce and spices, all easily found at your local grocery store. Here's what you'll need:
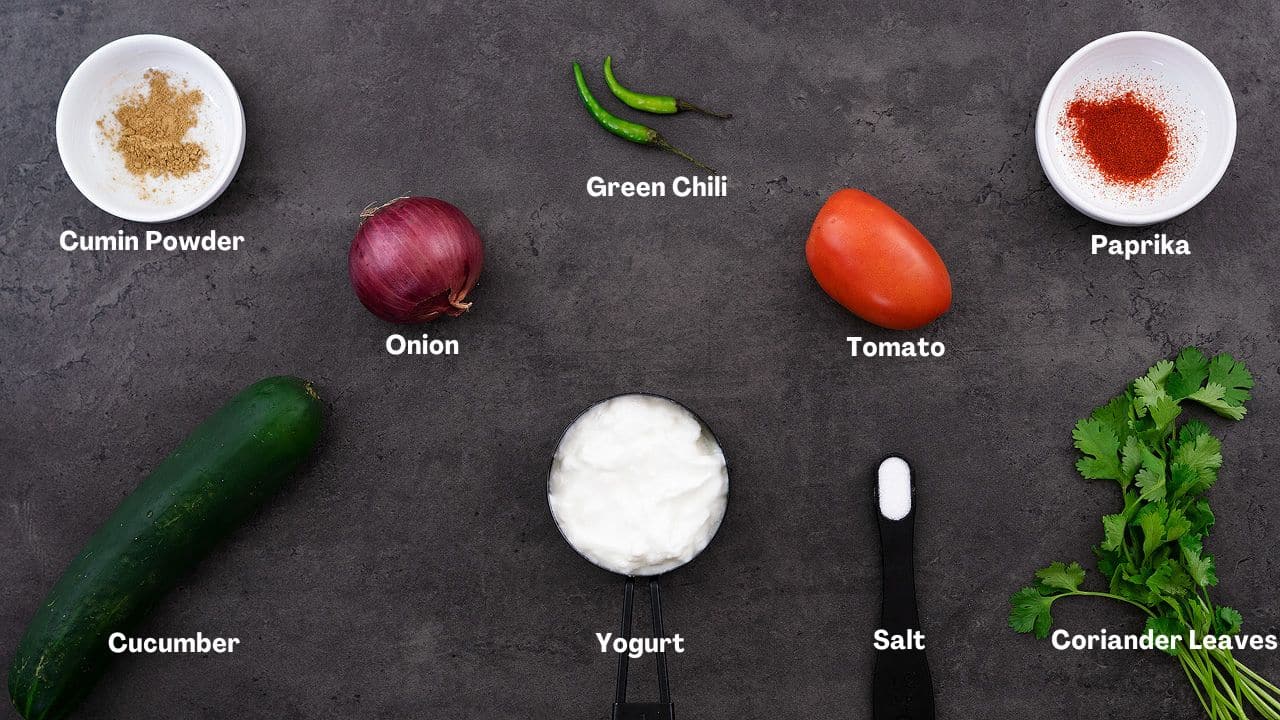
- Yogurt: Start with plain whole milk yogurt to achieve a rich, creamy base. For a lighter version, you can use nonfat or any non-dairy yogurt as a substitute.
- Onion: Purple onion adds vibrant color and flavor, but feel free to use yellow or white onion if that’s what you have on hand.
- Tomato: Adds a pop of color and a fresh taste.
- Cucumber: Provides a refreshing crunch and boosts nutritional value.
- Coriander Leaves: Introduce a burst of fresh aroma and a subtle citrusy flavor.
- Spice Powder: A sprinkle of cumin powder and paprika enhances the Raita with a warm, earthy flavor and a touch of spice.
- Green Chili (optional): For a bit of heat, add green chili if you like, but it’s completely optional.
How to Make Raita at Home?
Let's make this homemade Raita together! Follow my simple steps, supported by photos and a video guide, to create this refreshing yogurt dip. Here’s how we do it:
Explore More Dips from World Cuisine:
- Aioli
- Honey Mustard Sauce
- French Onion Dip
- Tzatziki Sauce
- Mango Chutney
- Tartar Sauce
- Remoulade Sauce
- Buffalo Sauce
- Mayonnaise
- Guacamole

Raita
Ingredients
- 2 cups Plain Whole Milk Yogurt
- 2 Onion, medium size
- ½ Cucumber, grated
- 1 Tomato
- 3 tbsp Coriander Leaves, small bunch
- 1 Green Chili, chopped, optional
- ½ tsp Salt, to taste
- ¼ tsp Cumin Powder, to garnish
- ¼ tsp Paprika, to garnish
Instructions
Making Raita
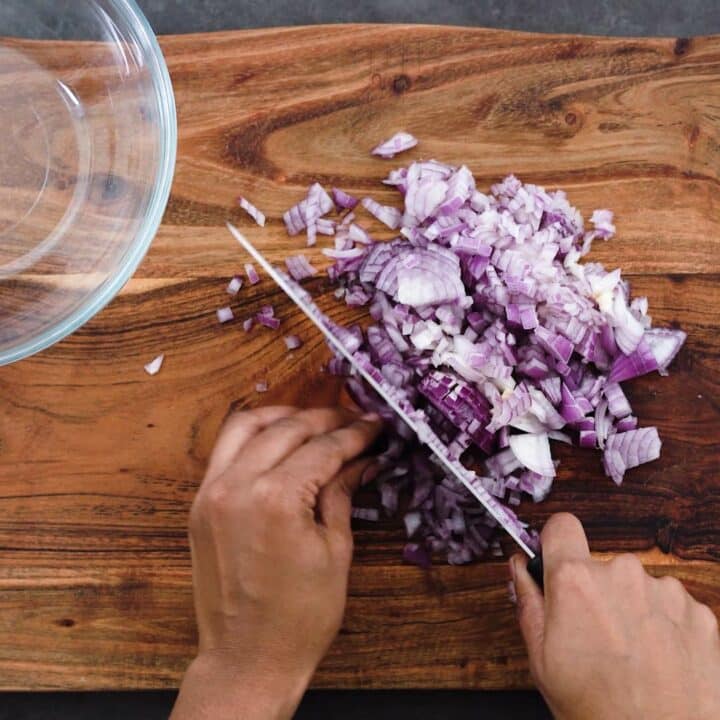
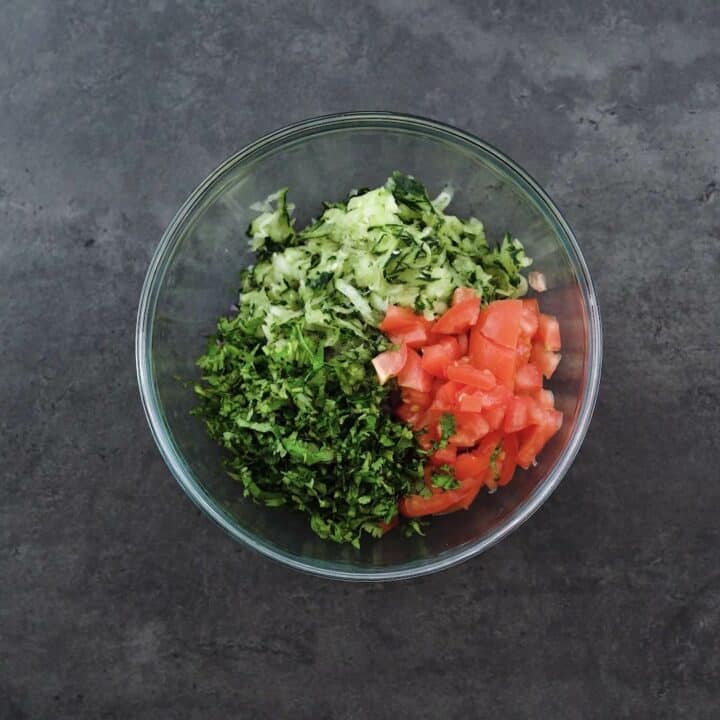
- Begin by finely chopping onions into small pieces for them to blend well with the other ingredients. Place them in a mixing bowl.

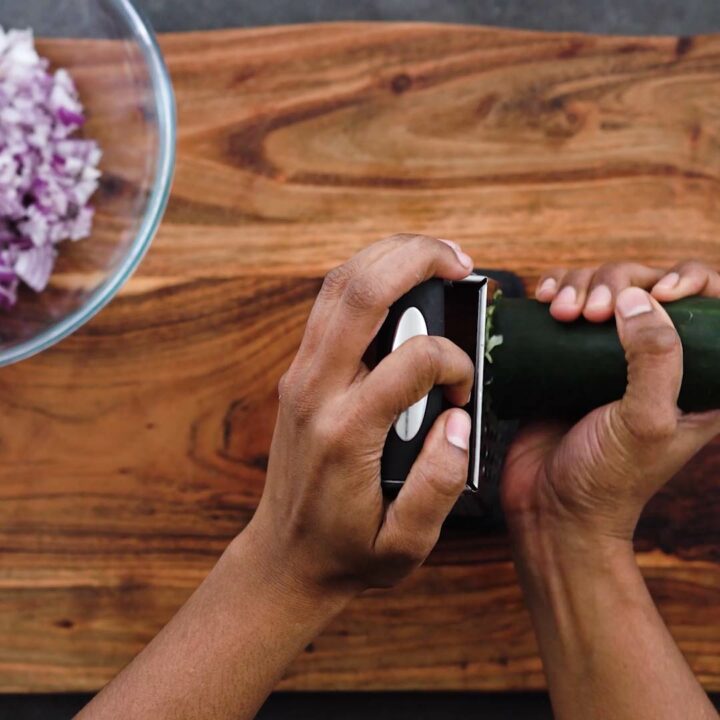
- Use the largest holes on your vegetable grater to grate the cucumber. This creates the ideal texture and ensures the cucumber mixes smoothly with the yogurt. Add it to the bowl with the onions.
- Next, finely chop the tomato and green chili (adjust the amount of chili according to your preference for heat), along with a small bunch of coriander leaves. Add these to your bowl to infuse the Raita with a burst of fresh flavor.
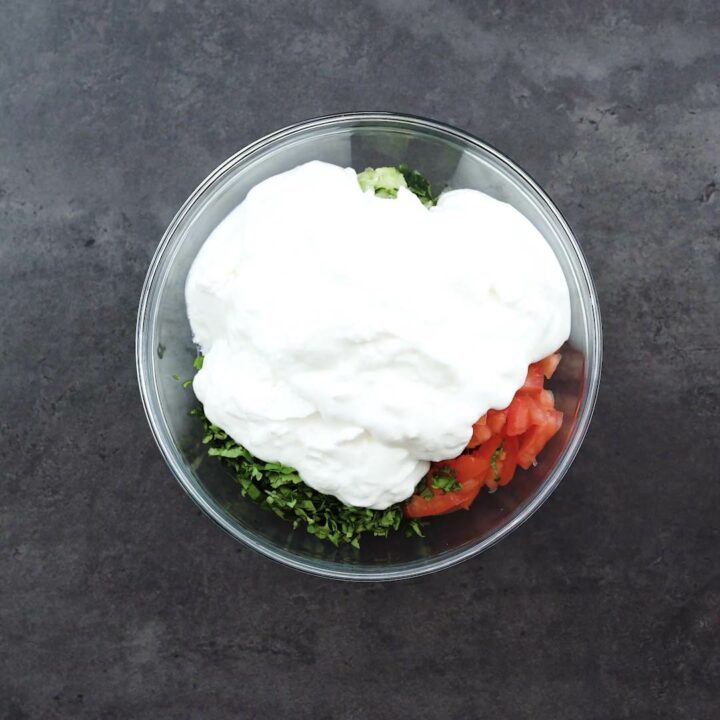
- Pour thick plain whole milk curd or yogurt over the chopped vegetables. Start with a moderate amount, as you can always add more to reach your desired consistency.
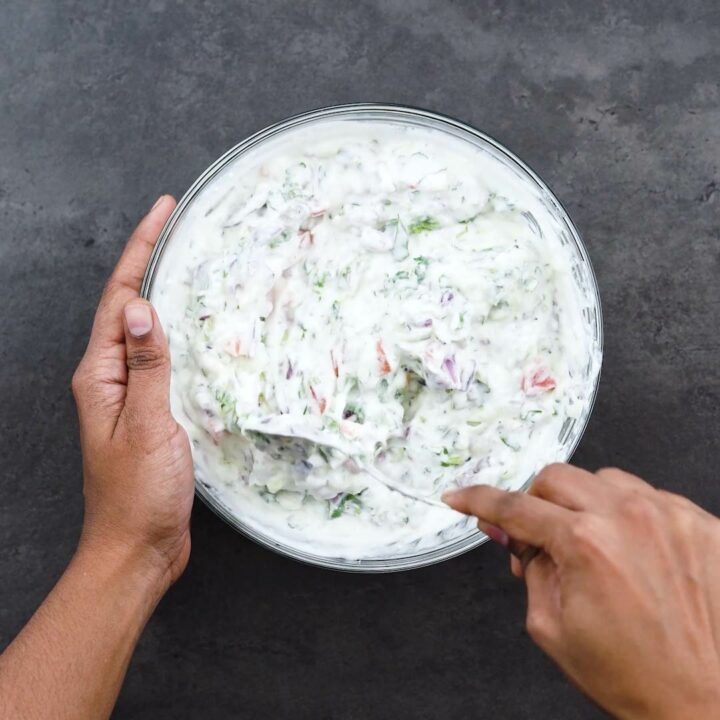
- Mix everything well to blend all the ingredients. Season with a pinch of salt, tasting as you go, to make sure the flavors are perfectly balanced.
- Sprinkle cumin powder and paprika over the top to garnish. This not only adds flavor but also makes the Raita visually appealing. Allow the Raita to sit for at least an hour in the refrigerator before serving to enhance the flavors. Your Raita is now ready to be savored!
Serving
- Enjoy this Raita as a cooling side to spicy dishes, biryani, or as a dip with your favorite snacks for a refreshing taste experience. For more pairing ideas, be sure to check out our serving suggestions section below.
Recipe Video
Chef's Notes and Tips
- Yogurt Choice: Choose thick, plain whole milk curd/yogurt for the best taste and texture. Avoid sour yogurt, as it can detract from the dip's flavor.
- Fresh Ingredients: Always use fresh, high-quality vegetables like onions and cucumbers, along with fresh herbs. These ingredients are crucial for a refreshing flavor.
- Chopping Techniques: Vegetables should be thinly sliced or chopped into small pieces. For ease, cucumbers can be grated using the largest holes of a grater, or finely chopped with a kitchen knife.
- Washing Herbs and Veggies: Herbs like coriander and mint can carry mud and debris, so make sure to wash them thoroughly and dry them before use.
- Spice Quantities: For enhancing the yogurt’s flavor, spices like cumin powder and paprika can be added. Start with a small amount, such as ¼ teaspoon for 4 to 5 servings; adjust according to taste.
- Preparation Time: For the best flavor, prepare Raita at least 1 to 2 hours ahead of time, though letting it sit overnight is even better. This allows the flavors of the onions, cucumbers, and herbs to blend beautifully with the yogurt. Refrigerate it until you're ready to serve.
- Consistency Adjustments: Depending on your preference for thickness, you can adjust the consistency of the Raita by adding a bit of cold water or more yogurt. This allows you to customize the dip to suit various dishes.
- Avoiding Watery Raita: To prevent the Raita from becoming too watery, especially when using vegetables like cucumbers, salt the chopped vegetables lightly and let them sit for a few minutes. Then, squeeze out the excess water before adding them to the yogurt.
- Chill the Raita: Serving Raita cold can significantly enhance its refreshing quality, especially on hot days. Make sure it’s chilled properly by storing it in the coldest part of your refrigerator.
- Vegan Option: For those following a vegan diet, substitute with your preferred non-dairy yogurt.
Nutrition Info
Disclaimer
We're not nutrition experts, and the nutritional information provided is an estimate. Please use it as a guide. For precise details, it's best to consult a professional. To learn more, please view our Detailed Disclaimers.
Looking for more? Explore our selection of party dips from around the world. You can also check out our collection of biryanis and Indian curry recipes to enjoy a rich variety of Indian flavors.
Variations of Raita
Raita is a versatile dip that you can easily adapt with various ingredients. While the yogurt base remains consistent, exploring different additions can transform its flavor and texture. Here are some options to try:
- Classic Vegetable and Fruit Mix: Blend vegetables and fruits like onions, cucumbers, mint, carrots, beetroot, and pomegranate for a refreshing and colorful mix.
- Boondi Raita: Add a fun twist by mixing in fried chickpea flour balls (boondi) for a nice crunch against the creamy yogurt.
- Mint and Coriander Raita: Adding a handful of mint and coriander leaves can greatly enhance the freshness, making it a perfect complement to spicy dishes.
- Burani Raita: For a bold flavor, add in crushed garlic, ground black pepper, cumin, and a pinch of salt. This variation adds a garlicky flavor that stands out.
Serving Suggestions
Raita is a delicous and versatile addition to any meal, especially in Indian cuisine where its cooling effect balances the heat of spices. Here are some of the best ways to serve Raita:
- With Biryani and Pulao: The creamy texture and refreshing taste of Raita complement the rich and aromatic flavors of various biryanis, including chicken, mutton, fish, and mushroom, as well as pulao. It provides a soothing contrast that enhances these dishes.
- As a Side to Spicy Dishes: Serve Raita alongside spicy Indian curries, grilled chicken kabobs, tandoori chicken and chicken tikka to soften the heat and enhance the overall dining experience
- With Indian Breads: Raita goes well with a variety of Indian breads such as naan, paratha, and roti, providing a moist, flavorful complement to these staple dishes.
- As a Dip for Appetizers: Use it as a dip for vegetable sticks, pakoras (chicken or vegetable), samosas, gobi 65, or papadums. It’s especially good with crunchy, deep-fried foods as it adds a refreshing flavor.
- With Grilled Meats and Vegetables: Spoon over or serve alongside grilled meats and vegetables for a refreshing side that cuts through the smokiness.
- As Part of a Thali: Include Raita as a side of a thali, a traditional Indian meal served on a platter with various dishes.
Storage Suggestions
For convenience, you can prepare Raita a day before you plan to use it. To keep it fresh, store the Raita in the refrigerator in an airtight container. It will maintain its best quality for 2 to 3 days. Make sure to give it a good stir before serving, as the ingredients may settle or separate slightly while stored.
Leave a Review