
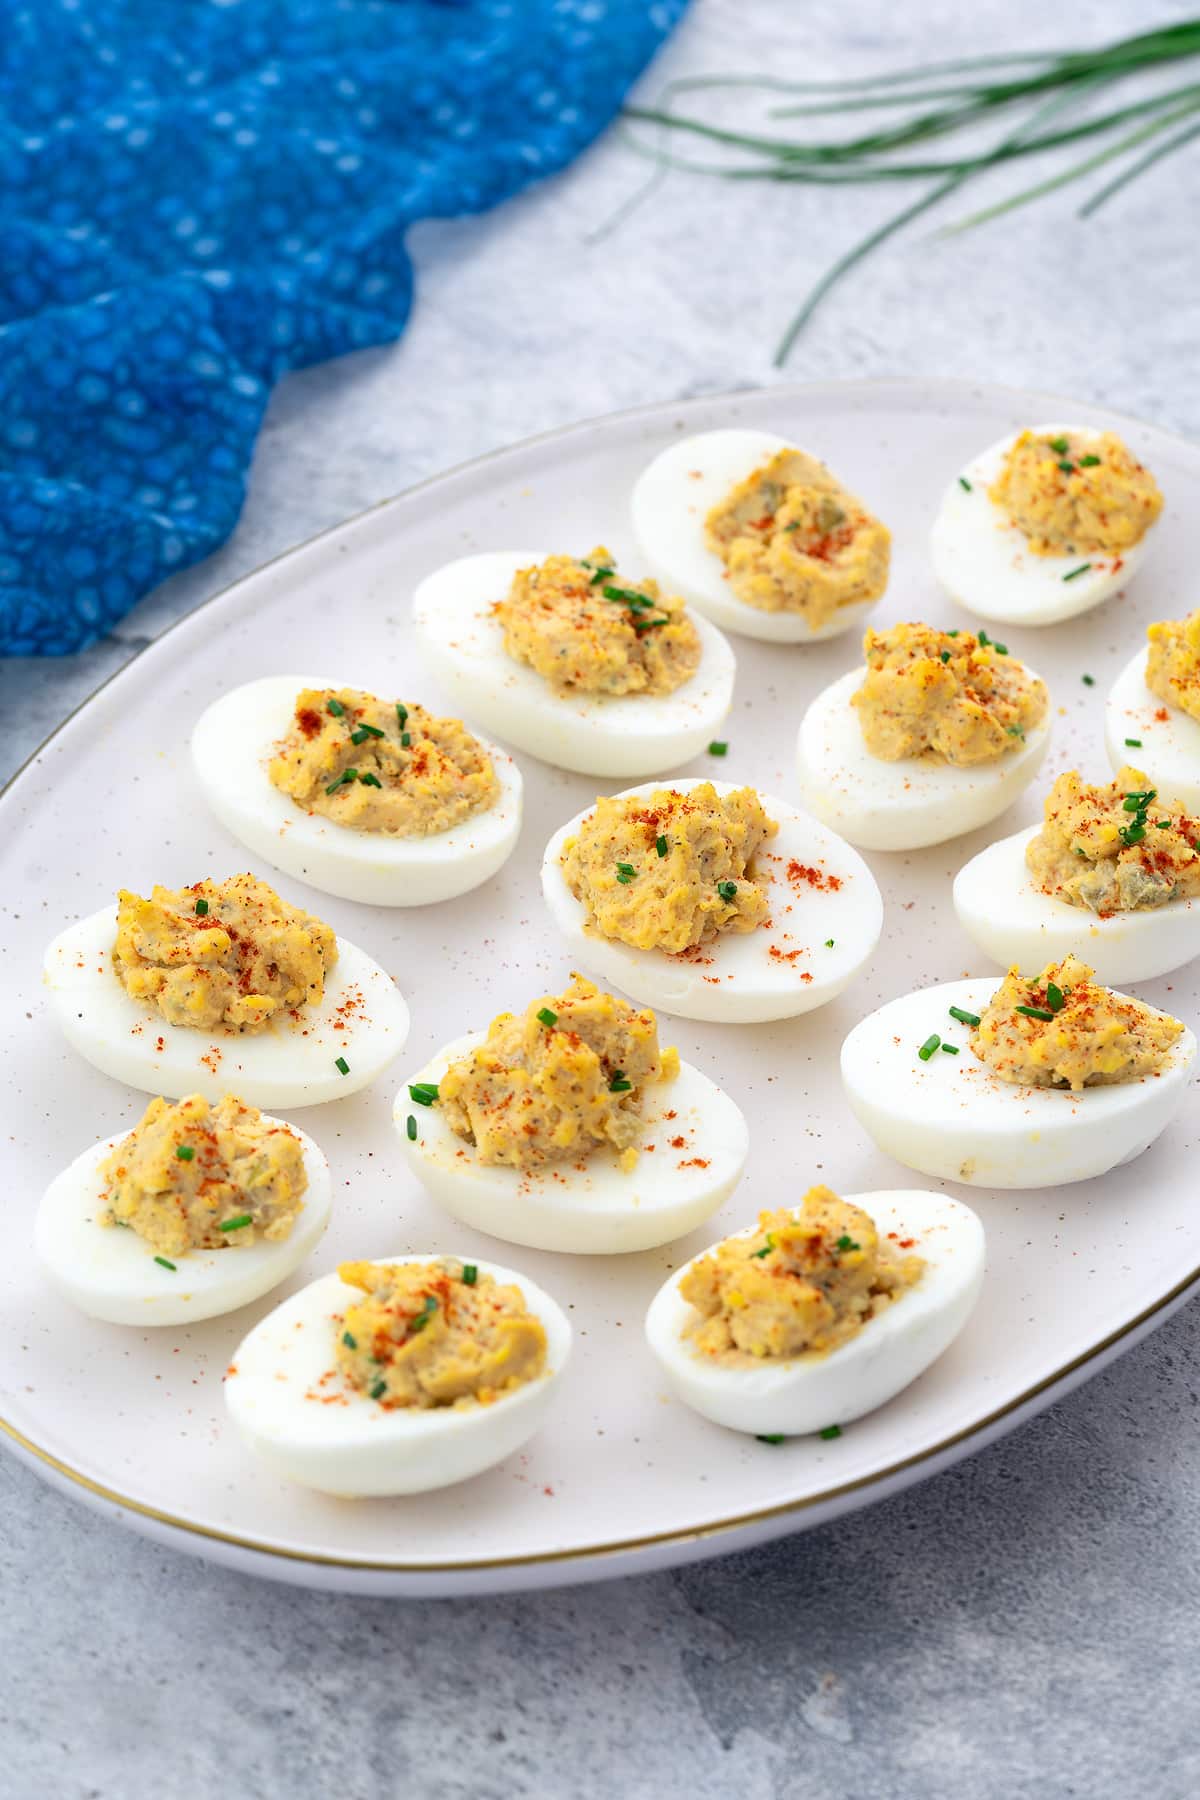
Deviled eggs are a simple, creamy appetizer with classic flavors. They’re made by filling hard-boiled egg whites with a smooth yolk mixture, usually seasoned with mayonnaise, mustard, pickles, and herbs. This easy dish is versatile and fits well with different meals. Whether you’re serving them at a gathering or a casual get-together, deviled eggs are always a reliable choice.
You can enjoy deviled eggs on their own, with salads, sandwiches, or as part of a charcuterie board. Their tangy, savory flavor goes well with fresh greens, meats, or cheeses. The name “deviled” might sound a bit intense, but it just refers to the zesty or slightly spicy taste. In some places, people also call them stuffed eggs, dressed eggs, or curried eggs.
Deviled eggs are a common choice for many events like Easter, Thanksgiving, Christmas, and potlucks. They’re easy to make, easy to share, and disappear quickly from the table. You can keep them simple or add toppings like bacon, paprika, or fresh herbs.
One of the best things about deviled eggs is how convenient they are. You can make them in under 30 minutes, or even faster if you already have boiled eggs ready to go. They’re also perfect for prepping ahead—boil the eggs and mix the filling in advance, then put everything together when you’re ready to serve. It’s an easy way to have something tasty and ready for last-minute plans.
In this post, I’ll walk you through how to make deviled eggs from scratch with simple ingredients and easy steps.
Explore More Christmas and Thanksgiving Recipes:
- Apple Pie
- Pecan Pie
- Mashed Potatoes
- Cranberry Sauce
- Gravy
- Stuffing
- Mac and Cheese
- Creamed Corn
- Chocolate Chip Cookies
- Pumpkin Muffins
- Cornbread
- Sweet Potato Casserole
Ingredients and Substitutions Overview
The ingredients for deviled eggs are simple and easy to find in most grocery stores. Here’s a closer look at what you’ll need:
- Eggs: You can use large white or brown eggs—both work perfectly for this recipe. When picking eggs, check the “sell by” or “best by” date on the carton to make sure they’ll stay fresh longer. Fresh, intact eggs will give you the best results.
- Mayonnaise: This is key for a rich, creamy yolk filling with a hint of tanginess. If you prefer an alternative, you can use Greek yogurt or sour cream for a similar creamy texture and a slightly different flavor.
- Dijon Mustard: Adds a tangy flavor with a slight kick. It helps balance the richness of the egg yolks and mayo, giving the filling a nice depth. You can also use regular yellow mustard if you prefer a milder taste.
- Pickle Relish: This adds a sweet and tangy flavor to the filling, giving it a refreshing twist. If you prefer, you can use finely diced dill pickles or sweet gherkin pickles for a similar flavor.
- Spice Powders: Mild paprika, black pepper, and salt add a balanced savory flavor to the filling. If you like a bit of heat, you can add a dash of cayenne pepper for an extra kick. Adjust the spice level to suit your taste.
- Herbs: Chives give a mild onion flavor that works well with the creamy filling. You can also try green onions, cilantro, or dill for a different twist and a fresh burst of flavor in your deviled eggs.
How to Make Deviled Eggs at Home?
Let’s make creamy deviled eggs together! I’ll walk you through each step—hard-boiling the eggs, peeling them, slicing them in half, and making a rich, creamy filling with the yolks. After that, we’ll fill the egg whites with this smooth mixture to create a tasty, classic appetizer. You’ll find step-by-step photos and a detailed video to help along the way. Let’s get started!
Enjoy More Healthy and Delicious Egg Recipes:
- Egg Salad
- Sunny Side Up Eggs
- Egg Foo Young
- Egg White Omelet
- Spanish Omelette
- Western Omelet
- Spinach Omelet
- Tamagoyaki
- Egg Sandwich
- Scrambled Eggs
- Egg Curry

Deviled Eggs
Ingredients
For Hard Boiling Eggs
- 8 Eggs, room temp
- Water, for boiling eggs
For Deviled Eggs
- 3 tbsp Mayonnaise
- 1 tsp Dijon Mustard
- 2 tbsp Pickle Relish
- ½ tsp Chives, chopped
- ½ tsp Paprika
- Black Pepper, to taste
- Salt, to taste
For Garnishing
- Paprika
- Chives
Instructions
Hard Boiling the Eggs
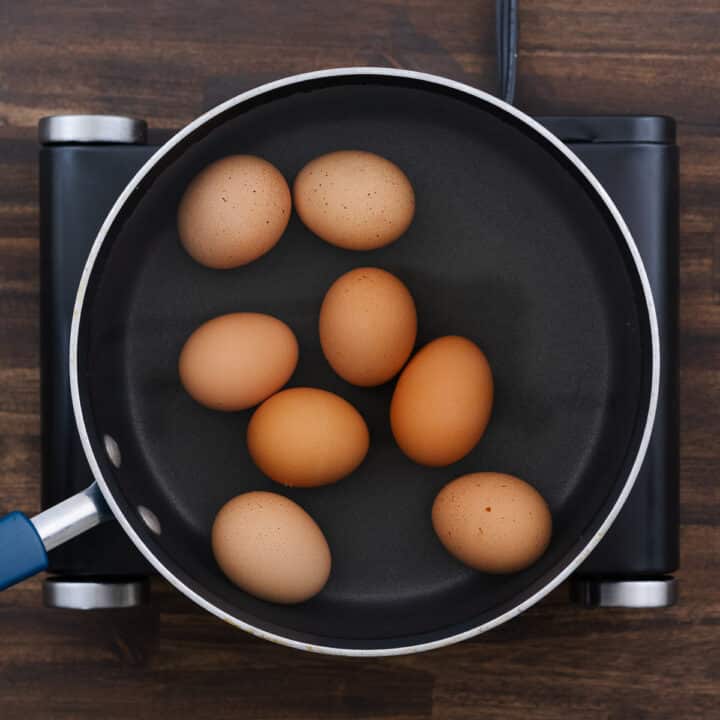
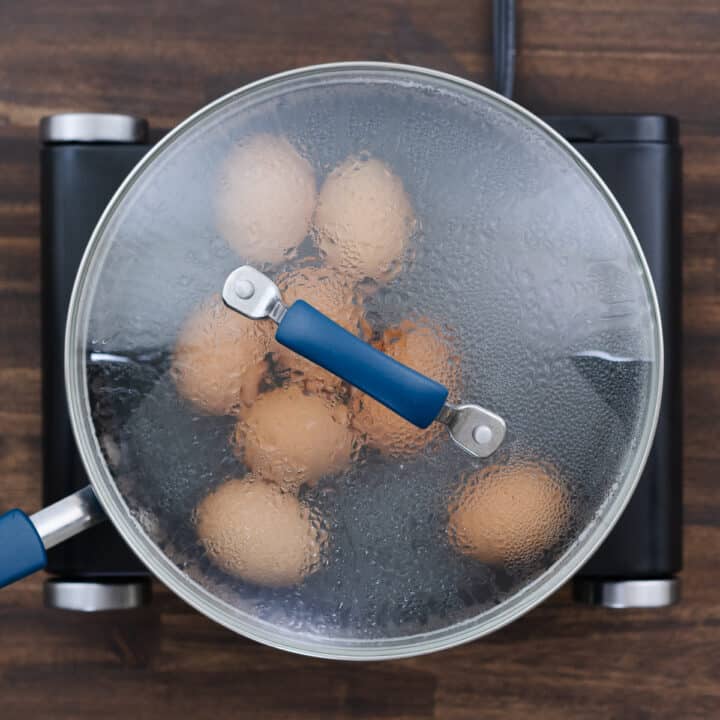
- Add the eggs to a pan and cover them with enough cold water to fully submerge them. Starting with cold water helps the eggs heat gradually, which allows them to cook evenly and reduces the chance of the shells cracking. Adding the eggs before heating also prevents cracks that can happen if you drop them into boiling water.

- Bring the water to a boil over medium heat. Once it reaches a boil, turn off the heat, cover the pan with a lid, and let the eggs sit in the hot water for 10-12 minutes. The residual heat will cook the eggs gently, giving you perfectly set yolks and tender whites.
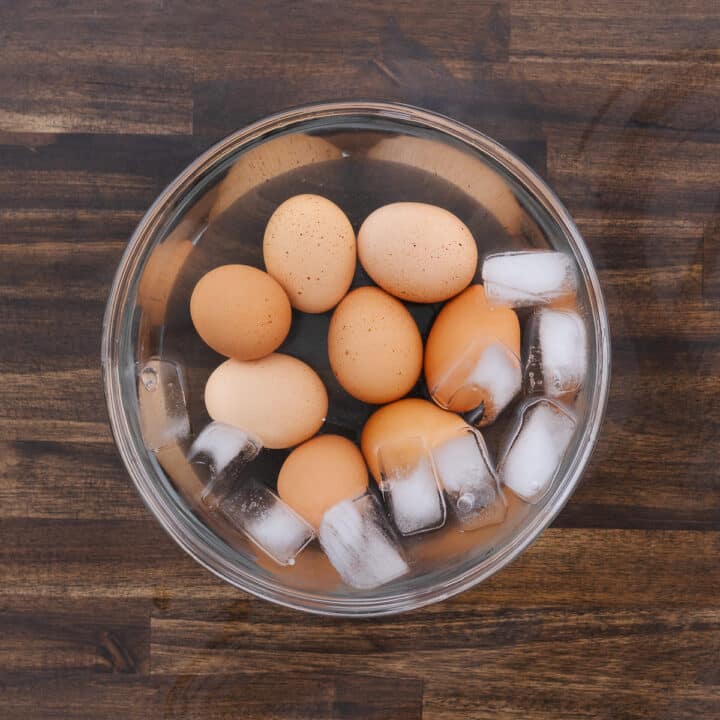
- After 10-12 minutes, transfer the eggs to a bowl of ice water and let them sit for at least 15 minutes. This stops the cooking process and makes peeling easier. If you don’t have ice, running cold water over the eggs works too.
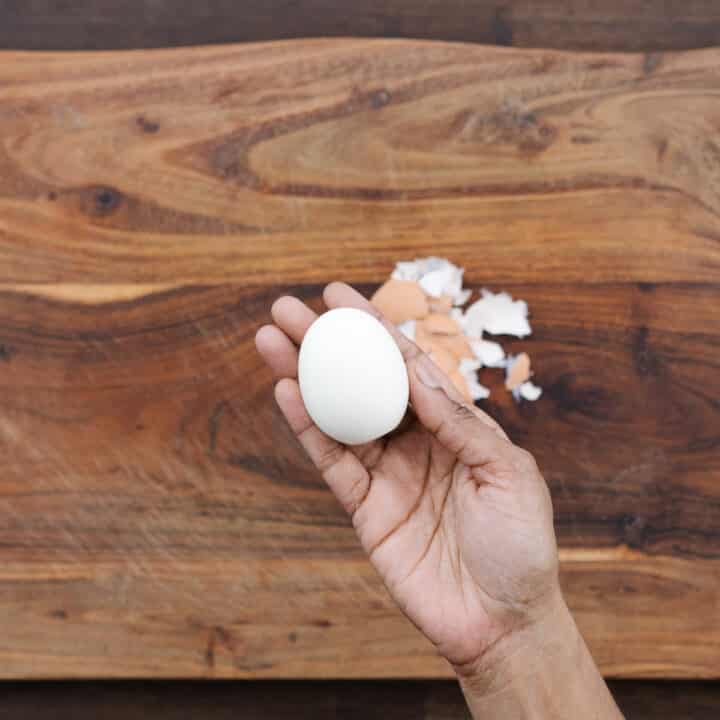
- When the eggs have cooled, gently tap them on a hard surface, like a countertop or wooden board, to crack the shells. Peel carefully, starting from the wider end, to keep the egg whites intact.
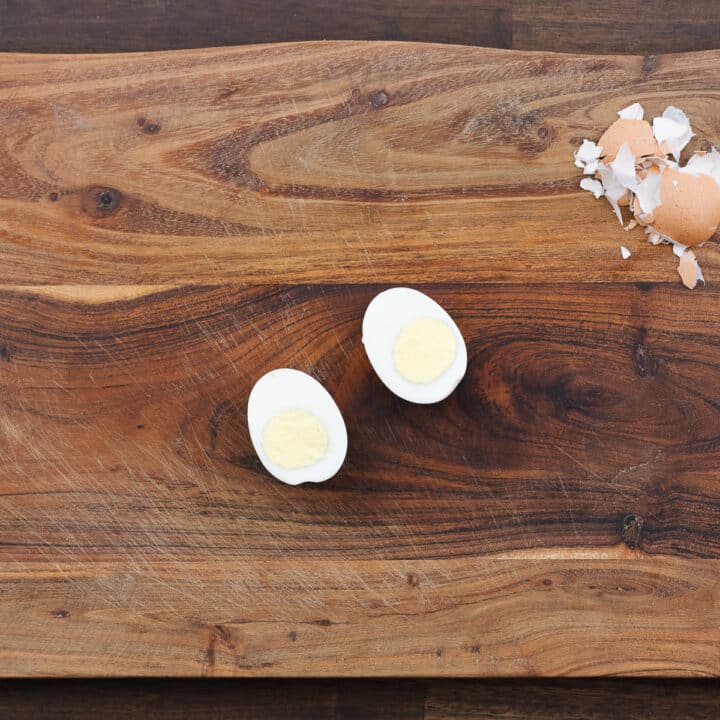
- Once peeled, cut the eggs in half lengthwise with a sharp knife. Press gently to avoid breaking the egg whites.
Preparing the Filling
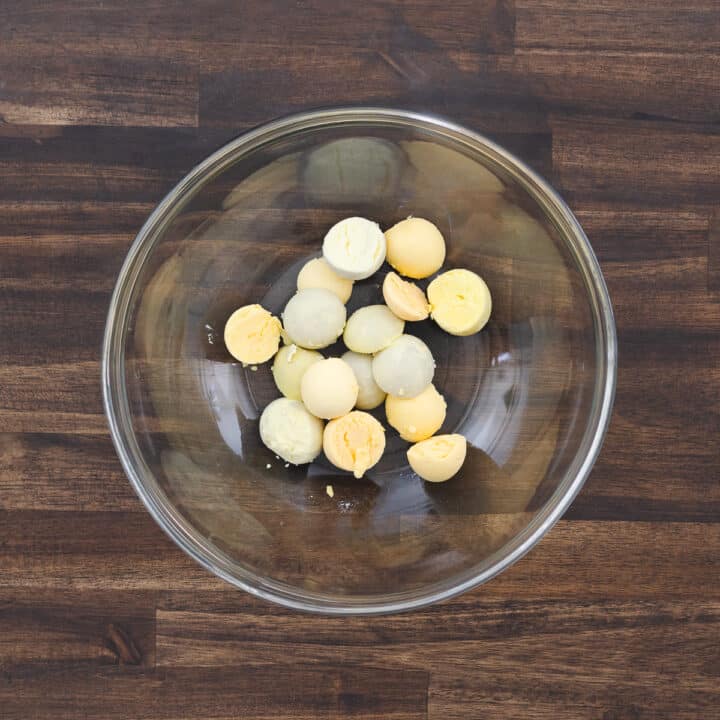
- Using a spoon, gently scoop out the egg yolks from the egg whites and transfer them to a mixing bowl. Be careful and take your time to avoid tearing the egg whites, as they need to stay whole to hold the filling. If the yolks are stuck, use the edge of the spoon to gently loosen them. Keeping the whites intact helps with a neat and polished presentation later.
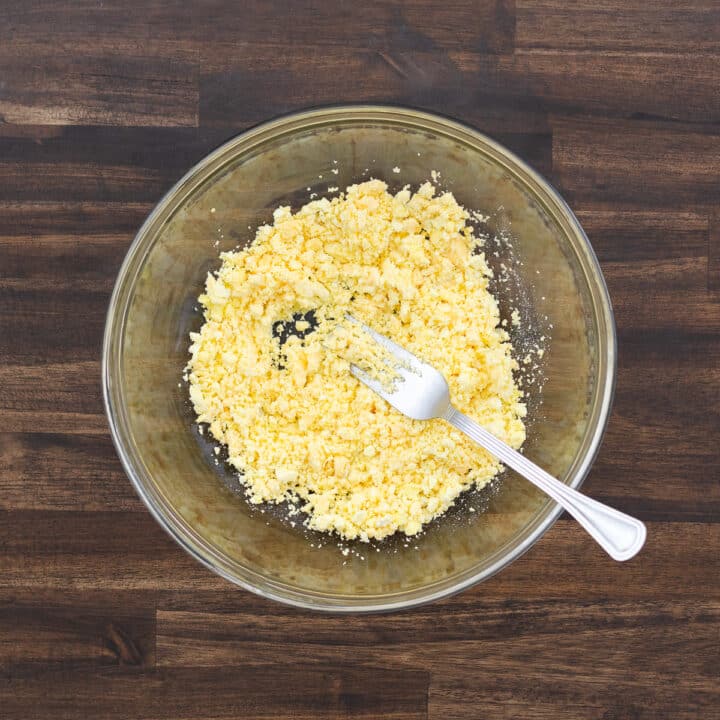
- Mash the yolks with a fork until they are smooth and crumbly. For an extra creamy texture, you can also press the yolks through a fine-mesh sieve. This helps break down any lumps and creates a smoother base for the filling, making it easier to pipe or spoon back into the egg whites.
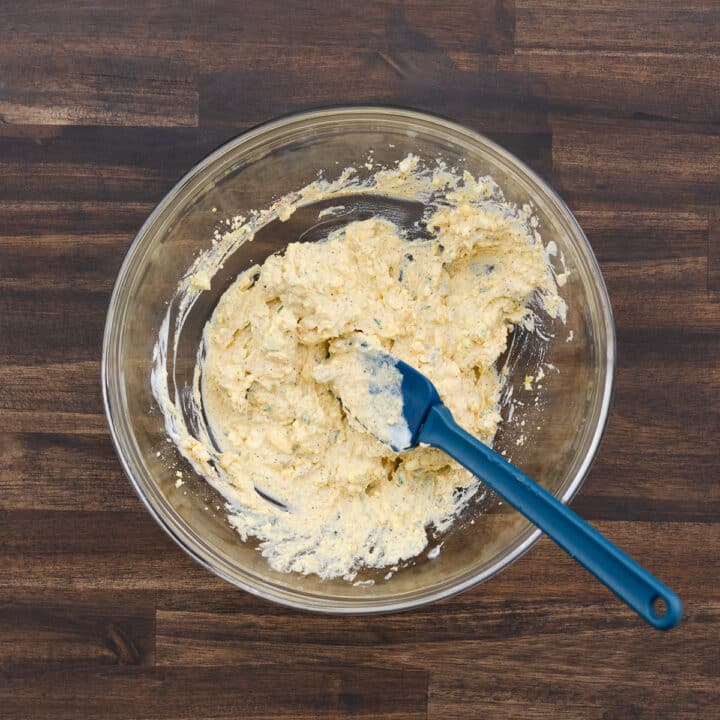
- Add the mayonnaise, Dijon mustard, pickle relish, paprika, salt, chives, and black pepper to the mashed yolks. These ingredients add creaminess, tanginess, and a hint of spice to the filling. Adjust the amounts to suit your taste for a perfectly balanced flavor.
- Mix everything thoroughly with a spoon or spatula until the ingredients are fully combined and the mixture is smooth. Make sure to scrape the sides and bottom of the bowl to evenly distribute the flavors. Taste the filling and adjust the seasoning if needed. Now, your creamy, flavorful filling is ready to be piped or spooned back into the egg whites.

Making Deviled Eggs
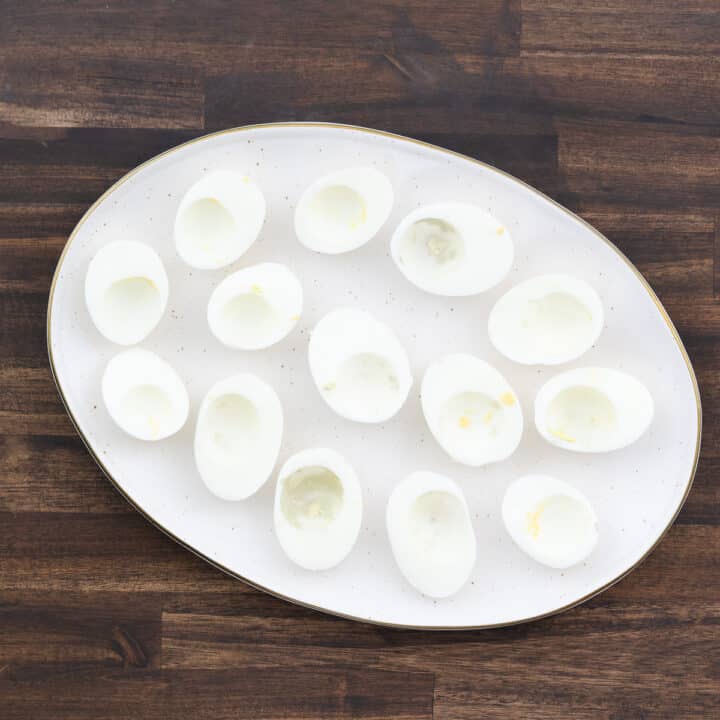
- Now, arrange the reserved egg whites on a serving plate, ready to fill the cavities with the prepared yolk mixture.
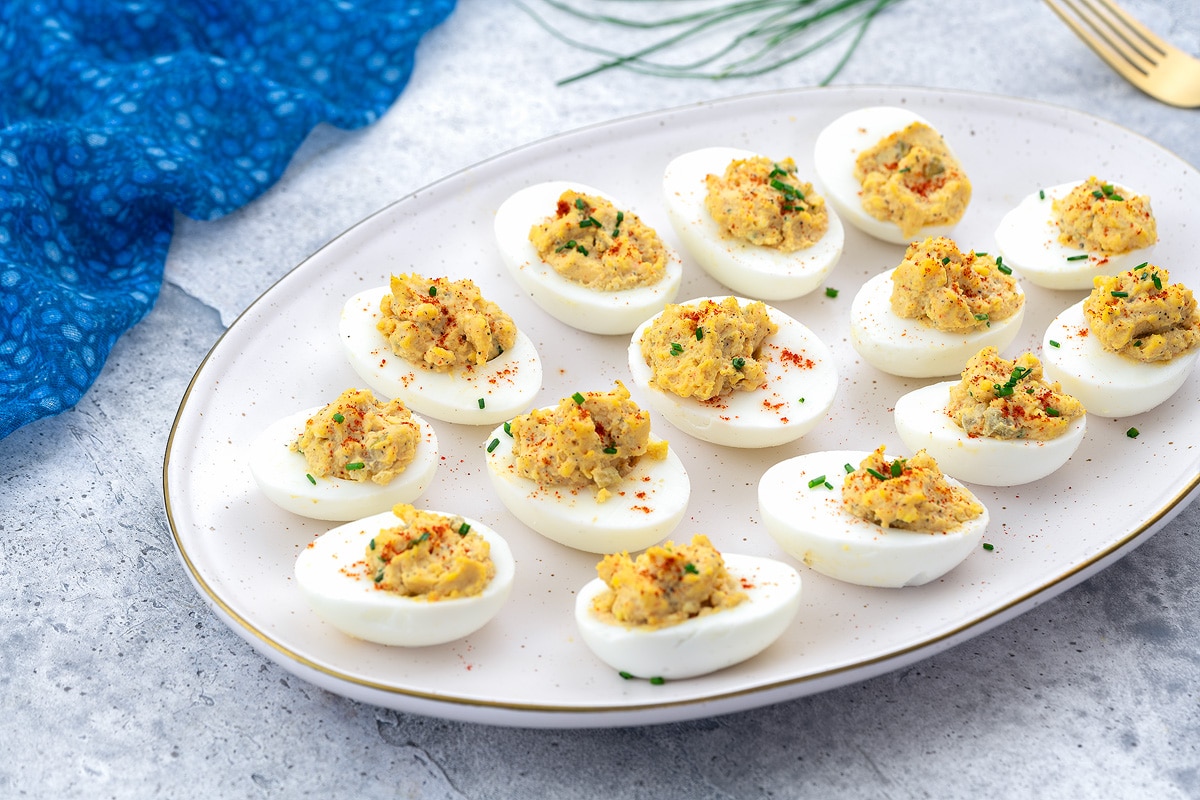
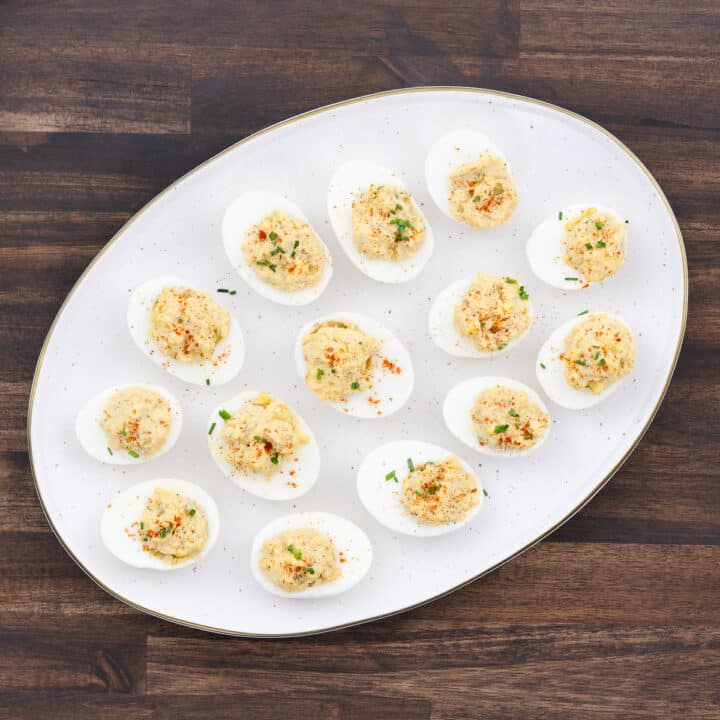
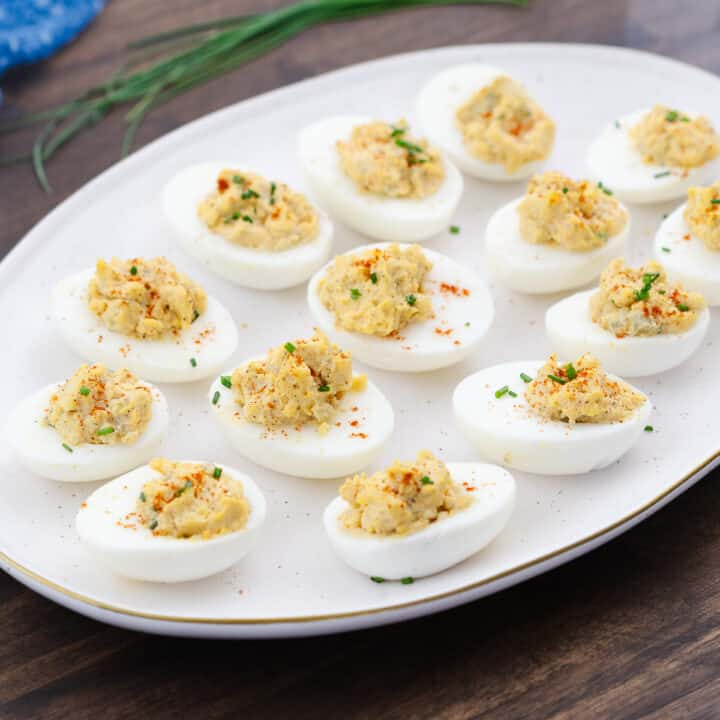
- Using a spoon or piping bag, carefully fill the cavities of the egg whites with the prepared yolk mixture. Try not to overfill to keep the presentation neat and the eggs easy to handle. Once filled, garnish with a sprinkle of paprika and some chopped chives for extra color and flavor. For the best taste, refrigerate the deviled eggs for at least 30 minutes to let the flavors meld together. Now, your delicious deviled eggs are ready to enjoy!
Serving
- Serve these deviled eggs on their own or alongside your favorite salads, sandwiches, or meats for a satisfying meal. For more pairing ideas, check out the Serving Suggestions section below for additional options.
Recipe Video
Chef's Notes and Tips
- Choose the Right Eggs: Eggs that are a few days old peel more easily after boiling because an air pocket forms between the shell and the egg white. If you’re using farm-fresh eggs, letting them sit in the fridge for a few days helps with peeling. For extra food safety, pasteurized eggs are a good option since they’re free from bacteria like Salmonella.
- Use Room Temperature Eggs: Room-temperature eggs cook more evenly and reduce the risk of overcooked yolks or cracking. If you forget to take them out ahead of time, place the eggs in a bowl of warm (not hot) water for 5 to 10 minutes to bring them to room temperature quickly.
- Don’t Over-Boil the Eggs: To get perfectly set yolks and tender egg whites, follow the recipe timing closely. Overcooking can cause a green ring around the yolk and give the whites a rubbery texture, which affects both the flavor and the appearance of your deviled eggs.
- Customize Your Seasoning: My version is mildly spiced with simple seasonings and herbs, but you can easily adjust the flavors to suit your taste. For more heat, add a little bit of hot sauce or a sprinkle of cayenne pepper. If you like a smoky flavor, top the eggs with crispy bacon bits.
- Pipe for a Polished Look: While spooning the filling works fine, piping gives a cleaner, more polished look. Just add the filling to a pastry bag or plastic sandwich bag, snip the tip, and pipe it neatly into the egg whites for a professional finish.
- Use Salt Sparingly: Ingredients like mayonnaise and pickle relish already add some saltiness, so go easy on the salt. Taste the filling first and only add salt if needed to avoid overly salty deviled eggs.
- Smooth Yolk Mixture: To achieve a creamy, lump-free filling, mash the yolks thoroughly with a fork until fine and crumbly. For an even smoother texture, press the yolks through a fine-mesh sieve. This technique removes any clumps, making the filling silky and easier to pipe or spoon.
- Dry the Egg Whites: After peeling and cutting the eggs, optionally pat the egg whites dry with a paper towel. This helps the filling stick better and keeps the presentation clean.
Nutrition Info
Disclaimer
We're not nutrition experts, and the nutritional information provided is an estimate. Please use it as a guide. For precise details, it's best to consult a professional. To learn more, please view our Detailed Disclaimers.
Serving Suggestions
These deviled eggs are a versatile dish that pairs well with a variety of foods. Whether you’re serving them as a snack or appetizer, there are plenty of ways to complete your meal. Here are some of my favorite dishes to serve alongside them that you might enjoy too:
- Salads: Deviled eggs pair perfectly with leafy green salad, potato salad, Cobb salad, or pasta salad. These combinations make for a refreshing and hearty meal.
- Grilled Meats: They taste great with roasted chicken, baked or fried chicken breast, burgers, or ribs. The creamy texture of the eggs balances out the smoky flavors of the meat.
- Sandwiches: For a balanced meal, enjoy them with sliders, deli sandwiches, or wraps. They make a satisfying addition to lunch or dinner.
- Soups: Pair deviled eggs with a warm bowl of tomato soup, chicken noodle soup, or butternut squash soup for a comforting and filling meal.
- Seafood: These eggs also go well with seafood like grilled or baked salmon, shrimp cocktails, crab cakes, or lobster rolls. The flavors complement each other beautifully.
- Breakfast Favorites: Deviled eggs also fit right in with breakfast! Serve them with bagels, croissants, avocado toast or breakfast casseroles for a satisfying start to your day.
- Roasted Vegetables: Enjoy deviled eggs with roasted asparagus, Brussels sprouts, or bell peppers for a warm, veggie-rich side.
- Grain Bowls: Serve deviled eggs alongside grain bowls with quinoa, brown rice, or farro topped with veggies and proteins for a balanced and satisfying meal.
- Vegetable Platters: Create a colorful platter with fresh veggies like carrots, celery, and cucumbers. This is a light and healthy option that works well for parties or snacks.
- Charcuterie Boards: Add deviled eggs to a board with cheeses, cured meats, crackers, and fruits for a fun and tasty appetizer spread.
Storage Suggestions
I recommend serving deviled eggs fresh to enjoy their best flavor and texture. However, if you have leftovers, store them in an airtight container in the refrigerator for up to 2 days. The flavors tend to develop and blend nicely as they sit, making them a great make-ahead appetizer for parties or gatherings. Just make sure they stay chilled until you’re ready to serve.
If you’re preparing them ahead of time, you can boil the eggs and make the filling a day in advance. Store the egg whites and filling separately, then assemble them right before serving to keep everything fresh and creamy.
Leave a Review